Request an Azure® Virtual Machine in the Customer Portal
Use the Customer Portal to request an Azure® virtual machine.
To request a virtual machine in the Customer Portal:
- Navigate to http://server/CherwellPortal where server is the location where the CSM Browser applications are installed.
- Log in to the Portal:
- Click the Click to login link to log in to the Portal Site.
- Provide login credentials (User Name and Password) for a User who has rights to access the Customer Portal.
- Click Sign-in.
- In the Customer Service Portal toolbar, click
Service Catalog.
The Service Catalog page opens.
- In the Cloud Services>Virtual Machines (VM) section, click the
Request Azure VM Service.

The Request VM form opens.
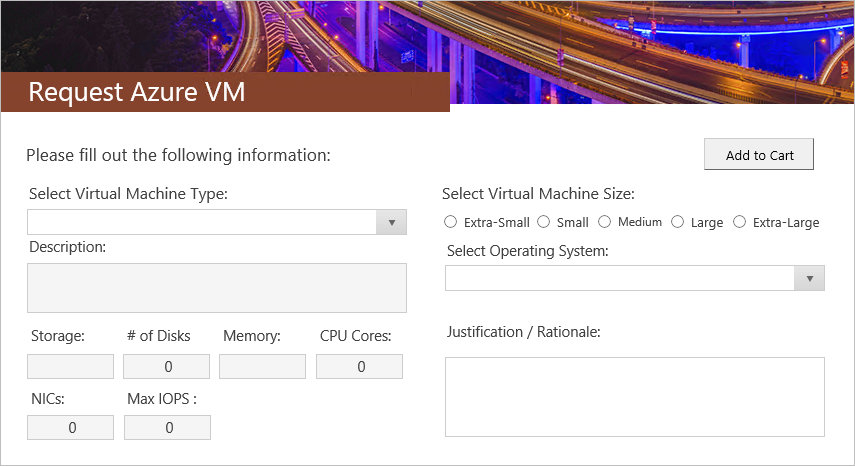
- Complete the
Request Azure VM
Specifics Form:
- Select Virtual Machine Type: Select a predefined
template from the drop-down. This field is required.
The description (read-only) field is auto-populated when the virtual machine type is selected.
- Select Virtual Machine Size: Select a
size for the virtual machine.
The following read-only fields are auto-populated when the size is selected: Storage, # of Disks, Memory, CPU Cores, NICs, and Max IOPS.
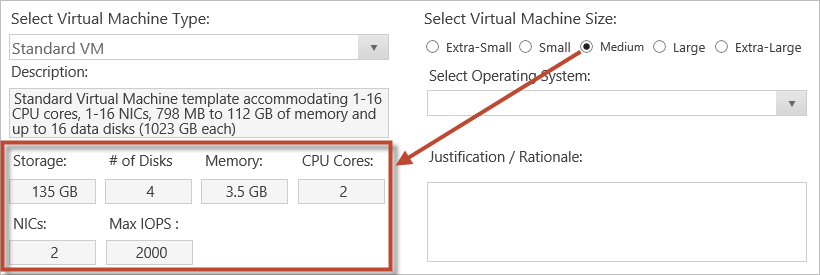 Note: The size field is populated using the VM Size Lookup Table in Table Management.
 - Select Operating System: Select the name of the Customer's operating system from the drop-down.
- Justification/Rationale: Provide additional details about the VM request.
- Select Virtual Machine Type: Select a predefined
template from the drop-down. This field is required.
- Click the
Add to Cart
button.
The Service Request displays on the My Service Orders page in the Services Ordered section.
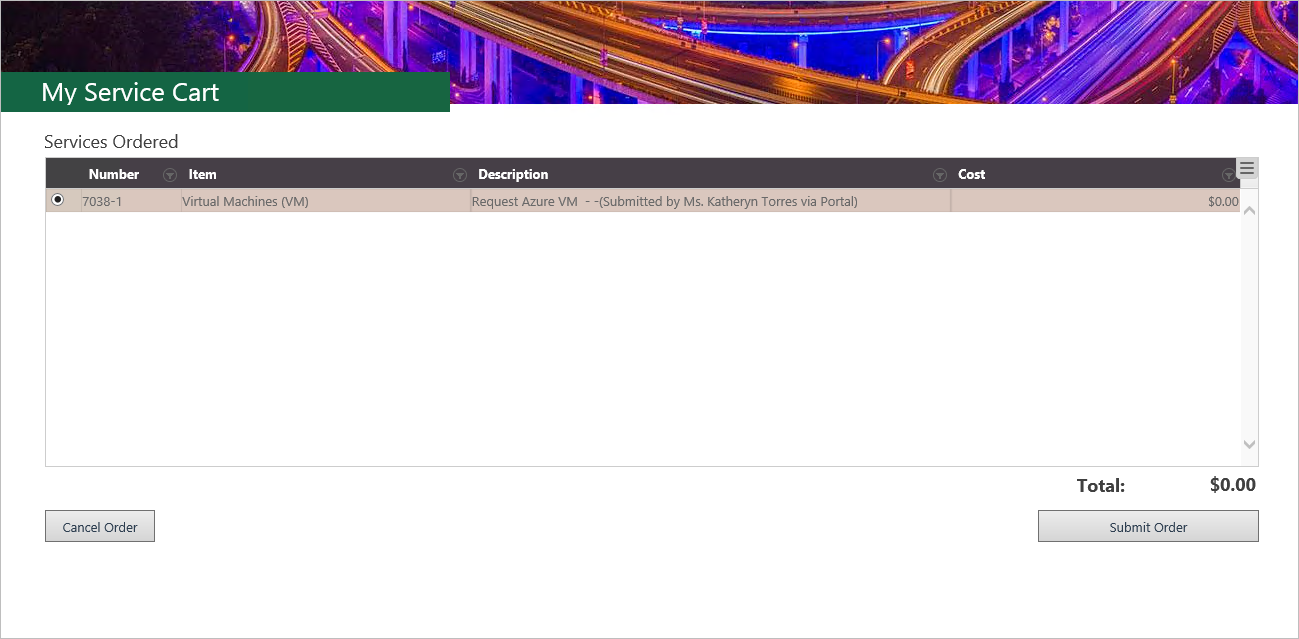
- Click the Submit Order button.
- Click
OK
to confirm the order.
After the order is confirmed, the Service Request is fulfilled using the CSM Desktop Client. When the virtual machine is provisioned, an Automation Process initiates a One-Step Action to send a request to Azure® using the Customer's credentials and specifications. If the request is successful, the One-Step Action e-mails the Customer, updates the Service Request record by creating a Journal entry, creates a new Virtual Machine CI for the VM, and changes the Service Request status to Resolved. If the request to Azure® is unsuccessful, the One-Step Action sends an e-mail to the Customer and updates the Service Request record by creating a Journal entry that includes an error message.
- In the Cloud Services>Virtual Machines (VM) section, click the
Request Azure VM Service.
- View the status of the request:
- In the Customer Service toolbar, click the
number next to My Requests (example: 1).

- Click the
Service Request that you want to view.
Note: When the virtual machine is provisioned, a new Virtual Machine CI Record is created and an e-mail notification is sent to the requestor.
- In the Customer Service toolbar, click the
number next to My Requests (example: 1).
- After the VM request is fulfilled, request a second day action:
- On the Customer Portal home page, click the
View My Devices
link.
The My Devices page opens.
- Click the
title of the Virtual Machine.
The Virtual Machine page opens.
- Select a second day action from the
Request Action for this VM
drop-down:
- Power Off
- Deallocate VM
- Restart VM
- Start VM
- Reset Access
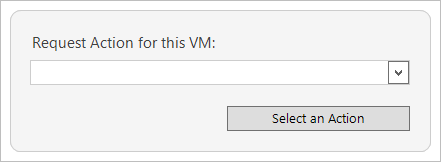
- Click the Run Action button.
- On the Customer Portal home page, click the
View My Devices
link.