Define an Approval Email
Use the Approvals page of the Approval Editor to define an email that is sent to approver(s) when needed (using a One-Step Action).
To define an approval email:
- Open the Approval Editor.
- Select the Approvals page.
- Select the
Notify Approver by Email check box below the
Approvals list, and then select
Edit.
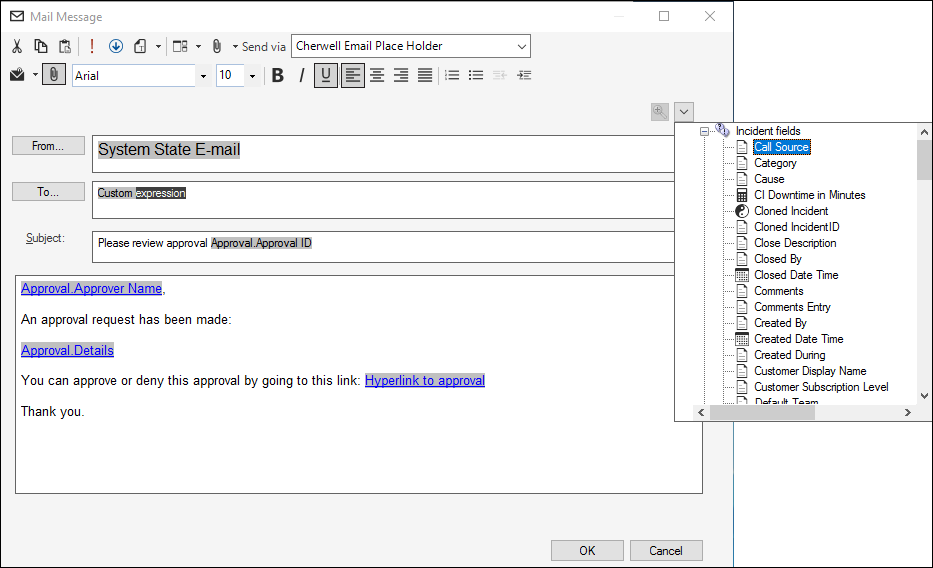
- From: Double-click on
System State E-mail in the
From field. The default expression in this field
uses a stored value called
Current System Production E-mail. This stores
the production email account for your company (example: [email protected]).
It is also the email address configured as the default for the Inbound Email
Monitor, so that if a reply is sent to it, it is processed and attached to the
corresponding record in
CSM.
If not already done during system setup, change the stored values for Current System Production Email and Current System DEV Email. See: Configure Test and Production Accounts.
- To: Select To to open the address book and select email recipients. You can choose users, customer, teams, Approver Workgroups, or their aliases. Choose a name and then select To, Cc or Bcc. The Bcc line is only available in the CSM Desktop Client.
- Edit the email contents:
- Provide text for an approval message (example: An approval request has been made.)
- Select
 (or right-click in the contents area) to insert
Tokens (fields, expressions, system functions, stored values, and variables)
directly into the text.
(or right-click in the contents area) to insert
Tokens (fields, expressions, system functions, stored values, and variables)
directly into the text.
- Define additional email properties:
- Attach to current <Business Object>: Select this icon to attach the email to the current record (example: Current Incident, current Problem) as a Journal - Mail History record. Specifically, when the approval is responded to using email, the Journal-Mail History record is attached to the parent record.
- Attach to recipients: Select this icon to attach the email to the customer records associated with recipients in the To, Cc, or Bcc lines. You can also attach the email to customer records that they originated from (parents of recipients) to provide more context for users. For example, if an e-mail recipient is a contact that works for a particular company, the e-mail can be attached to the company record as well as the customer record.
For more information, see Attach E-mail Messages to Records.
-
Select OK.
- Publish the Blueprint () to commit the changes, or save the Blueprint () to continue making other changes.
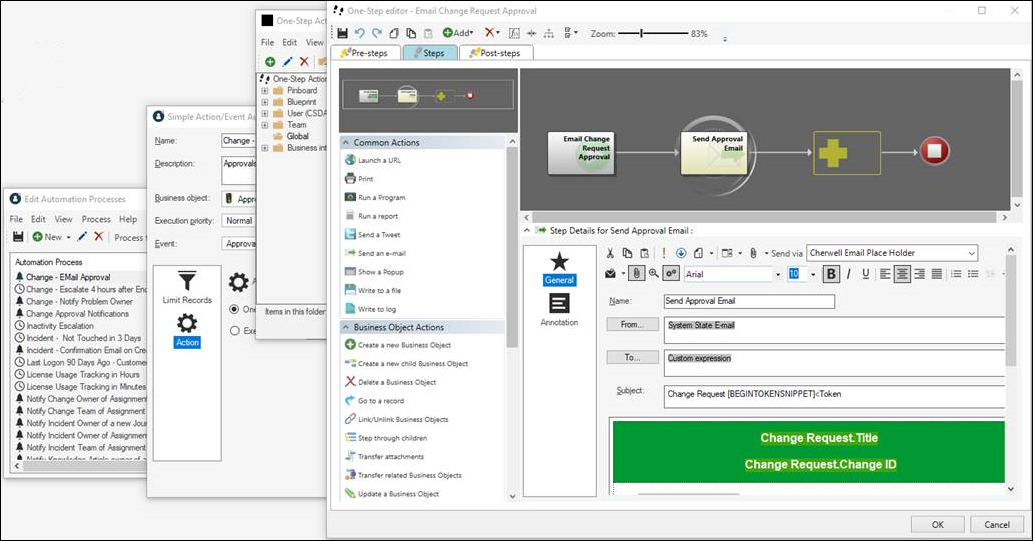
Note: You can also edit the approval email template by creating an
Automation Process Blueprint. Use the One-Step Editor to edit the Email Change
Request Approval as shown below.