Log Viewer Utility
Use the Log Viewer utility to review CSM logs, even if you do not have access to the server on which CSM or its services are installed.
Use the Log Viewer utility to view logs for the:
- Cherwell® Application Server
- Trusted Agent Server (only available for on-premise installations)
- Cherwell Service Host
- CSM Browser Client
- CSM Portal
- Cherwell REST API
You must select Log to File in your logging configuration in the Cherwell Server Manager. If you are a SaaS customer, contact Cherwell Support to configure file logging. See Configure Logging for a CSM Service, Web Application, and Cherwell REST API.
To avoid system performance issues, the Log Viewer only retrieves the most recent 10,000 lines (up to 512kb of data) from the latest log file. The Log Viewer does not combine the beginning of a new log file with the end of a previous log file if the new log file has fewer than 10,000 lines in it.
To use the Log Viewer:
- In CSM Administrator, select the Performance category.
- Select Log Viewer.
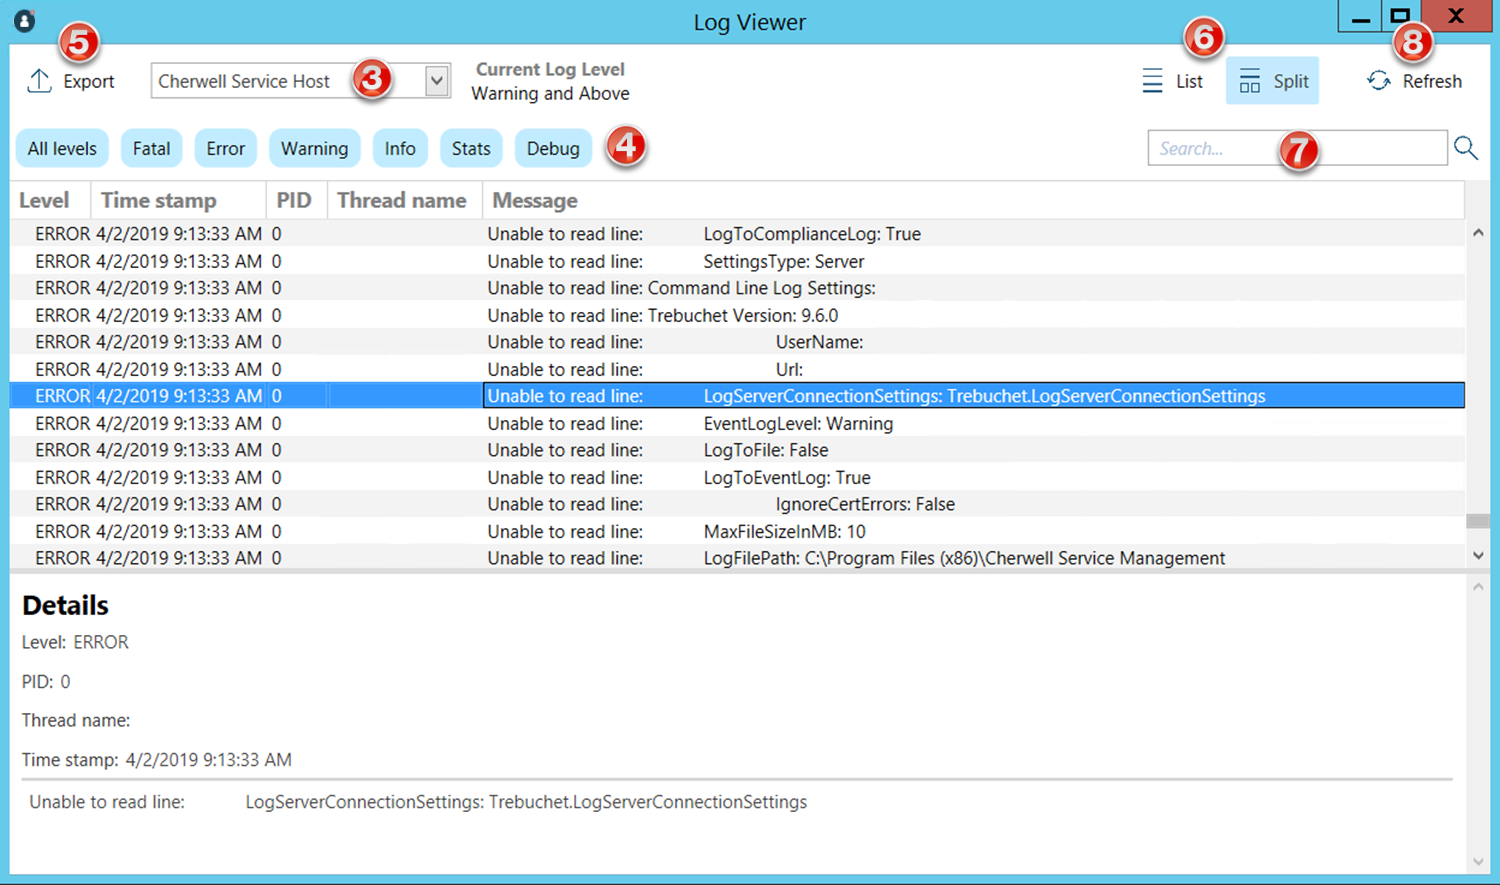
The Log Viewer window opens.
- Use the drop-down list to choose the logs you want to view.
- Select the log level you want to view.
- Select Export to generate a .txt of the log results.
- Choose List or Split to control your view. Choosing Split gives you a detail pane for the log record you select.
- Use the search box to search the log records.
Search results are shown as highlighted matching terms in the viewer, rather than a filtered list of matching records.
- Select Refresh to update log information.
- If you are not seeing entries in the Log Viewer as expected, perform the following steps. If you are a SaaS customer, contact Cherwell Support to perform these steps for you.
- In Windows Explorer, right-click the folder where the log file is located (this is the folder you created when setting up file logging).
- Select Properties.
- Select the Security tab.
- Select Edit.
- For all users and groups, select Allow on Full control.
- Reset Internet Information Services (IIS).