Configuring the Survey Frequency and Sending the Survey
•About Configuring the Survey Frequency
•Step 1: Configuring (or Creating) the Global Constant for the Survey
•Step 2: Configuring (or Creating) the Business Object Field for the Survey
•Step 3: Configuring (or Creating) the Business Rule for the Survey
•Step 4: Configuring (or Creating) the Workflow for the Survey
About Configuring the Survey Frequency
By default, the application generates a survey notification for every fifth record. You do not need to offer a survey to every customer to get a valid sampling. Sampling is controlled by a workflow and is available for incidents and service requests.
Step 1: Configuring (or Creating) the Global Constant for the Survey
Set the global constant to specify the frequency of the surveys.
1.From the Configuration Console, click Build > Global Constants to open the Global Constants workspace. The list of global constants appears.
2.Double-click the value for the following, then enter a frequency number:
| Parameter | Description |
|---|---|
| IncidentSurveyFreq | Sets the survey frequency trigger when an incident is closed. |
| ServiceReqSurveyFreq | Sets the survey frequency trigger when a service request is closed. |
Configure Survey Frequency

If these constants do not appear in your version of Neurons for ITSM, you must create them.
3.Click Save.
When an incident or service request is closed, the notification workflow compares the value with the total number of incidents that have closed since the last survey was triggered. If the number matches, the application triggers the survey email workflow (called Incident Survey for incidents or Send Survey Notification for service requests).
Step 2: Configuring (or Creating) the Business Object Field for the Survey
Set the business object field for the flag to show whether a survey goes out for this incident or survey request.
1.From the Configuration Console, click Build > Business Objects to open the Business Objects workspace.
2.Open the business object for which to send a survey.
3.Click the Fields tab. The application displays a list of fields.
4.The field called SendSurveyNotification should have the following settings:
| Setting | Description |
|---|---|
| Type | Boolean |
| Nullable | Checked |
| Stored | Checked |
| Hidden | Checked |
If this field does not appear for the business object that you are configuring, you must create it. See Working with Fields.
5.Click Save.
Step 3: Configuring (or Creating) the Business Rule for the Survey
The business rule should set the flag field.
1.From the Configuration Console, click Build > Business Objects to open the Business Objects workspace.
2.Open the business object for which to send a survey.
3.Click the Business Rules tab.
4.Expand the Editing and Calculation Rules section.
The SendSurveyNotification rule has the following settings:
| Parameter | Definition |
|---|---|
| Condition | BeforeSave |
| Field Value | $(if(((IncidentNumber % GetGlobal("IncidentSurveyFreq")) == 0) then true else false)) |
If this business rule does not appear for the business object that you are configuring, you must create it. See Using Business Rules.
Configuring the Survey Business Rule

5.Click Save.
Step 4: Configuring (or Creating) the Workflow for the Survey
The workflow sends the notification based on the value of the flag field.
1.From the Configuration Console, click Build > Workflow> Workflows to open the Workflows workspace.
2.Open the survey workflow. For example, under the Incident section, click Incident Survey. The Incident Survey workflow version list appears.
3.Click the edit icon  next to the last version on the list. The Workflow Editor appears.
Workflow Editor
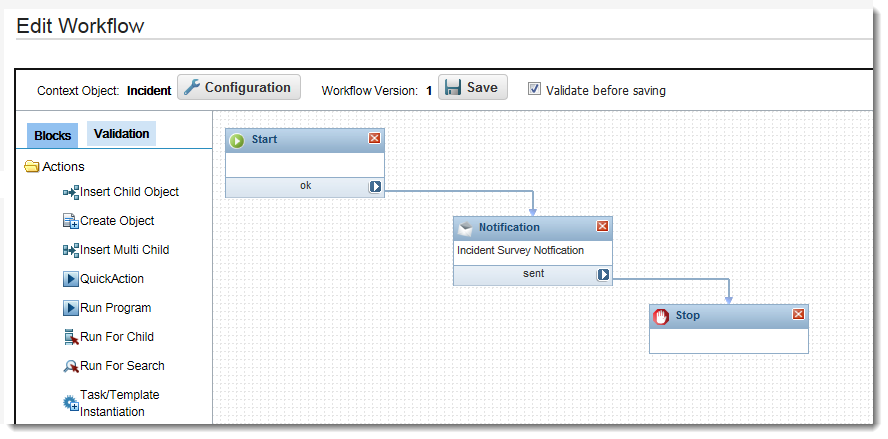
4.Ensure that the Start, Notification, and Stop workflow blocks are on the Workflow Designer. If not, you must drag the blocks onto the Workflow Designer and connect them.
Workflow Designer

5.Double-click the Notification workflow block to open the properties. See Notification Workflow Block.
6.In the Body area, click the source edit icon  to view the message in HTML format.
The following is the HTML version of the body:
<font size="3">Hi $(ProfileFullName),</font><br><br><font size="3">Please spend a few minutes to fill out the following survey. The feedback you provide will be used to improve our level of service:<br></font><font size="2"><br></font><font size="3"><a href="$(GetSurveyURL())&survey_name=$(GetSurveyName("DefaultSurveyName"))&customer_id=$(GetApplicationId())&ot=Incident&oid=$(RecId)&page_index=0">Click here to fill out survey</a></font><br><br><font size="3">Thank you.<br><br>--Service Desk</font>
7.Update the workflow configuration by doing the following:
| a. | In the workflow, click Configuration. The application displays the Workflow Configuration dialog box. |
| b. | Click the Trigger Definition tab. |
| c. | Under the Object Level Conditions header, ensure that Created and Updated are both checked. |
| d. | Ensure that Specific fields updated - at least one of the following fields should be updated. and AND are both selected. |
| e. | Ensure that there are two fields and they have this information: Field = Status, Operator = Equal to, Value = Closed and Field = SendSurveyNotification, Operator = Equal to, Value = True. |
| f. | Click Save. |
Survey Workflow Trigger Definition

8.Click Save.
For each incident, the business rule runs and this sets the SendSurveyNotification flag when incident number modulus the global constant is equal to 0 (that is, when dividing the incident number by the global constant results in a division with no remainder; for a frequency of 5, all incidents ending with 0 or 5 receive a survey).
When an incident is closed, if the SendSurveyNotification flag is set, the application runs the workflow and sends the survey.
9.To set the URL in the survey email, do the following:
| a. | In the properties for the Notification block, insert the survey URL into the HTML of the email (see the bold item in step 6 above). For example, change $(GetSurveyURL()) to $(GetSurveyURL("http://www.survey.company.com")). |
| b. | Click Save. |