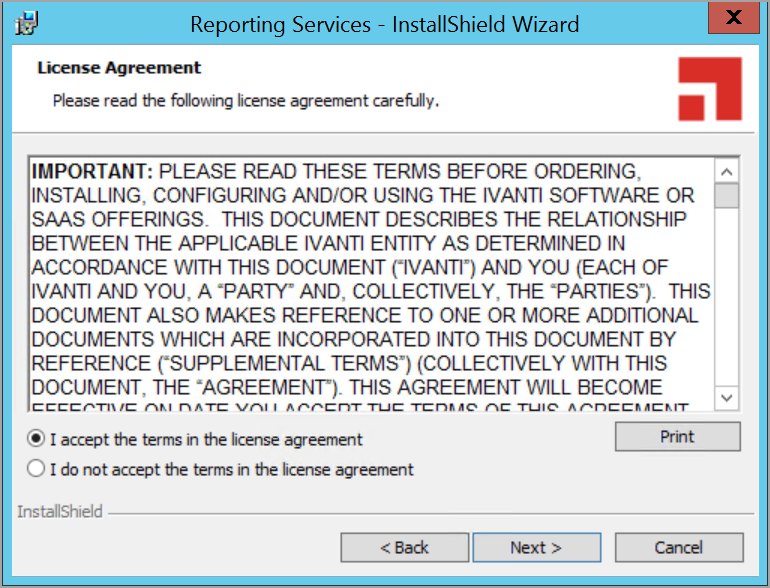
Configuring the Reporting Feature
If your Neurons for ITSM deployment includes the reporting feature, you need to set up authentication. Authentication is only needed for the reporting feature, and not for deployments that do not use the reporting feature.
•Authenticating the Application Database
•Configuring the Reporting Feature
Authenticating the Application Database
The wizard walks you through the first-time set up and configuration as shown in the screenshots below.
- Click Next.

- Click Next to continue the installation process.
- Select one of the options, Service Manager, Asset Manager, or Service and Asset Manager.
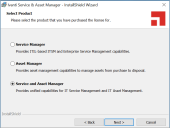
For more information on Asset Manager, access the following URL: https://help.ivanti.com/docs/help/en_US/IAM/2018/LandingPage.htm

- Click Next.
When you configure Neurons for ITSM, you set the authentication for the application database on the Neurons for ITSM Application page of the System Configuration Wizard, as shown in Ivanti Service Manager Application Settings.
Ivanti Service Manager Application Settings
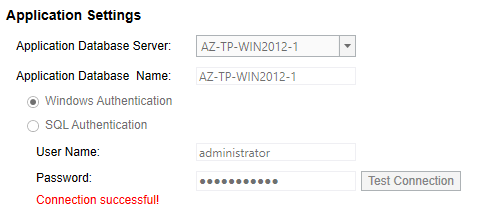
You can select either Windows Authentication or SQL Authentication. (When you configure the reporting feature, you have an opportunity to review and change the authentication method, if necessary, on the Microsoft SSRS Configuration page. See Configuring the Reporting Feature.)
•If you select Windows Authentication, you can use the Microsoft SSRS service account, the Microsoft IIS app pool identity account, or any other account, but they must have permission to access the application database and the Microsoft SSRS database.
•If you select SQL Authentication, you can use a different system account.
We recommend having separate authentication for Microsoft SSRS, the application database, and the Microsoft SSRS database.
Configuring Microsoft SSRS
Microsoft SSRS Configuration Page
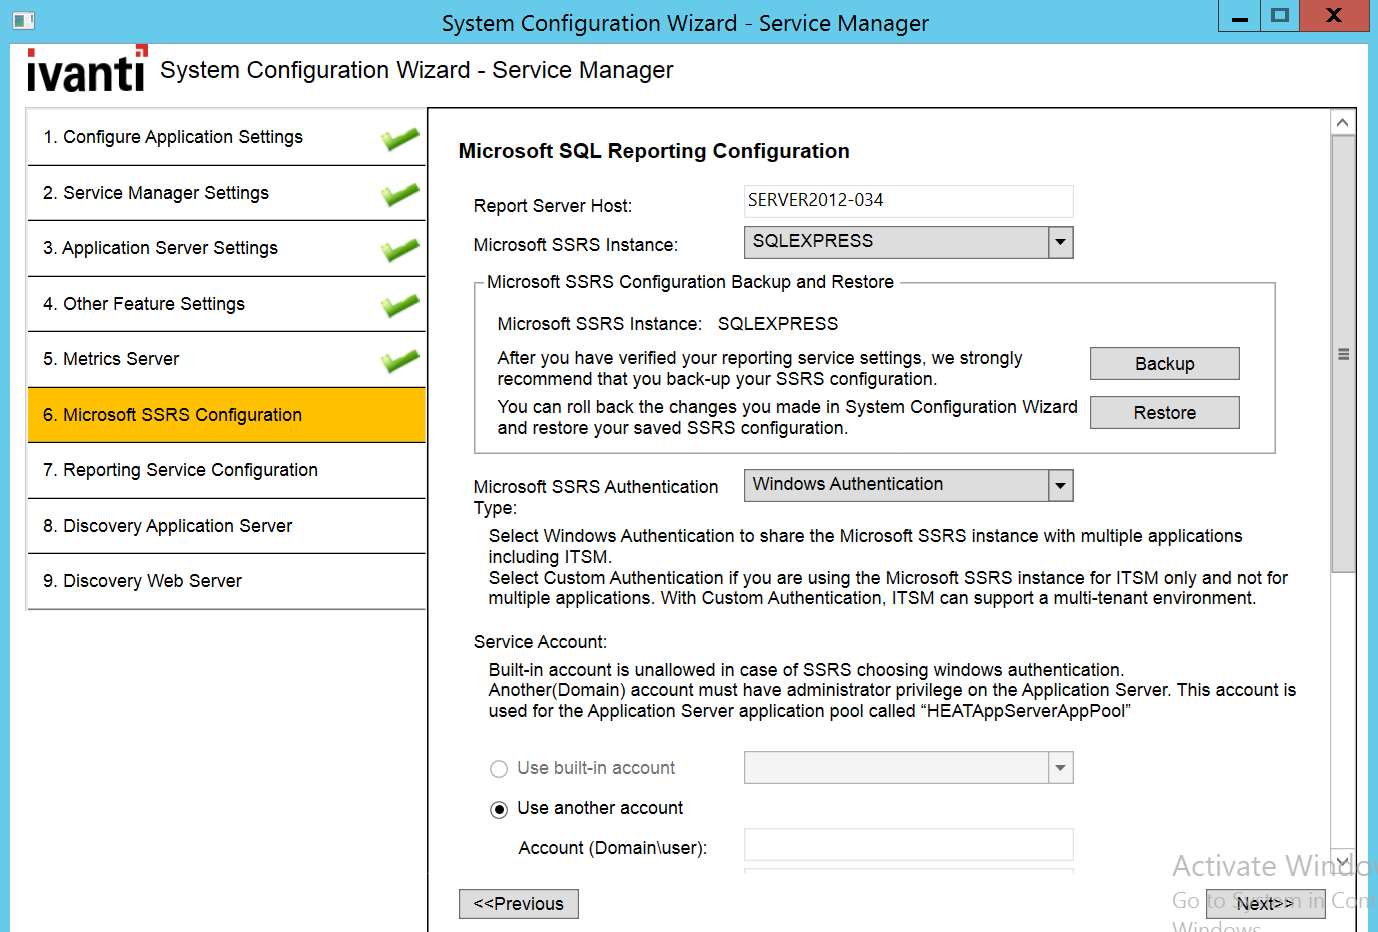
1.Enter values into the fields:
| Parameter | Description |
|---|---|
| Report Server Host |
The name of the Neurons for ITSM reporting feature server. The default name is the name of the server that you are currently logged into. You cannot change this value. |
| Microsoft SSRS Instance | The instance of Microsoft SSRS to use for the Reporting feature. Select a value from the drop-down list. |
2.(Recommended) Click Backup to back up your Microsoft SSRS configuration. (If prompted, enter a password to unlock the backup file, and then click OK.) The system displays the New SSRS Configuration Backup dialog box with information about the backup.
New SSRS Configuration Backup Dialog Box
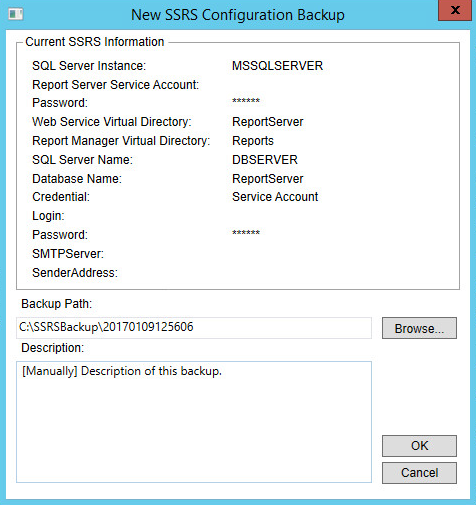
3.To change the location of the backup, click Browse..., select a new location, and click OK.
4.Click OK to close the dialog box. The system displays the Backup Encryption Key dialog box. (If you do not see this dialog box immediately, the system displays it after you click Next at the bottom of the page when you are done with the configuration on this page of the System Configuration Wizard.)
5.Do the following:
•(Optional) Enter a new file location.
•Enter a password.
•Confirm the password.
•Click OK.
6.Select a Microsoft SSRS authentication type:
•Windows Authentication: Shares the Microsoft SSRS instance with multiple applications, including Neurons for ITSM.
•Custom Authentication: Does not share the Microsoft SSRS instance with any other applications. The Microsoft SSRS instance is used for Neurons for ITSM only. With custom authentication, you can have a multi-tenant environment.
If you have multiple instances of Microsoft SSRS, choose each instance carefully before choosing the authentication method to use with that instance.
•If you plan to share the same Microsoft SSRS instance with other applications besides the reporting feature, you must use Windows authentication.
•If you plan to create a multiple-tenant environment, you must use custom authentication.
•If you plan to use a dedicated Microsoft SSRS instance only for the reporting feature, you can use either Microsoft SSRS authentication type.
If you select a Microsoft SSRS instance and select Custom Authentication, the System Configuration Wizard overwrites the existing Microsoft SSRS configuration.
If the Microsoft SSRS instance that you selected is shared with another application, the Neurons for ITSM installer deletes the configuration for that application. Before proceeding, be sure that the Microsoft SSRS instance is not in use by another application.
7.Enter values into the fields:
| Parameter | Description |
|---|---|
| Service Account |
Select the service account to use. This can be the same account that is used for the IIS application pool identity and the Windows service, that you entered on the Application Server Settings page. You can select one of the following: •Use built-in account (NOTE: You cannot select this option if you selected Windows Authentication for the Microsoft SSRS authentication type in step 5.) •Use another account |
| Use built-in account |
(Only if you selected Use built-in account) Select the built-in account to use. This can be the same account that is used for the IIS application pool identity and the Windows service, that you entered on the Application Server Settings page. You can select one of the following: •Local System: This account has the most permissions. •Network Service: We recommend that you use this account. •Local Service |
| Account |
(Only if you selected Use another account) The name of the service account. Use the format domain/name. |
| Password | (Only if you selected Use another account) The password associated with the service account. |
| Web Service Virtual Directory |
The name of the web service virtual directory. The system automatically fills in this field with the value that you entered in the Web Service Virtual Directory field on the Application Server Settings page. See Configuring the Application Server Settings.
The default value for the web service virtual directory is ReportServer + _SSRS_instance_name.
Do one of the following: •Accept the default value. •Enter a new value.
Click Advanced... to configure multiple identities for the reporting feature web service. |
| Report Manager Virtual Directory |
The name of the report manager virtual directory. The default value is Reports + _SSRS_instance_name.
Do one of the following: •Accept the default value. •Enter a new value.
Click Advanced... to configure multiple identities for the report manager. |
| Database Server |
The name of the database server. The system automatically displays the default Microsoft SQL server name.
Do one of the following: •Accept the default value. •Enter the name of the server of the configuration database in this format: machinename\instance. •Browse for a server name by clicking the down arrow and selecting <Browse for more...>. The system displays any Microsoft SQL Server instances in your network. Choose a server and click OK.
NOTES: •Do not choose localhost unless you are setting up a Demonstration or Proof-of-Concept Deployment. •To restore the Microsoft SQL server name if you changed the name previously, open Microsoft SQL Server Management Studio. The system displays the Microsoft SQL server name in the Connect to Server dialog box. |
| Database Name | The name of the reporting database. The default name is ReportServer + $SSRS instance name. |
| Credentials |
The credentials to use with the reporting feature. Select one of the following: •SQL Server Credentials •Windows Credentials •Service Credentials |
| User Name | The user name for the credential used with the reporting feature. |
| Password | The password associated with the credential used with the reporting feature. |
8.Click Test Connection. The system displays Connection successful! if the connection is good.
9.Enter values into the fields:
| Parameter | Description |
|---|---|
| SMTP Server | The server that sends out the reports. The system automatically verifies the SMTP server name that you enter. If the name is not valid, the system displays an error message. |
| Sender Address | The email address for the account that sends out the reports. |
10.Click Next. The system displays the Ivanti Reporting Service Configuration page. See Configuring the Reporting Feature. (If the system displays the Backup Encryption Key dialog box, see step 5.)
Configuring the Reporting Feature
You configure the reporting feature on theReporting Service Configuration page. See Reporting Service Configuration Page.
Reporting Service Configuration Page
1.Enter values into the fields:
| Parameter | Description |
|---|---|
| Configuration Server |
The host name of the configuration server. The default value is the name of the server that you are logged into now.
If the host that you are logged into now is not the configuration server, enter the machine name or fully-qualified domain name of your configuration server.
If you check Use SSL below, you must enter the fully-qualified domain name of the configuration server. |
| Port |
The port number of the configuration server. The default is 80, or 443 if you check Use SSL. |
| Use SSL |
Check to use SSL for connections to the configuration server.
NOTE: We do not recommend enabling SSL on the configuration server until you have fully tested Neurons for ITSM to ensure that it works with SSL. For information on configuring Neurons for ITSM with SSL, see Optional SSL Configuration. |
2.Click Test Connection to test the connection to the configuration server. The system displays a success or failure message. Click OK to close the message.
3.Enter values into the fields:
| Parameter | Description |
|---|---|
| Account Type |
The database account type. Select from one of the following: •SQL Server Credentials •Windows Credentials
NOTE: If you selected Custom Authentication in step 6 of Configuring Microsoft SSRS, this option automatically displays as SQL Server Credentials and you cannot change it. |
| User Name | The user name for the Neurons for ITSM database read-only account. |
| Password | The password associated with the user name. |
4. Click Test Connection to test the connection to the configuration server. The system displays Connection successful! if the connection is good.
5.Click Modify to add servers to or remove servers from the list of Neurons for ITSM application servers that are used with the reporting feature.
If you have multiple domains in your deployment, the reporting server may not be able to connect to the web server. In this case, remove the server from the list and configure reporting manually.
6.Enter values into the fields:
| Parameter | Description |
|---|---|
| Report User Name | (Only if you selected Custom Authentication in step 6 of Configuring Microsoft SSRS) The user name for the user who configures the reporting feature. |
| Report User Password | (Only if you selected Custom Authentication in step 6 of Configuring Microsoft SSRS) The password associated with the user name. |
7.To verify that the configuration settings work, do the following:
| a. | Click Reprovision Report Now to update the sample report data to the application. See Reporting Service Configuration Page. If the systems returns an exception such as "Cannot Decrypt the Symmetric Key". |
| b. | Log into Neurons for ITSM as a Report Manager. |
| c. | Ensure that you can see the sample reports and create one. |
8.When you see confirmation that the out-of-the-box reports have been provisioned, that is, the last line of this step changes from OOB Reports (not provisioned yet) to OOB Reports (provisioned on date), click Finish to close the System Configuration Wizard.
The system displays the Completed page of the System Configuration Wizard.
If the system displays an error message that the system failed to configure reporting for an Neurons for ITSM application server, ensure that you checked Use these settings for Reporting Service on the Application Server Settings page.
9.Restart your system (the host server that you just configured).
10.After the system restarts, ensure that you can access Neurons for ITSM. Go to http://server_name/HEAT and ensure that the reporting feature is functional.