Creating a SAML User
Summary: How to create a Security Assertion Markup Language (SAML) user in Ivanti Neurons.
Your client must have Security Assertion Markup Language (SAML) enabled to create a SAML user. For more information about SAML, see the SAML Setup Guide.
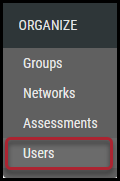
To create a SAML user, navigate to the Organize > Users page.
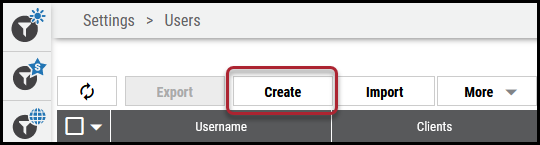
On the Users page, click the Create button.
In the Create User window, click the check box next to Authenticate this user with their [SSO] ID. This adds additional fields to the Create User window specifically for SAML.

The new fields are based on the two authentication attributes established in the SAML Setup Guide. For this example, the two attributes are Email Address (always required) and Last Name (can be changed based on the chosen, client-designated authentication attributes).
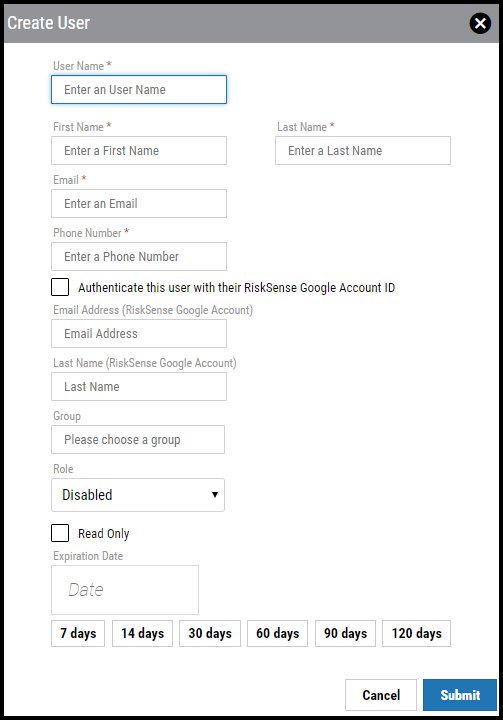
Complete the remaining fields and click Submit. The new user can now log in via SAML.
To log in via SAML, see Logging into Ivanti Neurons Using SAML.