Creating a Custom Product
Your organization may use a custom or "home-grown" software product. In order for Security Controls to be able to scan for and patch that product it must be able to detect the product. Creating a custom product provides the registry key information needed for Security Controls to determine whether the custom product exists on the machines it is scanning.
If you have multiple versions of a custom product you must define a unique custom product for each version. For example, assume you currently support both the original version as well as an updated version of a custom CRM product. Within the Custom Patch File Editor you must create a separate custom product for each version.
TIP: After importing a new custom XML file, you can use Patch View to verify the custom product is contained in the updated XML patch data file.
- To create a custom product, within Custom Patch File Editor select Insert > Add Product or click the Add Product toolbar icon (
 ).
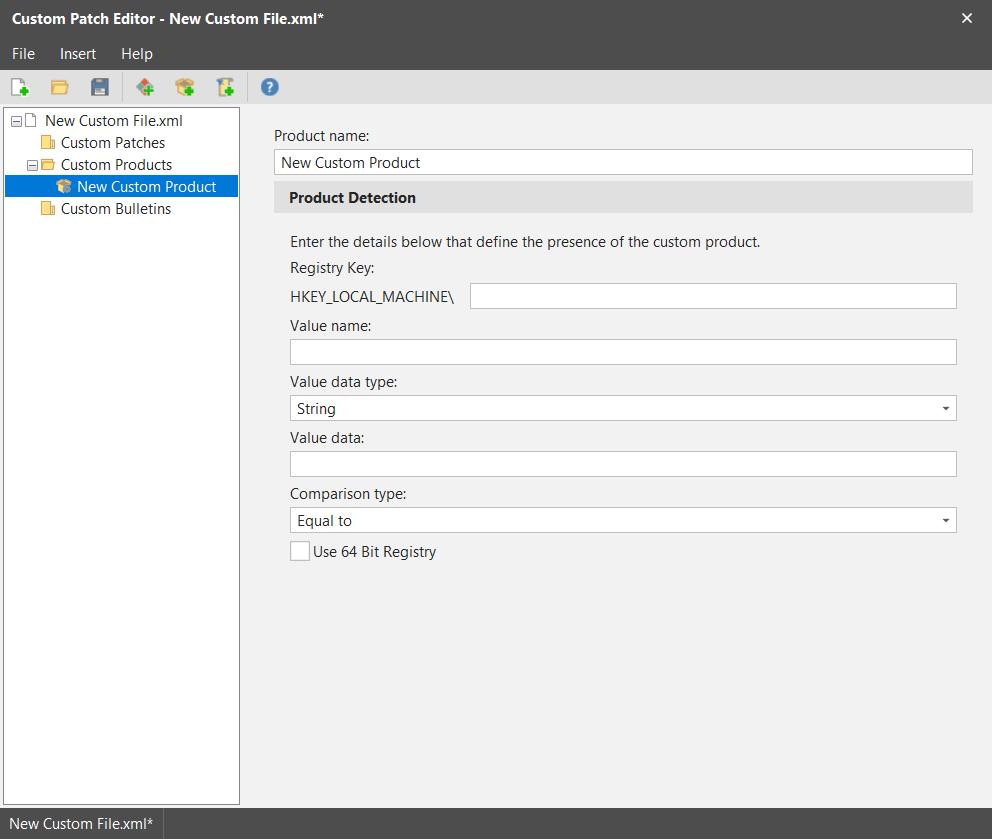
). - Select New Custom Product beneath the Custom Products folder.
The new custom product is selected and the product characteristics are displayed in the right pane. For example: - Use the options in the right-hand pane to define the new product.
- String: Specifies that the data must be a string.
- DWORD: Specifies that the data must be a number.
- Equal to: The check passes if the registry value is equal to the reference data
- Not equal: The check passes if the registry value is not equal to the reference data
- Less than: The check passes if the registry value is less than the reference data
- Less than or equal: The check passes if the registry value is less than or equal to the reference data
- Greater than: The check passes if the registry value is greater than the reference data
- Greater than or equal: The check passes if the registry value is greater than or equal to the reference data
- Exists, Does not exist: These two options will simply test whether the registry value itself exists.
- When complete, save and then validate the XML file (see Saving and Validating Your Changes).
To get the most current registry information we recommend using the Microsoft Registry Editor (regedit), a tool for viewing settings in your system registry. You can copy the required information from this tool to the appropriate fields in this dialog.
|
Field |
Description |
|---|---|
|
Product Name |
Provide a unique name for the product. The name cannot match a product name already defined to Security Controls. Once this custom product is defined and saved, the name you provide here will be added to the Available Products list that is used during the patch creation process. See the Targeting tab section in Patch Scan Information Tab for more information. |
|
Registry Key |
You can only specify keys that are relative to the HKEY_LOCAL_MACHINE hive. The easiest and most accurate way to populate this box is to display the desired key from within the Microsoft Registry Editor, copy the key name and then paste the name into this box. The HKEY_LOCAL_MACHINE portion of the name will likely be repeated so you'll need to remove that portion of the name from the box. |
|
Value Name |
The name of the specific registry value. You must provide a value and not just a registry key. |
|
Value Data Type |
There are two options: |
|
Value Data |
The expected data of the registry value. You can find this value by locating the key within the Microsoft Registry Editor and then looking in the Data column. |
|
Comparison Type |
This specifies the test criteria you want to use when determining if a product exists on a scanned machine. While there are many different options here, they can basically be broken down into two categories: Comparisons to value data: The first six options all relate to the value data you specified for the registry key. In either category, if the comparison test passes Security Controls will consider the product installed. |
|
Use 64 Bit Registry |
Enable this check box if the registry key is in the 64-bit part of the registry on a 64-bit operating system. |