Configuration Profile Editor
The configuration profile editor lets you create new configuration profiles or edit existing ones. The editor can create the following types of configuration profiles:
- Agent settings: MacOS Configuration
- Agent settings: MacOS Device Configuration
- Agent settings: Windows MDM Configuration
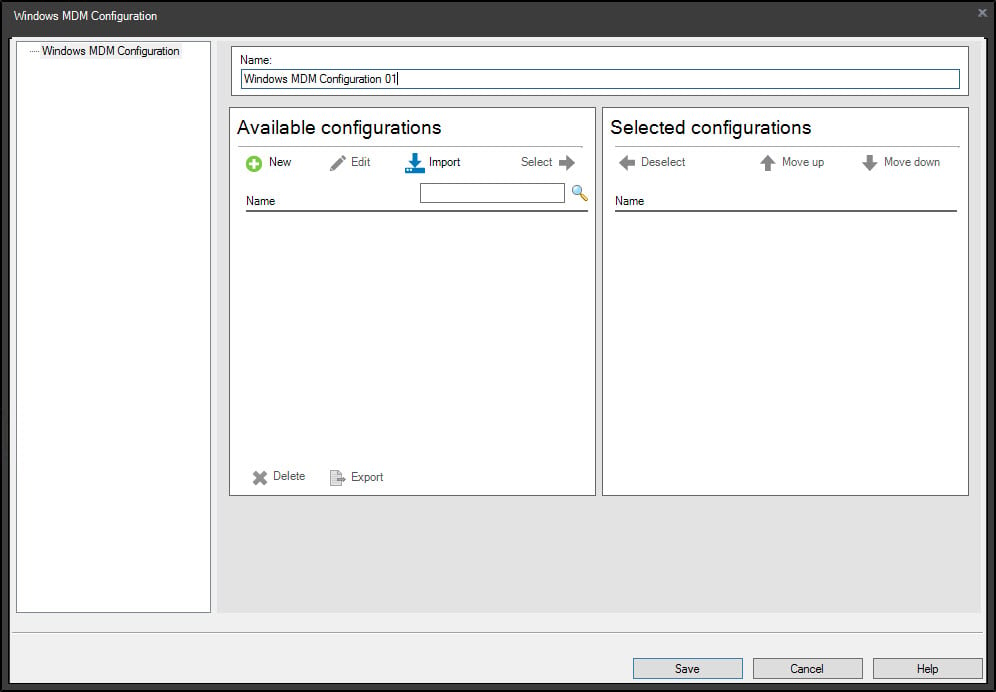
Open the configuration profile editor by clicking Tools > Configuration > Agent settings, and the agent setting you want. This opens a dialog box in which you can choose from new or available profiles or open an existing profile from disk; the chosen profile is then opened in the configuration profile editor.
This dialog box contains the following options (the exact content of the window depends on the type of the profile):
- Name: Type a unique identifier for the settings.
- Available configurations/Selected configurations: Use the Select and Deselect arrows to move one or more available configurations to the selected configurations list to select them for this named setting.
- New: Opens a dialog box to create a new configuration of the type you have selected.
- Edit: Opens a dialog box to edit the selected configuration.
- Import: Opens the Import new configuration profile dialog box, where you can browse for an existing .mobileconfig file. Give it a descriptive Display name and click Import. At this point the .mobileconfig file contents are imported into the LDMS database.
- Delete: Deletes the selected configuration from the Management Console.
- Export: Creates a .plist file of the selected configuration.
- Mode: Select whether you want to Append or Replace the configuration profile. Append preserves existing profile settings. Replace removes all existing profile settings, including settings you aren't modifying, and replaces them with the profile settings you specified.
- Set as default: Establishes all of the settings on the Mac configuration profile dialog box as the default settings. The name you entered will appear in the console with the default icon
 next to it. You cannot delete a setting that is marked as default. When you create a new agent configuration, those settings will be selected by default.
 -
Save: Saves the new or edited profile.
-
Save to Disk: Lets you export the profile as a text file to disk. This button is enabled only if exporting the profile was allowed by checking the Allow save to disk option.
NOTE: Administrators can access this editor only if the Modify Mobile Device Configuration Profiles option has been activated for their account.
Common settings
The Common section of the configuration profile editor lets you specify and edit settings that each configuration profile has, independent of its type. The section has two subsections:
•General
•Certificates
The settings from both sections are described below.
General
The General section contains mandatory settings for all kinds of configuration profiles:
•Name: The name of the profile. This is also the name that the profile will have in the Mobile Devices window.
•Identifier: A unique identifier for the profile, for example “com.mycompany.it.mdm.my-profile.421”.
•Organization: The name of your organization.
•Description: A brief text describing the purpose of the profile.
•Consent Message: A message that will be displayed on the target device when the user is prompted to allow the installation of the profile.
•Security: The options the user of the target device has for removing this profile:
•Always: The user can remove the profile as desired.
•With Authorization: The user can remove the profile when she or he enters a password that you specify in the Authorization password field. (The field is hidden unless you choose this option.)
•Never: The profile cannot be removed, although it can be overwritten with a newer version.
•Automatically Remove Profile: At which point the profile is automatically removed from the device (that is, without requiring further action by you or the user):
•Never: The profile is not automatically removed.
•On Date: The profile is automatically removed at the specified date. (Choosing this option displays a field for entering the date.)
•After Interval: The profile is automatically removed a set time after it has been installed. (Choosing this option displays a field for specifying the number of days.)
•Allow save to disk: If this option is checked, any administrator can save the profile to disk as a file (by clicking the Save to Disk button in the profile editor). If this option is unchecked, only super administrators can export the profile in this manner.
Certificates
The Certificates section lets you specify which certificates will be installed with the profile on the target devices.
Clicking the Configure button will let you choose an X.509 certificate file from disk to attach to the profile.
Imported certificates have + and - buttons beside their names. Clicking + lets you import an additional certificate; clicking - removes the imported certificate from the profile.
Each imported certificate has two editable fields:
•Credential Name: The name of the certificate. By default, this is the file name, but you can edit it as desired.
•Password: If the certificate is protected by a password, you can enter it. If you do not do so, the user must enter the password during the installation of the profile; if it is not entered correctly, the installation fails. (This does not apply when no password is set for the profile.)