Creating relationships
To create a relationship between two business objects, you drag from the object that you want to create a relationship to onto the object where you want to add the related object. When you create a relationship, you are asked if you want to create a collection of the related business object on the core business object. Creating a collection enables you to create many of the related objects on each of the core objects, and to view the core object from the related object.
If you choose not to create a collection, just an Object Relationship is created. For example, if you drag from object A onto object B, a relationship to A is created on object B, but there is no relationship to B on A.
 no collection:

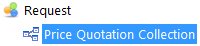
If you choose to create a collection, then an object relationship and a collection relationship are created. For example, if you drag from object A onto object B, and specify that you want to create a collection, then an object relationship to A is created on object B, and a collection relationship to B is created on A. You can then create actions that enable you to create the collection objects (for more information, see Actions).
yes collection: 
In the procedure below, we drag from Request onto Price Quotation and create a collection relationship, so that there are many Price Quotations related to one Request.
To create a relationship:
- On the Business Objects tree, drag the core business object to the business object that you want to create a relationship with. You can drag either to the object's name in the Business Object tree, or to the object's name at the top of the Attributes tree.
A relationship message box appears, telling you that a relationship has been created between the business objects. You are asked if you want to create a collection of the related business object on the core business object. - Click Yes or No.
If you click Yes, then using the example above, an Object relationship is created for the Price Quotation business object, and a Collection relationship is created for the Request business object.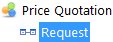
If you click No, then an Object relationship is created for the Price Quotation business object only. This means that you can view the Request business object from the Price Quotation, but you cannot see the Price Quotation business object from the Request. - Complete any properties as required.
Business object – Specifies the business object in which this relationship exists. This is automatically populated, and cannot be modified.
Title – The relationship title is the name by which you usually refer to the relationship. Titles can contain any characters (including spaces) and do not need to be unique.
Name – The name of the relationship. This is automatically generated, but you can modify it if required. Relationship names can consist of up to sixty-four alphanumeric characters, with no spaces. You can use only the following characters: A through Z, 0 through 9 (not as the first character), _ (underscore).
Description – Describes the function of the relationship. This description is used as a default description when you add a related control to a window.
Relationship Type – Object or collection. This is automatically generated, and cannot be modified. For more information about objects and collections, see Relationships.
Related Module – Indicates the name of the module that the related object is in. This is automatically generated, and cannot be modified.
Related Business Object – Indicates the business object to which this business object is related. This is automatically generated, and cannot be modified.
Related Attribute – Specifies the name of the corresponding attribute on the related business object for a collection. This is automatically generated, and cannot be modified.
Is Mandatory? – Indicates whether this relationship must exist before you can save the instance of the business object.
Is Owner? – Indicates whether this object is the owner for the relationship. This is used when setting up view rules based on a collection on a process object. For more information, see Creating views.
To delete a relationship, in the Attributes list, right-click the relevant relationship, then click Delete Attribute. Remember to delete both sides of the relationship (if required).
You cannot delete a relationship after you have saved it because this would affect the integrity of the database. That is, someone may have already specified data using the business objects which form the relationship. If you delete the Object of the relationship, the Collection of the relationship is automatically deleted.
- Click
 .
.