Creating a new dashboard
You create system and personal dashboards in a similar manner. The procedure below describes how to create a personal dashboard.
To create a new dashboard:
- On the Settings menu, click Dashboard.
The Dashboard Designer starts.
- On the Dashboard Pages tree, select the Personal Dashboards folder, then on the Actions list, click New Personal Dashboard Page.
The New Dashboard Page dialog appears.
- Type a name for the dashboard, and specify who the dashboard is being created for.

At this stage, you can change who the dashboard is for. If you use the New Personal Dashboard Page action, but then select the Everyone option button, you will create a system dashboard.
- Specify the number of columns you want to appear on the page, or alternatively, select the required Layout template.
You cannot add further columns to a dashboard after you click OK, but you can add up to a maximum of four rows to the page as you go along. You can add further columns by adding a Multiple Panel to a dashboard. You can split a Multiple Panel into 4 rows or columns, and then add different panels to each of these sections. For more information, see Adding multiple panels.
- Click OK.
The columns appear in the Dashboard Designer workspace.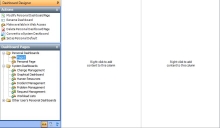

You can now panels to the dashboard.