Creating import configurations
You can use your existing connections to import data. Using the Data Import component, you can map the fields in your existing data sources to attributes in your Service Desk or Asset Manager database.
You can schedule when you import the data, for example, each night at midnight.
To run scheduled data imports, you need to run the Data Import Service in Configuration Center. For more information, see Setting up the Application Services Server.
To create a new import configuration:
- Start the Data Import component in the Console.
- On the Import Mappings tree, select the Scheduled Imports folder.
- On the Actions list, click New Scheduled Import.
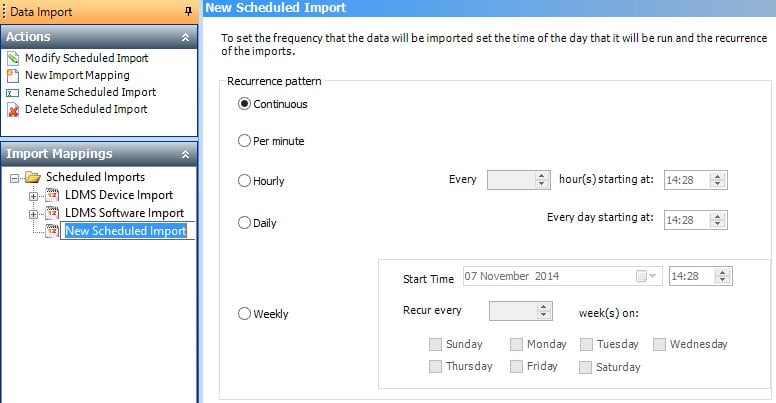
- Specify the required import time and frequency, then click
 .
.
If you select the Continuous option, a new import starts immediately after the previous import finishes.
- On the Import Configurations tree, select the schedule you have just created, then on the Actions list, click New Import Mapping.
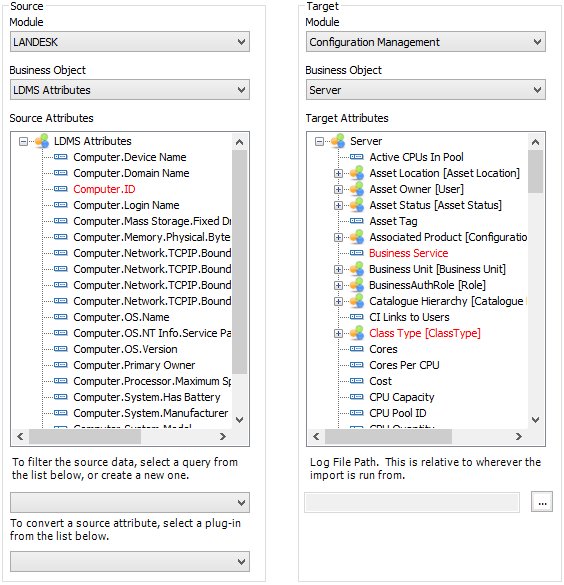
The New Import Mapping window appears. - In the Source Module list, select the relevant module, for example, XL Users.
- Select the Source Business Object from which you want to import data.
- Repeat for the target objects.
- If required, you can filter the data from the source. In the Filter list, select the required filter, or click [New]. For information about creating new filters, see Adding a filter to the data you import.
- If required, you can use a bespoke plugin to convert a source attribute. In the Plugin list, select the required plugin. For example, you may want to append a field with further data before importing that information into a single field.
Contact your supplier to request bespoke plugins.
- Drag the attributes that you want to import data from onto the target attributes.
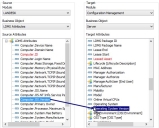
- You need to specify the Target Key attribute. In the Target Attributes list, select the required business object, then on the Actions list, click Set Target Key Attribute.
The Target Key Attribute dialog appears.

Alternatively, right-click the required business object, then click Set Target Key Attribute on the shortcut menu.
- Select the attribute you want to set as the key attribute, then click OK. For more information about Target Attributes, see Setting the target key attribute.
- If you are importing data into an object that has processes associated with it, such as Change, Customer, or (if you are using Asset Manager) Configuration Item, you can specify the process that you want to use for the items that you are importing. For information about specifying a process, see Specifying a process when importing data.
- If required, you can transform the data that you are importing. For example, you can truncate Incident IDs, convert the case of a name and so on. For information about transforming your data, see Converting attribute values.
You cannot transform the target key attribute. For more information about transforming your data and converting attribute values, see Converting attribute values.
- Alongside the Log File Path box, click
 to browse to a suitable location where you want to store the data import log file for manual imports.
The Save As dialog appears. - Type a log file name, then click Save.
The Log File Path box populates with the path and file name of the log file. This is where logs for data imports run manually are stored; for information about logs for scheduled data imports, see Setting up the Application Services Server. - Click .
The import runs at the scheduled time.
Alternatively, click the Import Mapping you have just created, then click Import Data Mapped on the Actions list to import the data immediately.
- You can create more than one import mapping, as described above, and you can change the order (or priority) in which the import mappings take place. You do this by dragging the mapping to the required position on the Import Mappings tree.
For information about data import errors, see Log file errors.
To deactivate an import mapping, select it in the Import Mappings tree, then click Deactivate Import Mapping in the Actions list. When you deactivate or activate an import mapping, any other changes you made to the mapping are also saved.