Setting up the import data connection for SCCM
To import data from SCCM, you use the Data Connections component to create the connection to the Microsoft SCCM database and then define which attributes are used in the import process.
Before you can import machine data into your Configuration Items, you need to define an SCCM Collection in the SCCM console. After you have saved the collection, a SQL view is created that can be used as the table name that is the basis of your data import. For more information about SCCM, refer to the Microsoft SCCM documentation.
To determine the SQL view name for the SCCM Collection:
- In SCCM Configuration Manager Console, either define a new collection for the information to be imported, or determine the Collection ID of an existing collection that is suitable.
You can determine the Collection ID by viewing the properties of the collection in SCCM Configuration Manager Console. The Collection ID appears at the bottom of the dialog.
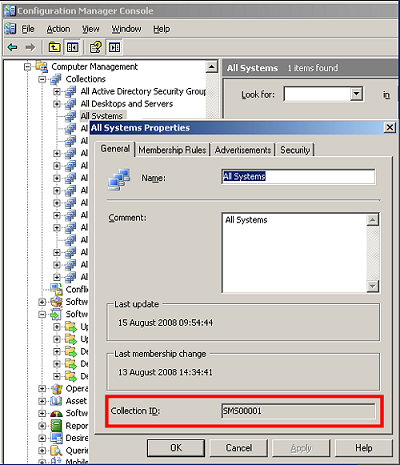
- From this Collection ID, determine the SQL view name that you will use as the table name when creating the Connection Type in Console.
All Collection SQL view names start with _RES_COLL_ and end with the Collection ID.
For example _RES_COLL_SMS00001.
To create the SCCM data connection:
- In Console, start Data Connections.
- In the Data Connections tree, select the Generic Data Source node, then on the Actions list, click New Connection.
An OLEDB5 branch is added to the tree and a property grid appears. - Name the branch SCCM, and complete the property grid as follows:
Provider – SQL Server
Server – the name of your SCCM Database server
Data Source – the SCCM database; this is usually of the form SMS_sitecode (for example, SMS_VMT)
User ID – the SQL Server login
Password – the SQL Server password
The SCCM installation recommends that SQL Server has only windows authentication enabled, so you may need to enable Mixed mode authentication for SQL Server before this connection will work.
- Click
 .
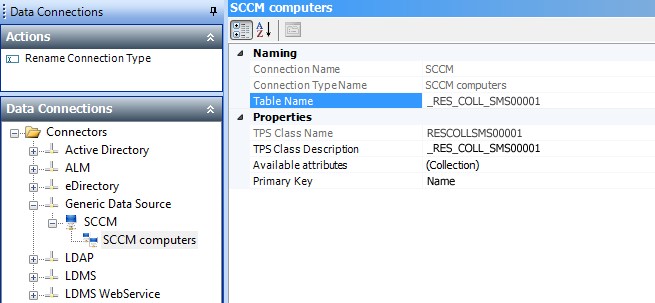
. - Select the SCCM connection, then on the Actions list, click New Connection Type.
- Name the connection type SCCM computers.
- In the property grid, alongside Table Name select the SQL view that you determined earlier.
For example, _RES_COLL_SMS00001. - Alongside Available attributes, click
 and select the attributes you want to import.
 - Set the Primary key to Name (this will be the computer name).
If you have a second view for servers, create a second data connection type to point to the second Server view you created.
The next step is to set up an import configuration. For more information, see Creating an import configuration. The mapping you create depends on the version o f SCCM you are using:
- For SCCM 2007, map Resource ID onto ID, and Name onto Title.
- For SCCM 2012, map Host Name onto ID, and Name onto Title.
- For both versions of SCCM, set the Primary Key to Title.
You may choose to add a filter to the import to restrict which data is imported.
Testing the Data Connection
To test the data connection, create a query against the Data connection and connection type in Query Designer. This shows the data before starting the import.