Import inventory
Now that we have a connector to Data Services, we can import inventory data from there. This process is similar to that we used in Business units, but requires less configuration and so has fewer stages. You may also need to import inventory data from spreadsheets to cover areas where you have no discovery tools, in which case you will need to complete further steps to configure the data source, as you did with the business units import.
Creating a new data source
The first stage is to create and name a data source.
To create the new inventory data source:
1.On the menu bar, expand Data Management, then click Data Import.
The Data Import page appears.
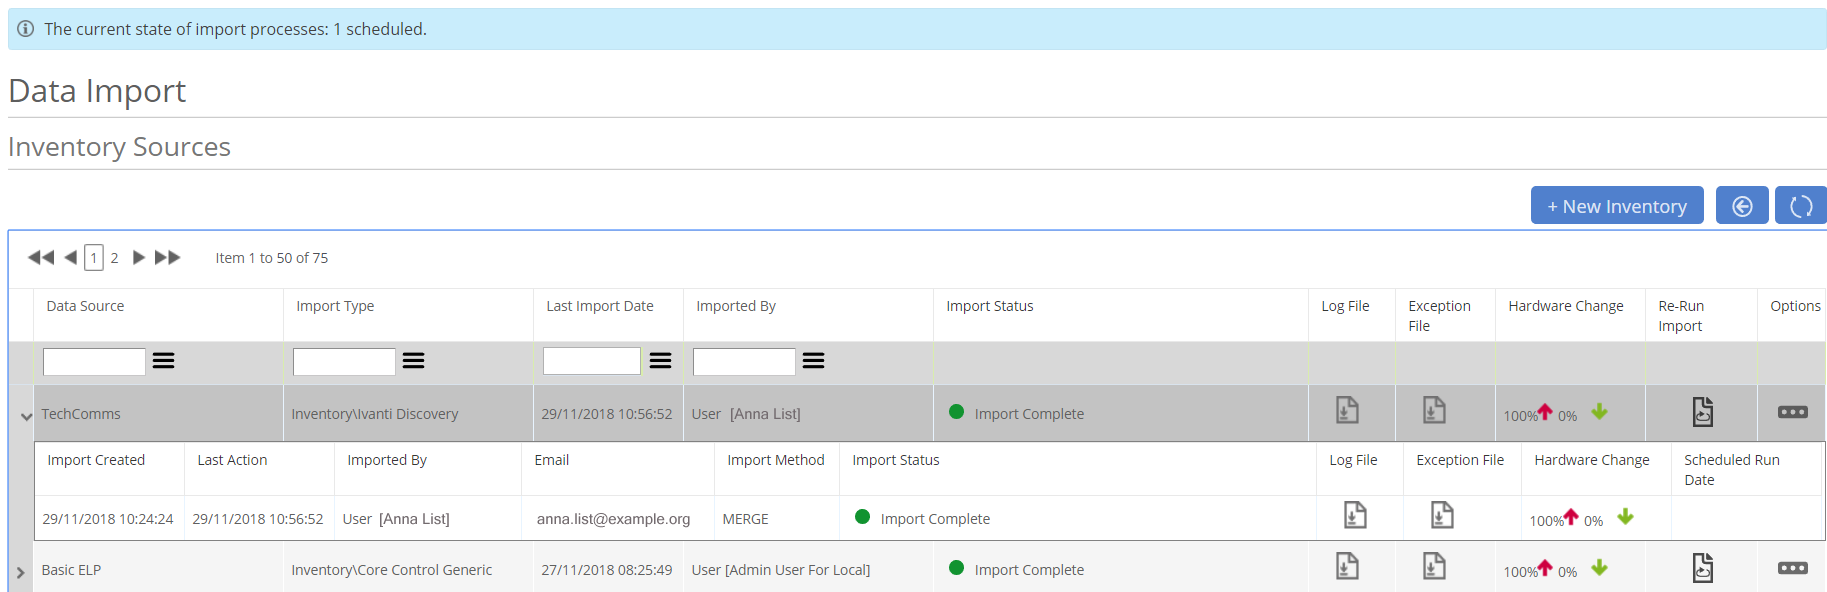
2.Under Import Types, click the Inventory tile.
The Inventory Sources page appears, which enables you to import hardware and software inventory. As with the Organisational Data Sources page we used when importing business units, the page shows a data grid of existing data sources that you have set up.
3.Click New Inventory.
The Create New Inventory Import page appears.
4.In the Import Name box, type a name for the data source, then in the Inventory Type drop-down select Ivanti Data Services.
The Select your sources section appears. We are going to import both hardware and software from Ivanti Data Services.
5.Select the check boxes alongside both the Hardware File and Software File rows.
An Options section appears. The specific options that appear in this section depend on which sources you choose to import.
Although the New Inventory Import pages often refer to "files", we are not going to use files when we import using the Ivanti Data Services inventory type, but are going to import directly from the Data Services database using an API.
6.In the Identify Hardware by drop-down, select Unique ID.
Usually, you identify hardware records using a unique ID. However, if a unique ID is not available, the system can take the name of the OSI and combine it with the Business Unit to identify each item to prevents duplicate hardware records being imported.
7.Click Save.
The data source is saved and the Settings page appears.
Data import settings
The next stage is to specify how we want to import the data. You can specify if you want to run recognition automatically when the import completes, set a notification email address, and schedule the import to recur.
To specify the import settings:
1.On the Settings page, the Import Method drop-down is set to Merge,
This imports the differences between the current data from the selected data source and the import data sets. Data is inserted, updated, and deleted as required.
2.Select the Run recognition after import check box.
This means that any software that is imported is automatically matched with items in the Definitive Software Library. If you don't select this check box, you will have to run recognition manually when the import completes.
The decision of whether or not to select the Run reconciliation after recognition check box is yours. If you select it, then after the software data has been imported and matched with items in the Definitive Software Library, the system's rules engine reconciles this information to determine an initial estimated license position. Until we have imported our licenses later, this will give a meaningless answer – and we are going to run reconciliation manually later after we have imported our licenses (see Reconciliation). However, you might decide to select this check box so that each time you re-import your inventory data, your estimated license position updates automatically.
3.Type your email address in the Email address for notification after import box.
This data import is likely to import a large amount of data, and take some time. Rather than keep checking back to see if it has finished, get the system to tell you.
The final section on this page enables you to specify a recurrence schedule for the import. We are not going to use that in this example.
4.Click Save & Test Import.
The import configuration is validated and the Test Import page appears, reporting Import Files Validated OK or debug information if there was a problem.
Test import
This page is most useful if you are importing from a spreadsheet. It enables you to examine and preview the data, and run a test import. You can learn more about this in the user guide using the link at the bottom of this page.
However, we are importing from Data Services, so all of the hard work of mapping the correct fields and validating everything has already been done for us. All that remains for us to do is to click Queue Import.
The import is added to the queue. The message at the top of the page changes to Import Pending, and the Queue Import button changes to Cancel Import.
You can now click Close and carry on with other work until you receive an email telling you that the import has completed.
There can be only one import, recognition, or reconciliation in progress in your License Optimizer at the same time. For example, if you are importing data and start a recognition, reconciliation, or another import then the new request is queued until the original import has completed. Because these processes can take a significant amount of time to complete, a message appears in the title bar at the top of the page informing all users logged in to the system that one of these processes is in progress, so that they are aware that any new process they start will initially be queued.
When the import has completed, you can see its details on the Inventory Sources page by clicking  to expand your data source entry.
What next?
Now that you have some inventory data in your system, you can already use License Optimizer to learn something about your IT estate: Dashboards.
More information
Creating a new data source – more detailed information about creating a new data source, including how to import a spreadsheet that maps your OSIs to specific business units