User accounts
You don't want to have to do all of the work yourself, so we need to create some more user accounts to enable your colleagues to help you. In this section we create a new user, and start to learn about how data is displayed in License Optimizer, and how you can work with this data.
It is important that each user of License Optimizer has their own login. Do not share your login with anyone else. There are places where your user account is recorded, such as in the data import feature. It can be helpful to know who created a particular data import, so that you can identify its source for example.
Creating user accounts
There are two types of user recorded in License Optimizer: users of the system, and Named Users that are associated with the license usage that we are trying to optimize. In this section we are going to use the Manage Users page to create new users of your License Optimizer system. We will learn about Named User Management in the Inventory section.
To create a new user of License Optimizer:
1.On the gears menu alongside the Account details section at the top right of the page, click Manage Users.
The Manage System Users page appears, displaying a data grid of all existing users of the system apart from the user you have logged in as.
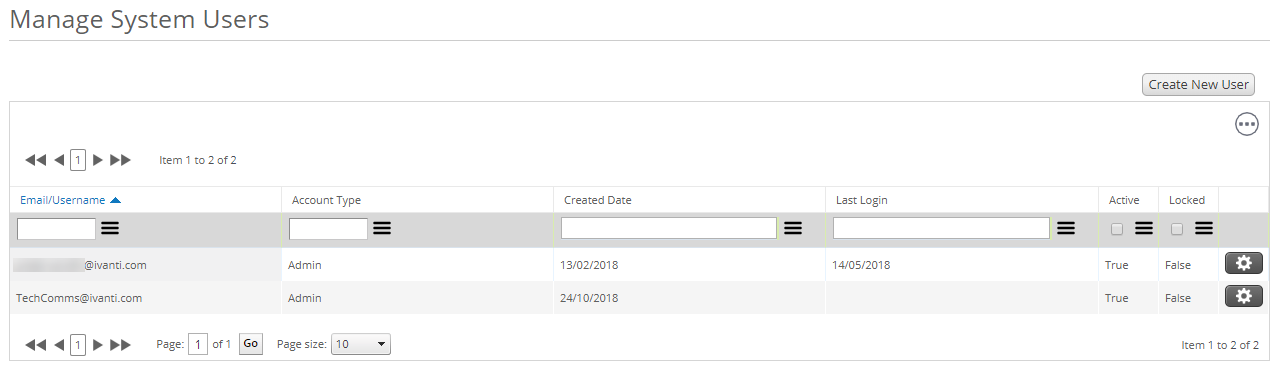
There are a number of shared features for data grids in License Optimizer:
•page controls appear above and below the grid so that you can navigate to other pages on large lists
•the Page size control beneath the grid enables you to specify the number of items you want to appear on each page
•clicking a column header sorts the grid by that column, clicking again reverses the sort order
•the boxes beneath the column headers enable you to enter filters for the column; clicking  enables you to choose the type of filter (Equal To, Less Than, and so on)
•clicking ![]() enables you to clear the filters, add or remove columns from the grid, reset the columns to the default selection, and in some instances export the grid to Excel or CSV
enables you to clear the filters, add or remove columns from the grid, reset the columns to the default selection, and in some instances export the grid to Excel or CSV
We are now going to create a new user.
2.Click Create New User.
The New User dialog appears.
3.In the Email/Username box, type the email address of the new user.
Users log in using their email address. When you create a new user, they are sent a link to the log in page, their user name, and a temporary password.
4.Complete the name fields and enter a temporary password.
5.Make sure the Active check box is selected, then select the Account Type.
There are two types of account: Admin who has access to all permissions, or Standard User who has specific permissions set.
The permissions pane appears. If you selected Standard User, set the required permissions.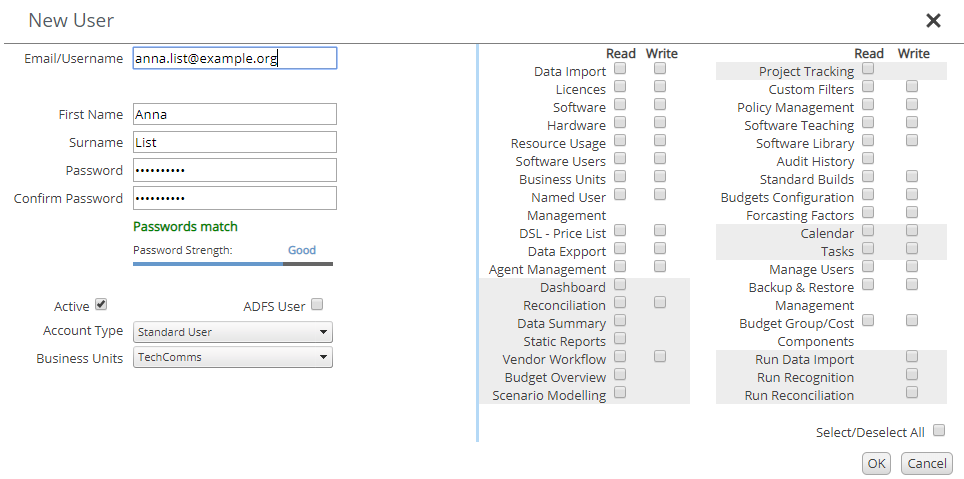
6.Select the Business Units that the user can access, then click OK.
We will learn more about business units in the next section, Business units. The user is created and an email is sent to them with the login URL and their credentials. Like when you first logged in, the new user will be asked to change their password and submit some memorable information.
What next?
Now that colleagues can help us, let's get to know the system a bit better by looking at business units: Business units.
More information
•Managing users – more information about managing user accounts