Adding SAML SP Metadata in Pulse Connect Secure Server
You do not have to perform the process in the section if your appliance is at v8.3r1 or later, and you have already performed auto-configuration of SAML, see Automatically Configuring a SAML idP on Pulse One.
This section provides the steps to add SAML Service Provider metadata in PCS server.
1.Navigate to System > Configuration > SAML.
2.Click New Metadata Provider.
3.Enter a Name for the metadata provider.
4.Under Metadata Provider Location Configuration:
•For Location, select Local.
•For Upload Metadata File, click Browse and select the SP metadata file saml-metadata-pws.xml that you saved on your computer in the previous process.
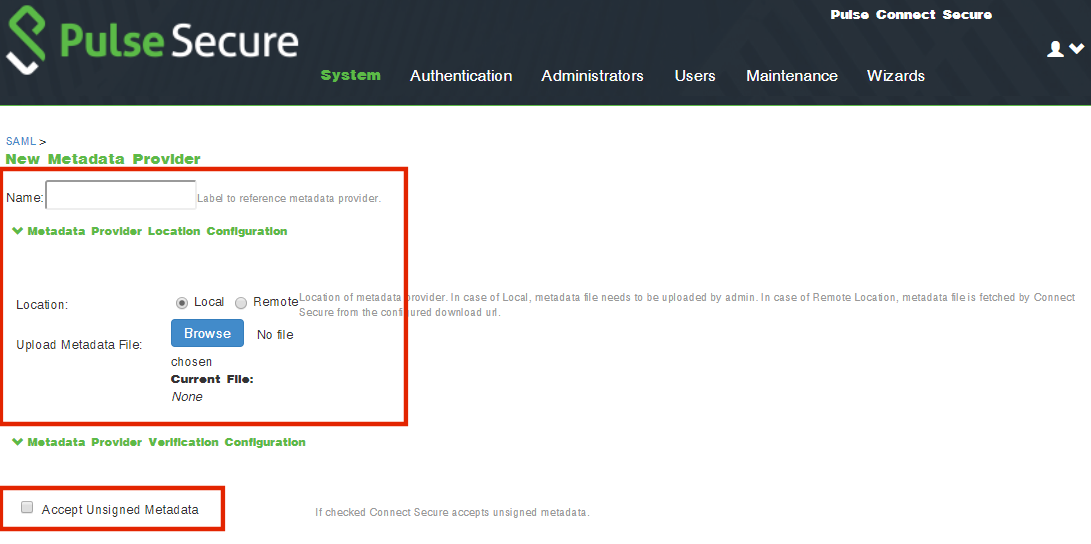
5.Under Metadata Provider Verification Configuration:
•Select the Accept Unsigned Metadata check box.
6.Under Metadata Provider Filter Configuration:
•For Roles, select the Service Provider check box.
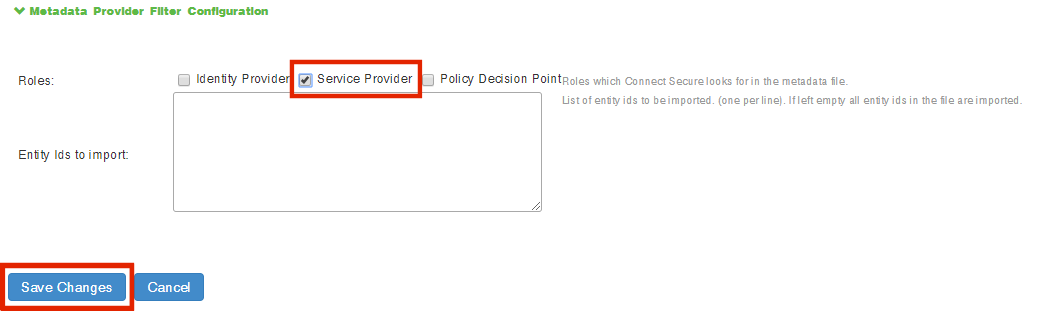
7.Click Save Changes.
8.Navigate to Authentication > Signing In > Sign-In SAML > Identity Provider.
9.In the Configuration section, click Add SP.

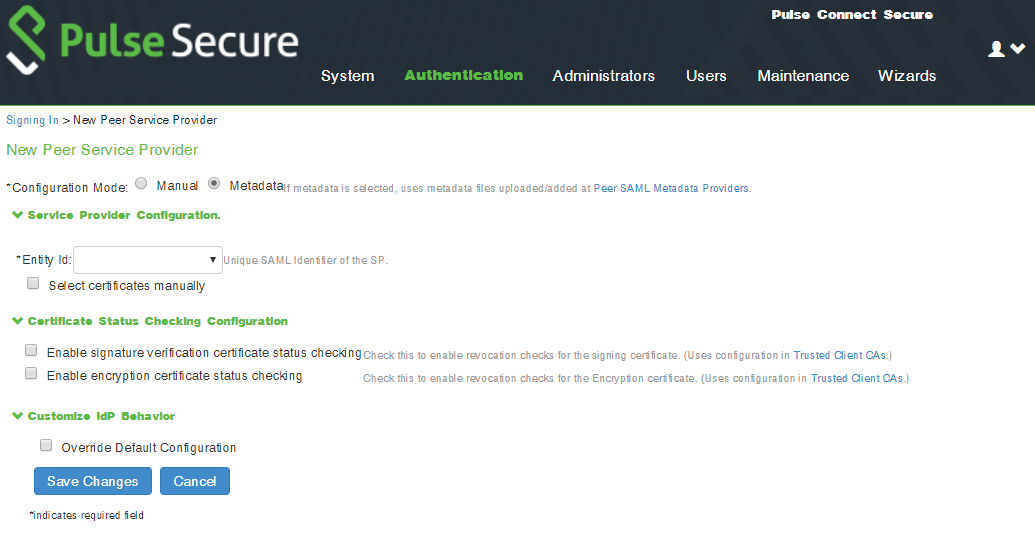
The New Peer Service Provider page appears.
10.In the Service Provider Configuration and Certificate Status Checking Configuration sections, make the necessary service provider specific settings. For more details, refer to the "Configuring Sign-in SAML Identity Provider Settings" section in the Pulse Connect Secure Administration Guide.
11.In the Customize IdP Behavior section, select the Override Default Configuration check box.
12.Clear the Reuse Existing NC (Pulse) Session check box.
13.Select the Accept unsigned AuthnRequest check box.
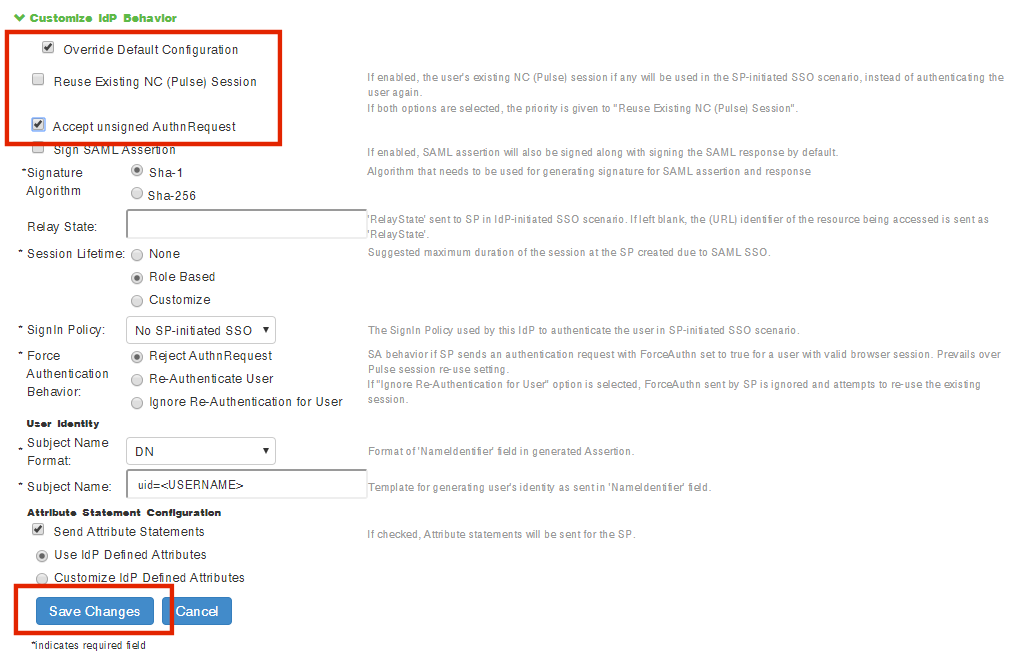
14.At the bottom of the page, click Save Changes.
SAML configuration is complete.
You can then either:
•Continue with an optional activity Automatically Creating Pulse One Users for SAML SSO Logins.
•Move directly to testing the SSO login, see Testing Sign In with Enterprise SSO.