Editing Applications
You can only edit applications if you belong to the zeusafm Administrator user group, or if you’ve been given the appropriate read/write permissions for the application by your individual user group assignment
Applications and their mappings represent the top level element in the structural hierarchy of vWAF. Applications contain one or more rulesets (see also Application Mapping, Paths, Preconditions).
For further information regarding the underlying principles and how vWAF is structured and controlled, see Basic Principals of Use.
Creating an application with the help of the Application Creation Wizard
The simplest way to set up a new application is by using the Application Creation Wizard. The wizard does not only create the new application, but it also sets up the application mapping for the application.
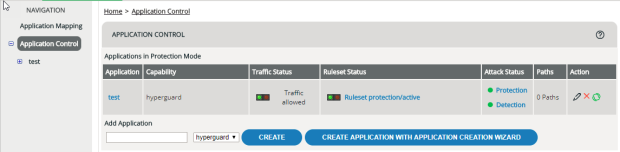
- In the navigation area, select the entry
Application Control. An overview of all existing applications appears
Finally, the Application Creation Wizard brings up the Logfiles tab for the application that you’ve just created. On this tab, you can monitor how vWAF and your web application handle requests now that your basic configuration has been set up. For details on viewing log files, see Monitoring Attacks, Statistics, Log Files, Reports and Log Files.
Creating an application manually
To create an application without the help of the wizard:
- If there’s only one capability available for your installation, the name of this capability appears next to the entry field. (For details on capabilities and licenses, see
Assigning Capabilities). If there are several capabilities available to choose from, a dropdown list appears. Select the capability that you want to assign to the application.
- Click the
Create button.
The new application now appears in the navigation area.
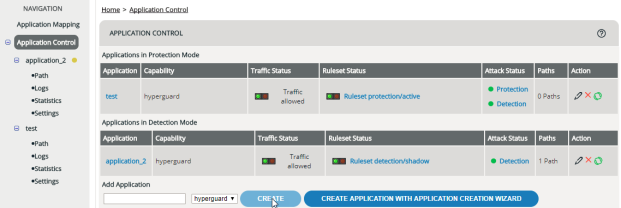
In the navigation area, a yellow dot appears next to the name of the new application. This dot indicates that the application has not yet any mapping, which in turn means that its rulesets are not used for checking any requests. So the next configuration step needed is setting up application mapping (see Editing Application Mapping).
Renaming an application
The name of an application is only for you to be able to handle the application in the administration interface. It’s not used for request processing. You can change the name of an application at any time:
- Under
Name, change the name.

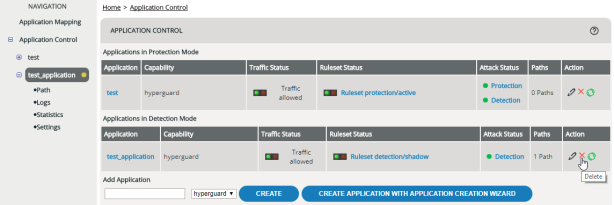
Deleting an application
ATTENTION
When deleting an application, the rulesets for this application are also deleted.
- In the navigation area, select the entry
Application Control.
The list of all applications appears.
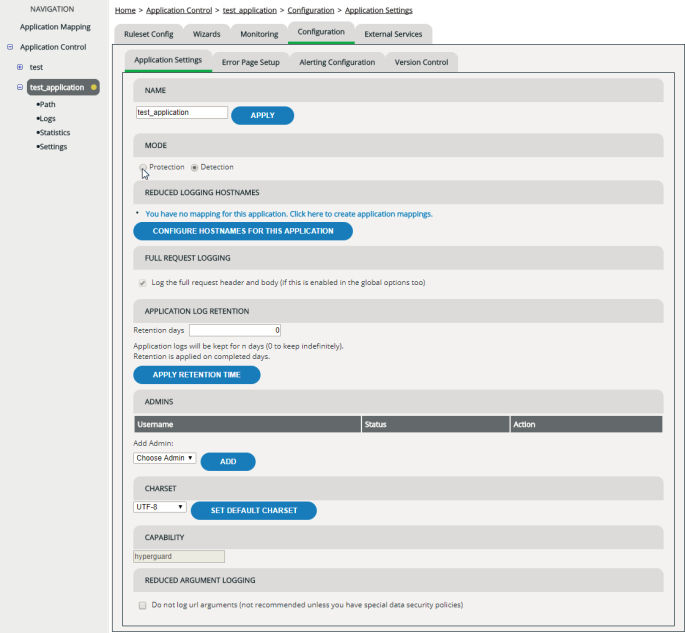
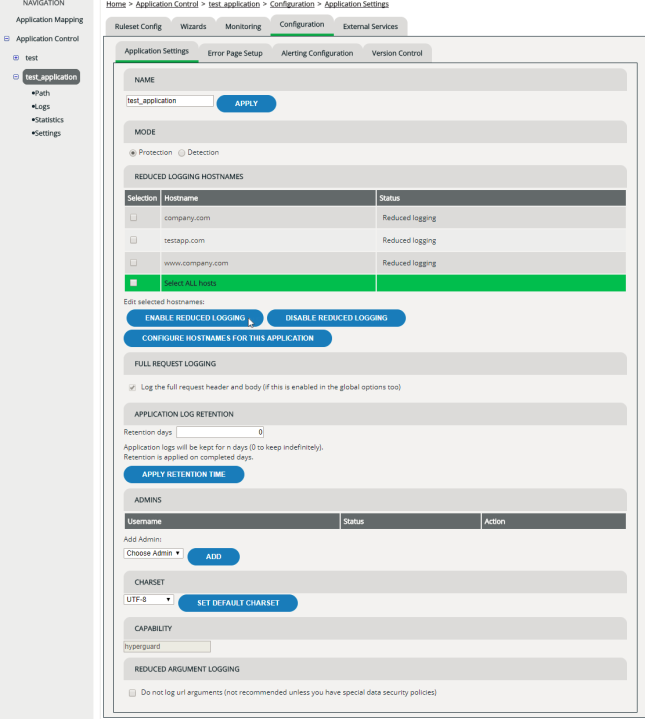
Setting protection mode/detection mode
The mode determines whether there’s only a detection ruleset that just logs, or also a protection ruleset that actually denies unwanted requests (see Detection Mode, Protection Mode). To determine which mode an application is in:
- Under
Mode, select whether you want to enable protection mode or detection mode. Mind that some handlers don’t work in detection mode (for details, see
Detection Mode, Protection Mode and
Handlers).
When switching the mode, the following happens to your rulesets:
-
When switching from detection to protection for the first time, your current detection ruleset becomes the protection ruleset. The detection ruleset gets disabled.
-
When switching from detection to protection repeatedly, your current detection ruleset remains in place, and the ruleset that was the protection ruleset before is restored as the protection ruleset.
-
When switching from protection to detection and there’s no detection ruleset in place, the protection ruleset becomes the detection ruleset.
-
When switching from protection to detection and in the meantime there has been another ruleset enabled as the detection ruleset, this detection ruleset isn’t changed by switching to detection mode. In this case, the protection ruleset simply is disabled (it remains available in Version Control).
To check and set which rulesets are selected for detection and protection, use Version Control.
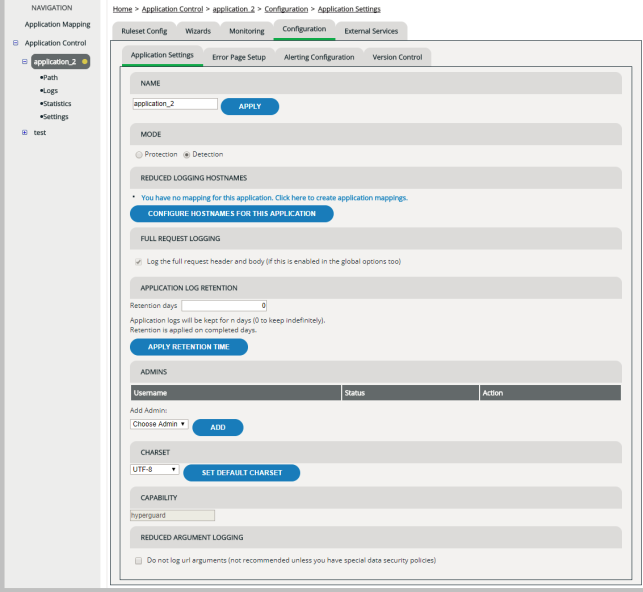
Activating reduced logging for particular hosts
By default, vWAF used Reduced Logging for all hosts, but you can select the logging level for any host. If reduced logging is active for a host, vWAF doesn’t create a log file entry for each request on this host, but only if one of the configured handlers has been active. This can be useful for pages with high traffic.
However, even when reduced logging has been activated for a host, vWAF continues to include all requests for the application statistics functions (see Application Statistics).
To log all requests, disable reduced logging.
You can also switch off logging for individual handlers (see attribute “enable-logging” of individual handlers).
- Go to the
Reduced Logging Hostnames section.
Enabling full request logging
Full request logging enables you to conduct in-depth analysis of denied requests but might write sensitive data to your log files.
Full request logging needs to be enabled both generally in Global Configuration and for each application for which you want it to be active. For more information on full request logging see Global Configuration.
To enable full request logging for a particular application:
- In the navigation area, select the application for which you want to enable full request logging.
- Activate the Configuration | Application Settings tab.
- Select the check box under Full Request Logging. You can only select this check box if full request logging has been enabled globally in Global Configuration.
Viewing, adding and removing administrators
On the Application Settings tab, the section Admins lists all users who’ve been assigned to the Application Administrator user group for this application. For your convenience, you can also add or remove new application administrators here.
ATTENTION
If you add any application administrator in this place, this assigns this user to the default Application Administrator user group. This group grants this user full control of all application-specific settings. If this user belonged to a user group with limited user rights before, this now adds up to these user rights, giving him or her full control of the application! For adding and removing application administrators we usually recommend using
User Management.
Note that the list shown in the Admins section only lists users who’re members of the default user group Application Administrator. However, there may be more persons who can administrate the application: Users who are member of the zeusafm Administrator user group always have full access to all applications’ settings and data, but aren’t listed here. Users of custom user groups may also have some user rights, depending on the individual settings of their groups (see Organizational Integration and Group Management). These users also aren’t listed here.
Specifying the character set
Browsers don’t tell the web application which character set they’ve used for encoding a request. By default, vWAF initially presumes that requests to the web application are UTF-8 encoded. If a request can’t be interpreted as UTF-8, vWAF tries to use ISO-8859-1 instead. While this approach works in most cases and for most western languages, when your web application uses a special character set, interpretation of requests might fail.
If this happens, you can manually specify the character set that your web application uses:
Checking the capability
The capability determines which vWAF features are available for protecting the application. Currently there is only one default capability available, named “hyperguard”.
To check which capability is currently assigned to an application:
- In the navigation area, select the application for which you want to see its capability.
- Activate the Configuration | Application Settings tab.
- Under Capability you can see which capability is currently assigned.
To assign a different capability (if available), follow the link Go to Capability Management, which takes you directly to the Capability tab in the Cluster Management. For details, see Assigning Capabilities.
Enabling reduced argument logging
By default, vWAF logs requests including their full URL parameters. However, if any security-related information is transferred via URL parameters, this may not be desired because it requires you to take extra precautionary measures to prevent unauthorized access to the log files. For this reason, for example, PCI compliance regulations explicitly demand that security-related information is not logged.
By enabling the Reduced Argument Logging feature, you can tell vWAF to strip all URL parameters from all requests it logs. For example, GET /test/index.php?password=test&user=user is then just logged as GET /test/index.php.
To enable reduced argument logging: