Configuring Managed Clients
Managed client mode of enrollment for mobile devices is one of two modes supported by Pulse Workspace, see Understanding Managed Devices and Managed Clients.
Managed client enrollment for mobile devices does not use Mobile Device Management (MDM). Instead, the admin can currently push policies manually from Pulse Workspace to enable VPN on Demand on a mobile device.
The managed client mode is currently only supported on iOS devices.
Enabling Managed Client Mode
To enable Pulse Workspace to enroll devices as managed clients, set the Enable enrollment of managed iOS clients? workspace property to True, see Workspaces.
If the Enable enrollment of managed iOS clients? workspace property is False, Pulse Workspace will enroll devices as managed devices. Pulse Secure recommends that the Enable enrollment of managed iOS clients? workspace property setting is consistent.
Once managed client mode is enabled, you can configure VPN on Demand, see Configuring VPN on Demand for Managed Clients.
Configuring VPN on Demand for Managed Clients
After you have enabled managed client mode (see Enabling Managed Client Mode) you can enable VPN on Demand for managed client mobile devices, and configure it for use.
Understanding VPN on Demand
VPN On Demand lets mobile devices automatically establish a VPN connection on an as-needed basis, based on an ordered list of user-defined rules.
VPN On Demand rules are evaluated when the device’s primary network interface changes. For example:
•When a mobile device switches to a different WiFi network, or
•When a mobile device switches from WiFi to cellular (in iOS), or
•When a mobile device switches from WiFi or Ethernet (in macOS).
If the new interface is virtual, such as a VPN interface, VPN On Demand rules are ignored.
Each VPN on Demand rule has user-defined rules criteria that enable a match to be determined, see Understanding VPN on Demand Rules Criteria.
Each rule is evaluated in turn. If a rule matches, a specified On Demand action is performed for the rule. The supported On Demand actions are:
•Connect. Connects to the VPN when any of the specified rules criteria is met.
•Evaluate Connection. The VPN can be triggered based on connection requests to specific domains, rather than generally connecting/disconnecting based on the network interface. When any of the specified rules criteria is met, a list of action parameters is evaluated, see Understanding VPN on Demand Action Parameters. If any of the action parameters matches, the specified response is performed.
•Disconnect. Disconnects from the VPN when any of the specified rules criteria is met.
•Ignore. Leaves any existing VPN connection up, but does not create a new connection. This is performed when any of the specified rules criteria is met.
Once a rule matches, its On Demand action is performed, and all remaining rules in the list are not evaluated.
- In any rules list, a final rule should define a default response. That is, there should be no criteria, only an action that is appropriate for when the connection has not matched any of the previous rules.
- For a full technical description of VPN on Demand for iOS, see https://help.apple.com/deployment/ios/#/iord4804b742
Understanding VPN on Demand Rules Criteria
Each VPN on Demand rule can have one or more rules criteria which enables it to be evaluated as a match.
Where you specify multiple rules criteria, the rule matches if at least one criterion matches.
Supported rules criteria are:
•DNS Domain. (Optional) A comma-separated list of search domains. If the configured DNS search domain of the current primary network is included in the list, the rule matches.
A wildcard prefix (*) is supported. For example: *.example.com
•DNS Server. (Optional) A comma-separated list of DNS server addresses. If all of the DNS server addresses currently configured for the primary interface are listed, the rule matches.
A wildcard prefix (*) is supported. For example: 1.2.3.*
•Interface Type. (Optional) This can be set to:
•Cellular (for iOS)
•Ethernet (for macOS)
•Wi-Fi
If the primary interface hardware is of the type specified, the rule matches.
•SSID. (Optional) A comma-separated list of SSID network identifiers to match against the current WiFi network. If the network is a WiFi network and its SSID appears in the list, the rule matches.
•URL Probe. (Optional). A single URL to a trusted HTTPS server to probe for reachability. Redirection is not supported. If the server is reachable, the rule matches.
You can also create a rule with no criteria, which provides a default response. This can be used as a standalone rule to enable all connections, or as a final rule in a list to disallow all connections by default after all other rules have failed to trigger.
Understanding VPN on Demand Action Parameters
Each VPN on Demand rule that has an On Demand action of Evaluate Connection must have one (or more) action parameters which enable the rule to be evaluated.
If you specify multiple action parameters, all of them must match for the rule to match.
•Domains. (Required). A comma-separated list of the domains for which this evaluation applies.
A wildcard prefix (*) is supported. For example: *.example.com
•Domain Action. (Required) Defines VPN behavior for the domains. Supported values are:
•Connect If Needed. Starts the VPN if DNS resolution for the domains fails. For example:
•If the DNS server indicates it can’t resolve the domain name.
•If the DNS response is redirected.
•If the connection fails or times out.
•Never Connect. Don’t trigger VPN for the domains.
•Required DNS Server. (Optional) A comma-separated list of IP addresses for DNS servers to be used for resolving the domains.
This parameter is available when the Domain Action action parameter is set to Connect If Needed.
These servers do not need to be part of the device’s current network configuration.
Typically, you will configure an internal DNS server or a trusted external DNS server.
If these DNS servers cannot be reached, the VPN is started.
•Required URL Probe. (Optional) An HTTP or HTTPS URL to probe.
This parameter is available when the Domain Action action parameter is set to Connect If Needed.
If DNS resolution for this server succeeds, the probe must also succeed.
If the probe fails, the VPN is started.
Enabling and Configuring VPN on Demand
To enable and configure VPN on Demand:
1.Log into Pulse One as an administrator.
2.Click the Workspaces menu and then the Policies tab.
3.In the Policies tab, select the required policy.
4.Select the Properties tab and expand the VPN on Demand group. For example:
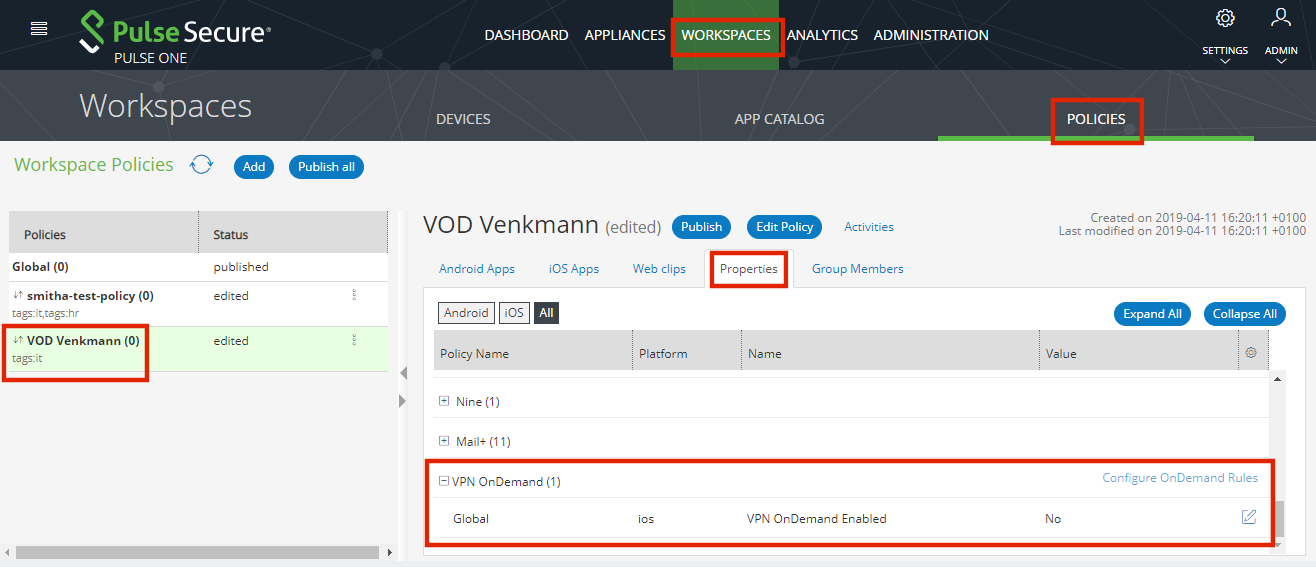
5.Set the VPN OnDemand Enabled property to True.
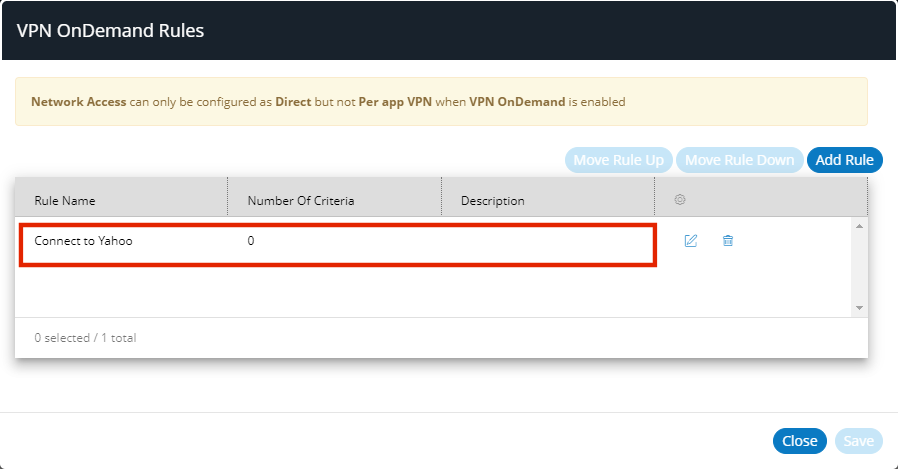
When the policy property VPN OnDemand Enabled is True, Network Access for this policy can only be configured as Direct (and not Per app VPN).
The Configure OnDemand Rules control is then enabled.

6.Click Configure OnDemand Rules.
The VPN OnDemand Rules dialog appears. This lists all defined rules for VPN On Demand. Initially, this list is empty. For example:
![]()
7.Click Add Rule.
The VPN OnDemand Rules dialog updates to display a new panel for specifying a rule and its criteria. For example:
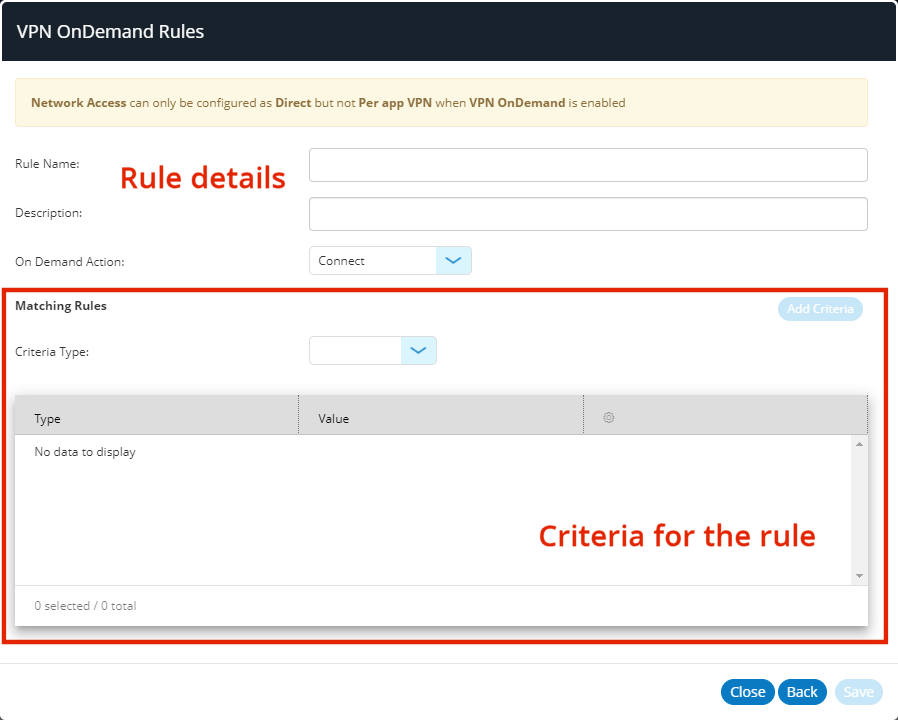
8.(Optional) To create a standalone rule that connects to the VPN for all domains/endpoints, you must define a rule with no specified criteria:
•Enter a Rule Name and (optionally) a Description.
•Set the On Demand Action to Connect.
•Leave Criteria Type unset.
•Click Save.
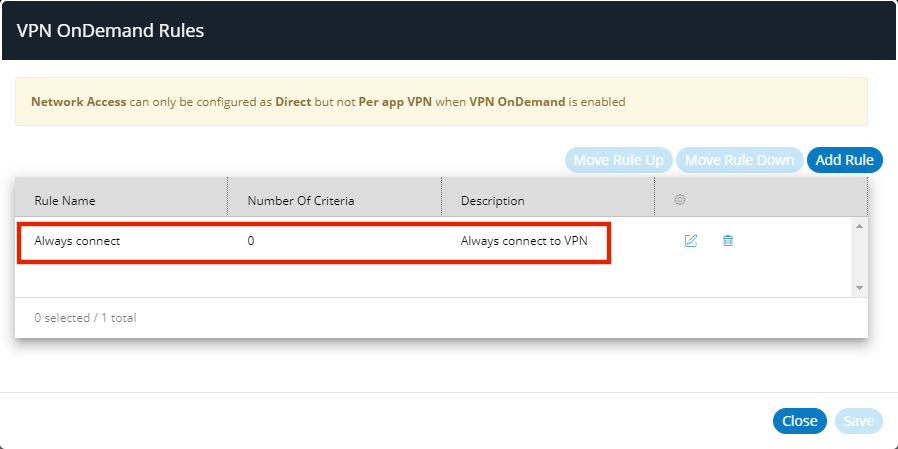
The VPN OnDemand Rules dialog shows the rules list, with the new rule added. For example:
9.(Optional) To create a rule that performs an On Demand action for one (or more) specific criteria:
When you specify multiple criteria for a rule, any of the criteria must match for the rule to match.
•Enter a Rule Name and (optionally) a Description.
•Set the required On Demand Action, see Understanding VPN on Demand.
If you require an On Demand Action of Evaluate Connection, see the example later in this procedure.
•Set the required Criteria Type, see Understanding VPN on Demand Rules Criteria.
•Click Add Criteria.
The criteria is added to the list of rules criteria. For example:
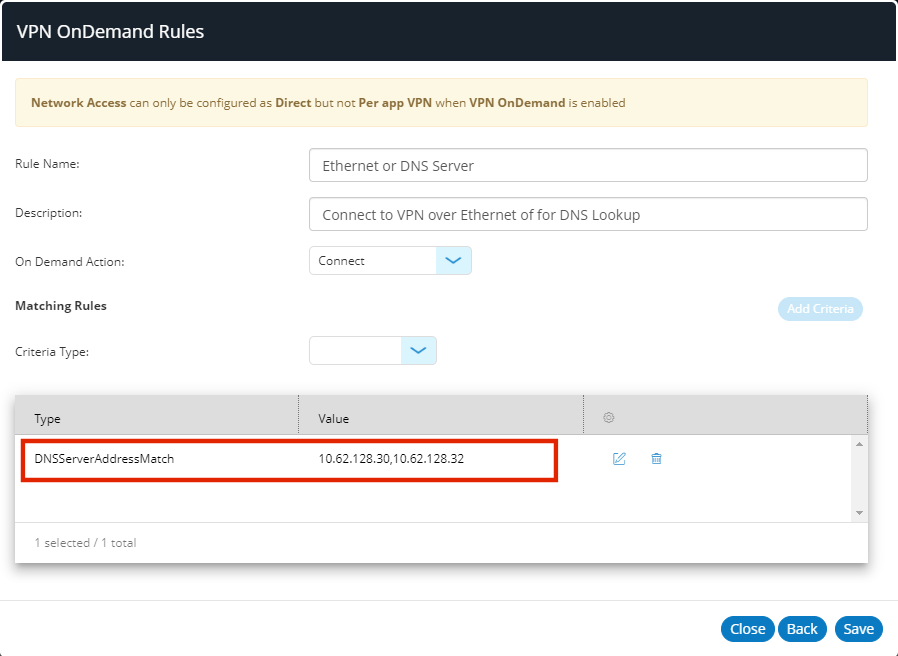
In the above example, a pair of DNS servers are specified. If both servers are configured for the primary interface, the criteria matches, and so the rule matches.
•Add additional criteria for this rule if required. For example:
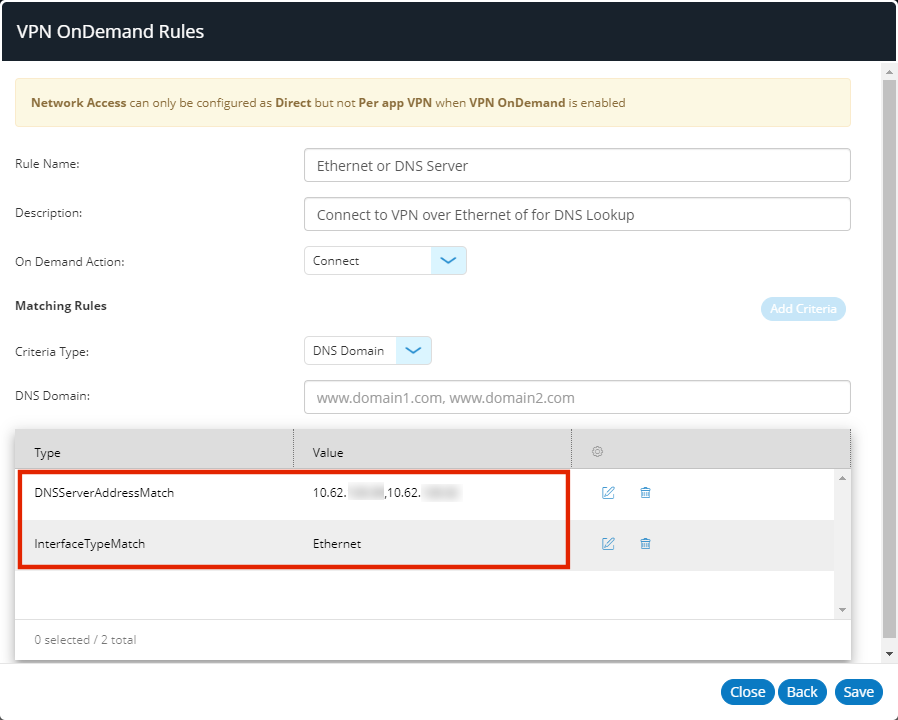
In the above example, a second criteria tests if the primary interface is Ethernet.
Only one criteria for each Criteria Type is supported.
If at least one of the specified criteria matches, the rule is a match.
•(Optional) You can edit the condition by clicking Edit (![]() ).
).
•Click Save.
The rule is added to the list of VPN on Demand rules:
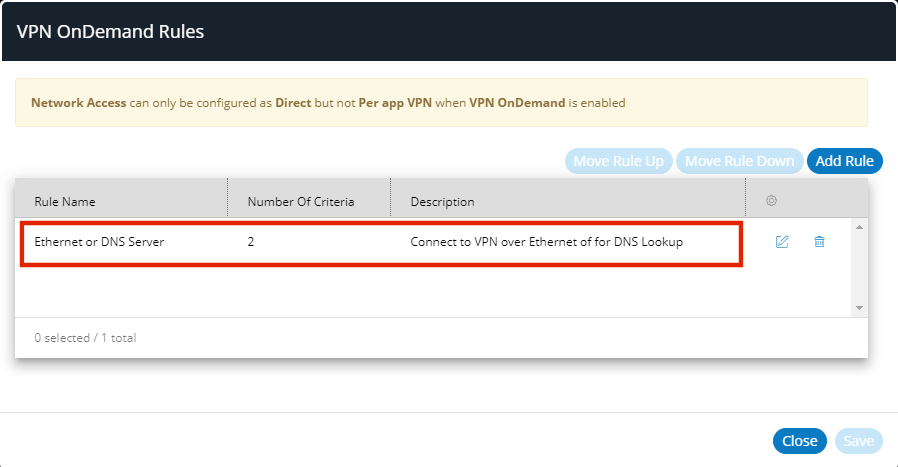
In this example, there are two criteria.
10.(Optional) To create a rule with action parameters:
•Enter a Rule Name and (optionally) a Description.
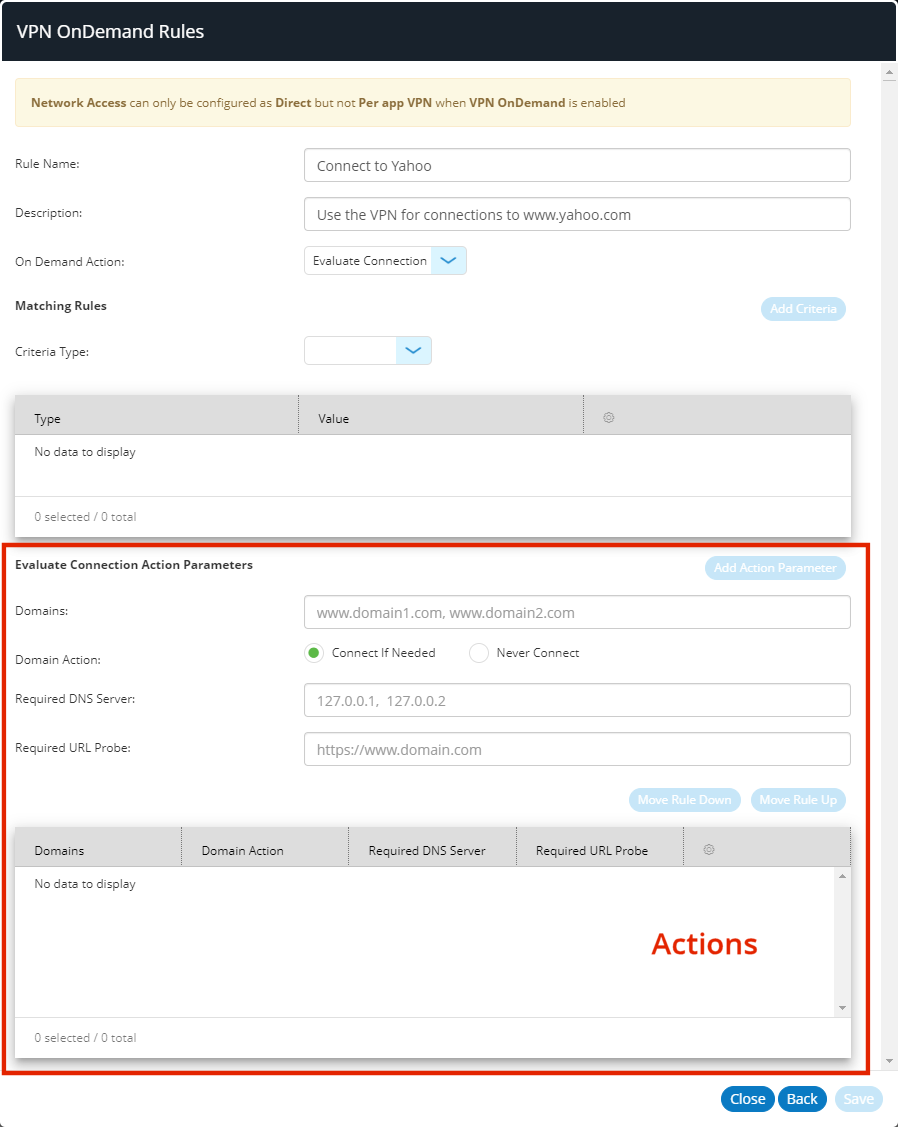
•Set the On Demand Action to Evaluate connection.
The VPN OnDemand Rules dialog updates to include actions. For example:
•(Optional) Add one (or more) rules criteria, and add each to the list of criteria with Add Criteria. For details of criteria, see Understanding VPN on Demand Rules Criteria.
•Add one (or more) action parameters, and add each to the list of actions parameters with Add Action Parameter. For details of action parameters, see Understanding VPN on Demand Action Parameters. For example:
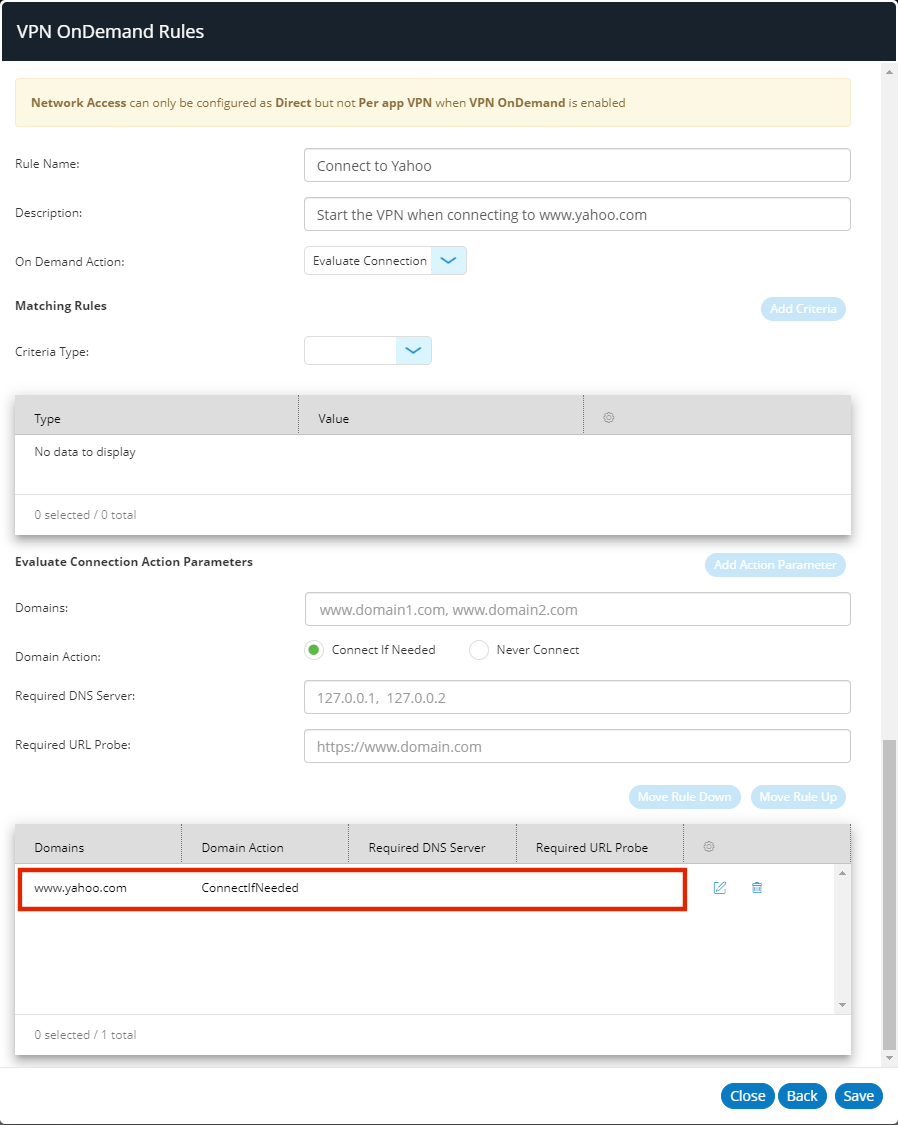
In this example, no rules criteria are specified, but a single action parameter activates the VPN when a connection to www.yahoo.com is requested.
•Click Save.
The rule is added to the list of VPN on Demand rules. For example:
11.(Optional) You can edit any rule by clicking its Edit (![]() ) icon.
) icon.
12.(Optional) You can delete any rule by clicking its Delete (![]() ) icon and confirming the deletion.
) icon and confirming the deletion.
13.(Optional) You can change the order of rule using the Move Rule Up and Move Rule Down controls. Rules are always tested in the listed order.
14.Add a final rule that defines a default response for when none of the rules match. This rule will have an On Demand action but no criteria.
Once you have configured VPN on Demand for managed client devices, you can enroll devices using managed client mode, see Enrolling Personal Devices as Managed Clients.
Enrolling Personal Devices as Managed Clients
After you have configured VPN on Demand (see Configuring VPN on Demand for Managed Clients) you can enroll devices using managed client mode.
Adding a Personal Device to Pulse Workspace as a Managed Client
This procedure describes how an administrator adds a user’s personal mobile device to Pulse Workspace with the intention of it being used as a managed client. Before starting, the admin must:
•Enable managed client mode on Pulse Workspace, see Enabling Managed Client Mode.
•Configure VPN on Demand, see Configuring VPN on Demand for Managed Clients.
To add a user’s personal device to Pulse Workspace:
1.Log into the Pulse One appliance.
2.Select the Workspaces menu and then the Devices tab.
3.In the Devices tab, create (or edit) the required user. The user details should include:
•The user’s corporate email as the Workspace Email.
•The user’s personal email as the Provisioning Email, so that they will receive the required registration information in an email.
•(Optional) Any required policy Tags for the user.
4.Click the Add Workspace tab, add device details, and click Create.
The user will then receive registration details at their personal email address.
The user can then enroll their personal device as a managed client, see Enrolling a Personal Mobile Device as a Managed Client.
Enrolling a Personal Mobile Device as a Managed Client
After a user’s personal mobile device is added to Pulse Workspace with the intention of it being used as a managed client, the user receives a registration email at their declared personal email address.
This procedure describes how the user then enrolls their personal device as a managed client.
1.In your email, click the iOS registration link. This installs Pulse Secure.
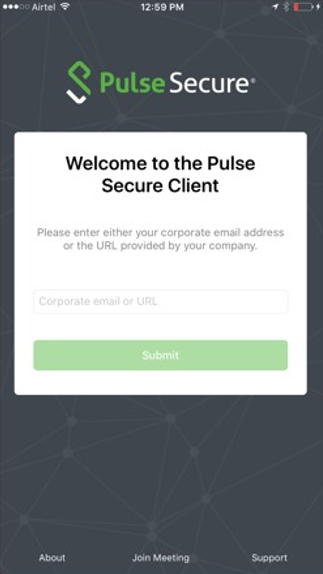
2.Start Pulse Secure on your device.
The Pulse Secure Welcome screen appears.
3.Perform the standard iOS BYOD enrollment procedure (see Registering an iOS BYOD Device) until the following screen appears:
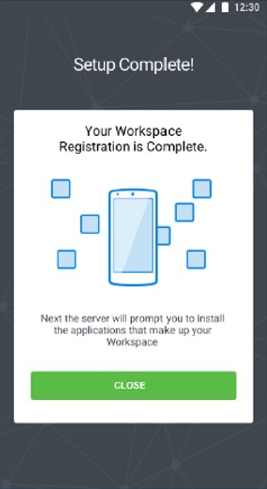
4.Click Close.
In the Pulse Secure client, the Connection screen appears.
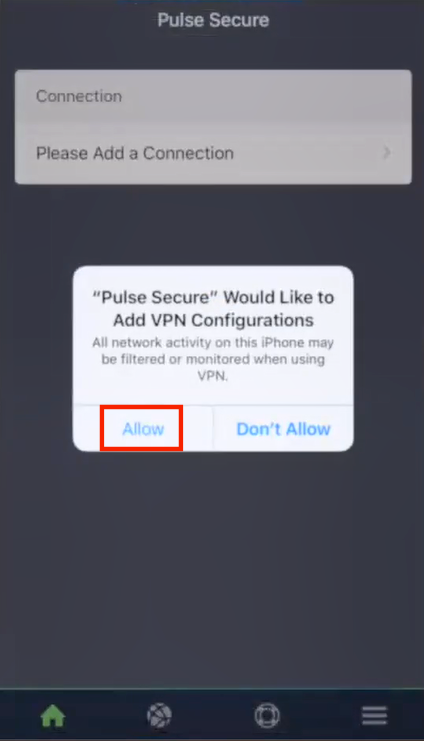
5.Press Allow to confirm the addition of the required VPN configuration policy.
If required, enter a PIN or perform a fingerprint confirmation to download the policy.
The Connection screen updates to show the configured (but not currently active) VPN connection.

6.Press the VPN to view its details.
This configuration cannot be updated on your device.
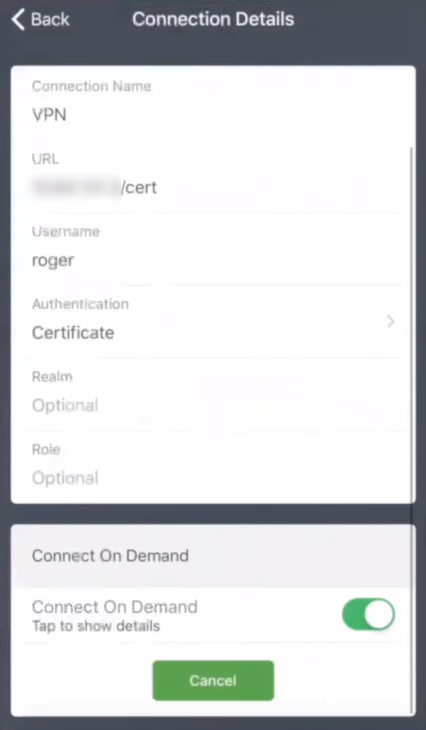
7.Press Connect on Demand to view configured VPN rules.
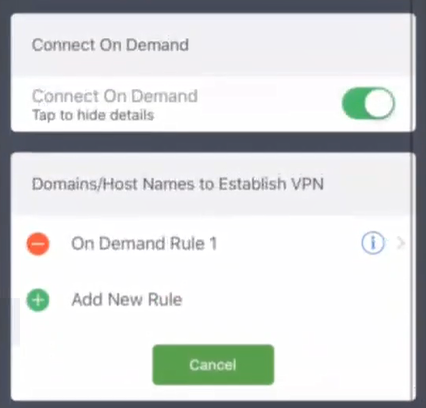
8.Press the configured rule (in this example, On Demand Rule 1) to view its details and actions.
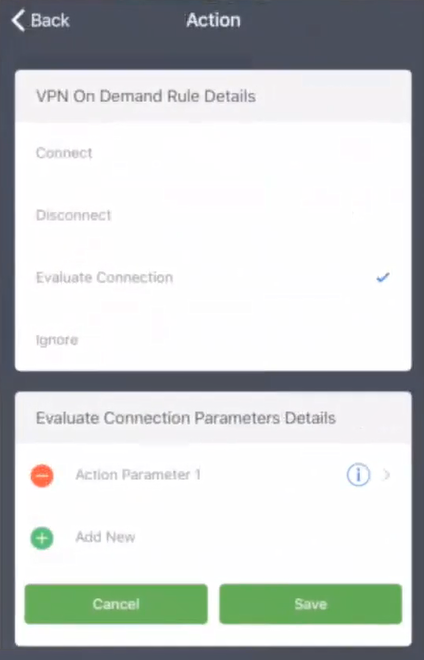
9.Press the configured action (in this example, Action Parameter 1) to view its details.
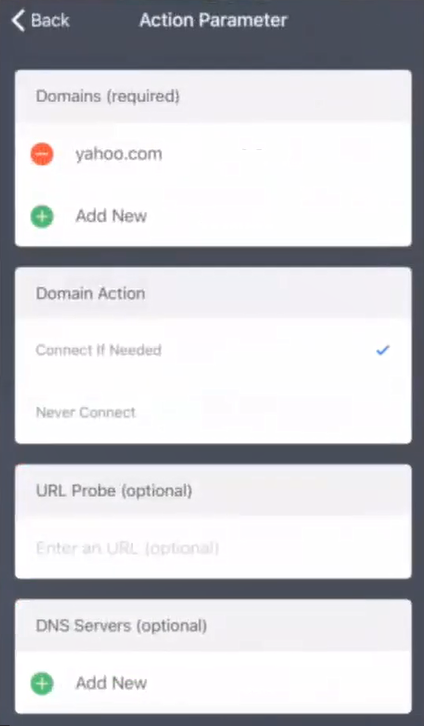
In this example, the yahoo.com domain will connect to the VPN when it is started.
10.To test the VPN, start a browser and access the listed domain. (In this example, yahoo.com).

The VPN will active and display the VPN icon at the top of the screen. For example:

11.Return to the Connection screen to see the VPN in use.
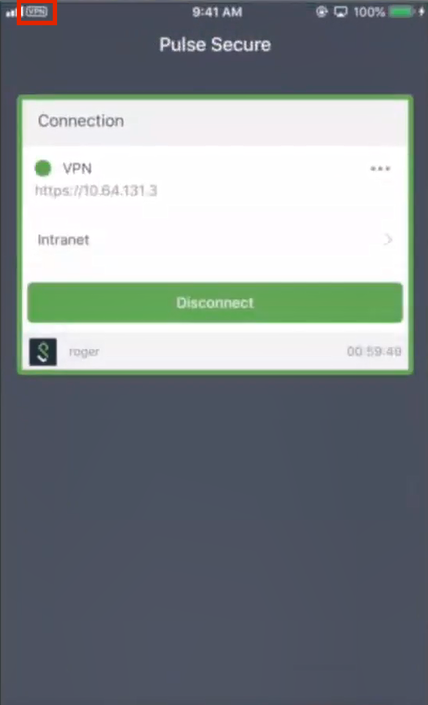
The VPN will disconnect automatically when it is not required, or you can press Disconnect.