Workspace Management
Managing Users
Pulse One users with a Workspace license entitlement can manage Workspaces from the Workspaces menu.
Adding a User
This section details the steps to add a new user (workspace) to your domain.
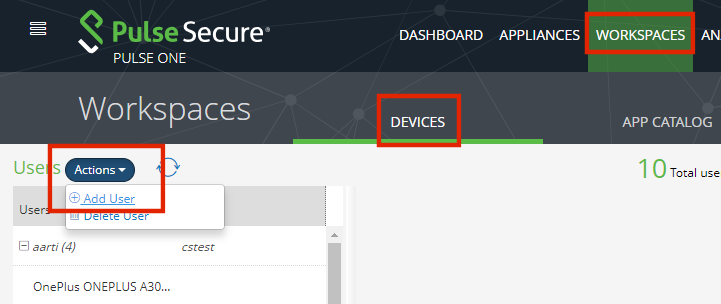
1.Select the Workspaces menu.
2.Select the Devices tab. A list of Users appears.
3.Click the Actions drop-down menu, and click Add User.
The Create New User dialog appears.

4.Complete the required fields:
•Username – The user name. This must be unique. This property can be used to configure the email client inside the workspace during the provisioning process.
•Full Name – User's full name.
•Workspace Email – Email account to which workspace notifications are sent. This account can also be used to configure the email client inside the workspace during the provisioning process.
•Provision Email – Email account to which the welcome email is sent
5.(Optional) Complete the following fields:
•Phone Number – Phone number to which the welcome SMS is sent.
•Tags – Tags assigned to this user, used for policy assignment.
6.(Optional) Select the required state for the following options:
•Create a Space for this user
•Send the welcome email to this user
•Send the welcome SMS to this user
7.Click Create to complete the process.
The new user is added to the Users list.
Deleting a User
This section details the steps to delete a user from your domain.
You must delete all workspaces/devices from a user before you can delete the user.
1.Select the Workspaces menu.
2.Select the Devices tab.
A list of Users appears.
3.Locate the required user, or (optionally) click the Search button and use the search box.
4.Expand the user you want to delete.
A list of the workspaces/devices registered to that user appears.
5.Delete each individual workspace/device from the user by using Actions > Delete Workspace.
6.After all workspaces/devices are deleted, select the user you want to delete.
7.Click the Actions drop-down menu, and click Delete User.

A confirmation dialog appears.
8.Click Yes to confirm the user deletion.
The selected user is removed from the Users list.
Verifying an LDAP Group
When a user group is changed in the back-end Active Directory server, the change is not immediately reflected in the User Info page. The Verify Group button is provided to re-verify the user's LDAP group and recalculate the policy for the user.
To verify an LDAP group for a user:
1.Select the Workspaces menu.
2.Select the Devices tab. A list of Users appears.
3.Locate the required user in the list, or (optionally) click the Search button and use the search box.
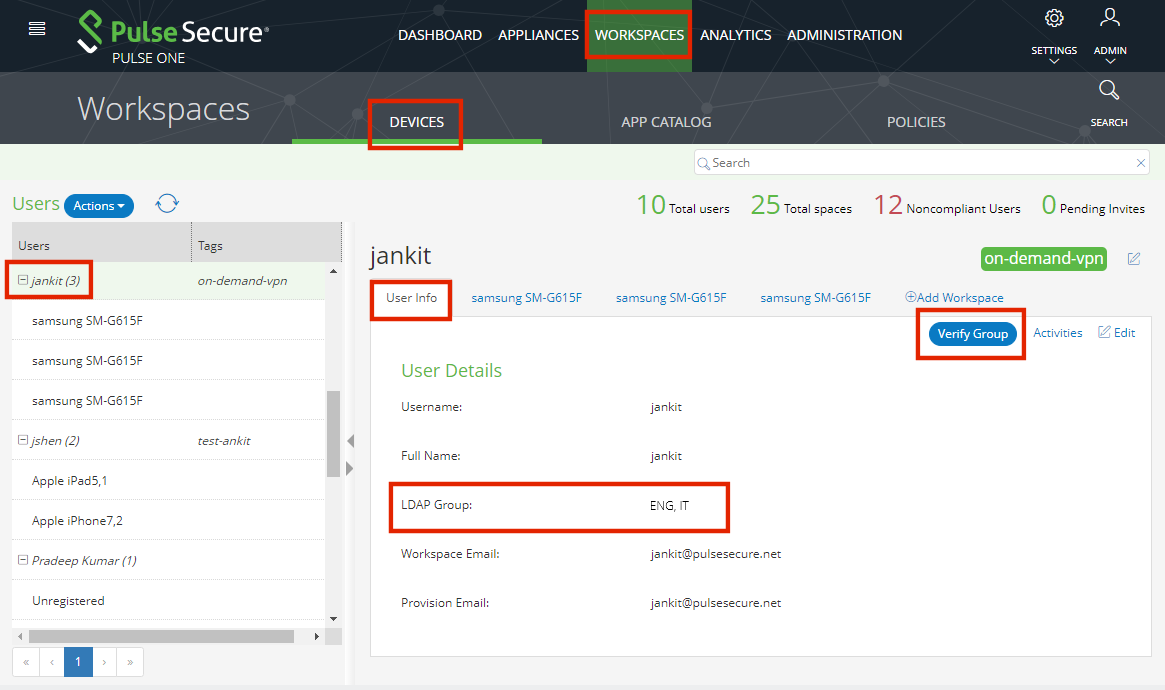
4.Select the User Info tab in the right-hand panel.
5.Click the Verify Group button.
The LDAP group updates and the corresponding policy is reapplied to the user. For example:
Adding a Policy Tag to a Workspace User Account
Tags are used to apply policies to users’ accounts. After a policy is tagged, just add the same tag to the user to apply the policy to that user's device.
This section describes the steps to apply a policy tag to a Workspace User Space.
1.Select the Workspaces menu.
2.Select the Devices tab. A list of Users appears.
3.Locate the required user in the list, or (optionally) click the Search button and use the search box.
4.Click the Tags icon located at the corner of the user details panel. For example:
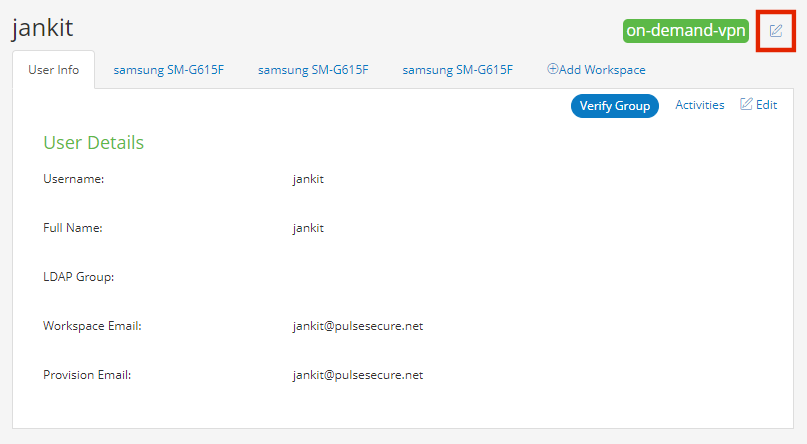
The Tags dialog appears. For example:
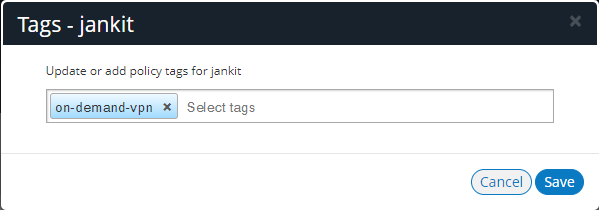
5.Update or add policy tags to the user and click Save.
Performing Workspace Actions
This section details the steps to perform administrative actions on a workspace.
1.Select the Workspaces menu.
2.Select the Devices tab. A list of Users appears.
3.Locate the required user in the list, or (optionally) click the Search button and use the search box.
4.Expand the required user, and select the required workspace.
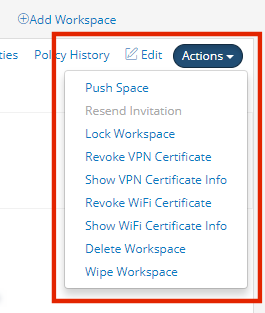
5.Select Actions from the Workspace panel. For example:
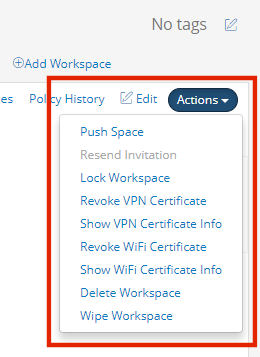
6.Select the action you want to perform:
All possible actions are listed below. However, all actions cannot be seen simultaneously.
•Push Space – sends the latest policy to the user’s device and forces a check-in.
•Resend Invitation – resends the Workspace Welcome email or SMS with a new registration token.
This action is only available before the Workspace has been provisioned.
•Reset Passcode – resets the Workspace passcode (supported in iOS devices only).
•Lock Workspace – (Android only) Locks the device.
•Lock Device – (iOS only) Locks the device.
•Show VPN Certificate Info – shows if the VPN certificate is valid. This action is not active when Force Update VPN Cert is present.
•Revoke VPN Certificate – prompts to revoke the VPN certificate. This action is not active when Force Update VPN Cert is present.
•Unrevoke VPN Certificate – prompts to reverse a revoke request on the VPN certificate.
•Force Update VPN Cert – where an external PKI server is configured, this forces a fetch of a new VPN certificate from the external PKI Server using SCEP. This action is not active when either Revoke VPN Certificate or Show VPN Certificate Info are present. See the required settings in Enterprise PKI Integration.
•Show Wifi Certificate Info – shows if the WiFi certificate is valid. This action is not active when Force Update Wifi Cert is present.
•Revoke Wifi Certificate – prompts to revoke WiFi certificate. This action is not active when Force Update Wifi Cert is present.
•Unrevoke Wifi Certificate – prompts to reverse a revoke request on the WiFi certificate.
•Force Update WiFi Cert – where an external PKI server is configured, this forces a fetch of a new WiFi certificate from the external PKI Server using SCEP. This action is not active when either Revoke Wifi Certificate or Show Wifi Certificate Info are present. See the required settings in Enterprise PKI Integration.
•Update Location – updates the location of the device (iOS only), see Locating a Device.
•Lost Mode – indicates that the device is lost, see Working with Lost Mode for a Device.
•Request Lost Mode Location – requests a location update for a lost device (iOS only), see Working with Lost Mode for a Device. This command is only active when a device is in Lost Mode.
•Play Lost Mode Sound – requests that a continuous loud tone is played on a lost device (iOS only), see Working with Lost Mode for a Device. This command is only active when a device is in Lost Mode.
•Disable Lost Mode – cancels lost mode for a device (iOS only) after it is returned to its user, see Working with Lost Mode for a Device. This command is only active when a device is in Lost Mode.
•Delete Workspace – deletes the Workspace record from the Management server.
When a Workspace is deleted, no further administrative actions can be performed on the Workspace, including wiping the Workspace.
•Wipe Workspace – wipes all enterprise data from the device. A confirmation appears.
This action will un-enroll the device and permanently delete enterprise data, apps, and configuration. All personal information on the device remains intact.
This action does not appear for corporate owned devices, as it would perform the same action as a Full Device Wipe (see below).
•Full Device Wipe – wipes the entire device back to its factory defaults. A confirmation appears.
This action requires that the Allow the ability to perform full device wipes? workspace property is enabled for the policy, see Workspaces.
Understanding the Workspace Details Window
The Devices panel allows you to view the overall status of the workspace.
•Device Manufacturer/Model – used to identify the workspace.
•Workspace State – the status of the workspace.
•Workspace Apps – the apps installed in the workspace.
•Workspace Details – the workspace details. This includes Resources, which lists:
•The number of apps on this policy, and hyperlink to the app(s).
•(iOS only) The number of web clips on this policy, and hyperlink to the web clip(s).
•Device Info – information gathered from the device.
•Device Location – physical device location gathered from the device (iOS only) and displayed on a map, see Working with Device Location.

The Compliance tab displays the status of device properties and whether they are compliant with the Workspace security policy.
Android devices support the following properties, and indicates if the current value is compliant:
•Compliance Rooted Detection – Indicates whether the device is Rooted or Non-Rooted.
•Policy Expired – Indicates if the policy is expired (Yes / No).
•Compliance USB debugging – Indicates whether debugging is USB Enabled or USB Disabled.
•Profile password complexity – Indicates the profile password type. That is: none, biometric, password, pattern, pin, pin_complex, alpha, alphanumeric or complex.
•Device password complexity – Indicates the device password type. That is: none, biometric, password, pattern, pin, pin_complex, alpha, alphanumeric or complex.
iOS devices support the following properties, and indicates if the current value is compliant:
•Jailbreak Detection – Indicates whether jailbreak detection is enabled (Yes / No).
•Policy Expired – Indicates if the policy is expired (Yes / No).
•iOS Minimum OS version – Indicates the policy’s minimum OS version.
•iOS Pulse Client Denied To Use Location Service – Indicates whether the device can use the location service, see Working with Device Location.
•iOS Minimum Pulse Client version – Indicates the policy’s minimum Pulse Client version.
The Edit window allows you to view and edit the phone number to which the welcome SMS is sent. For example:

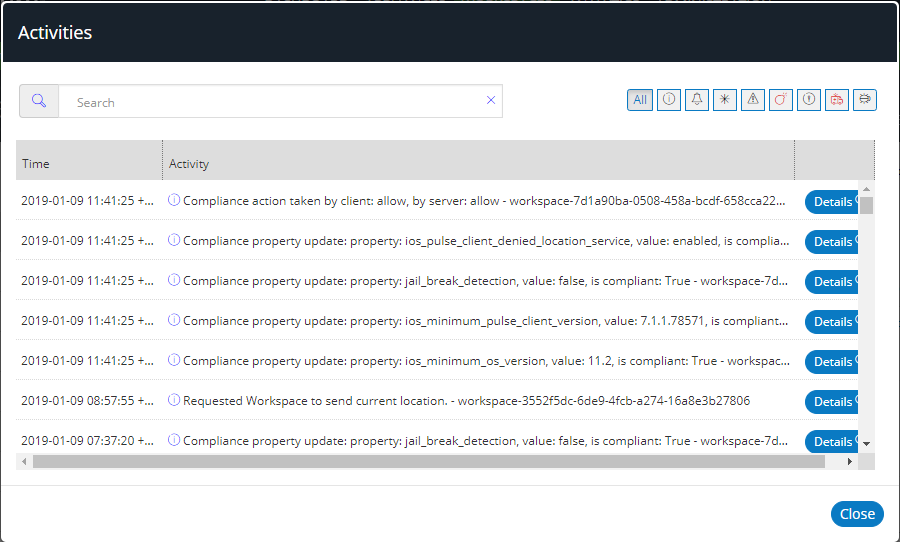
The Activities window displays the log of Workspace activity. Double click an activity to see the detailed view.
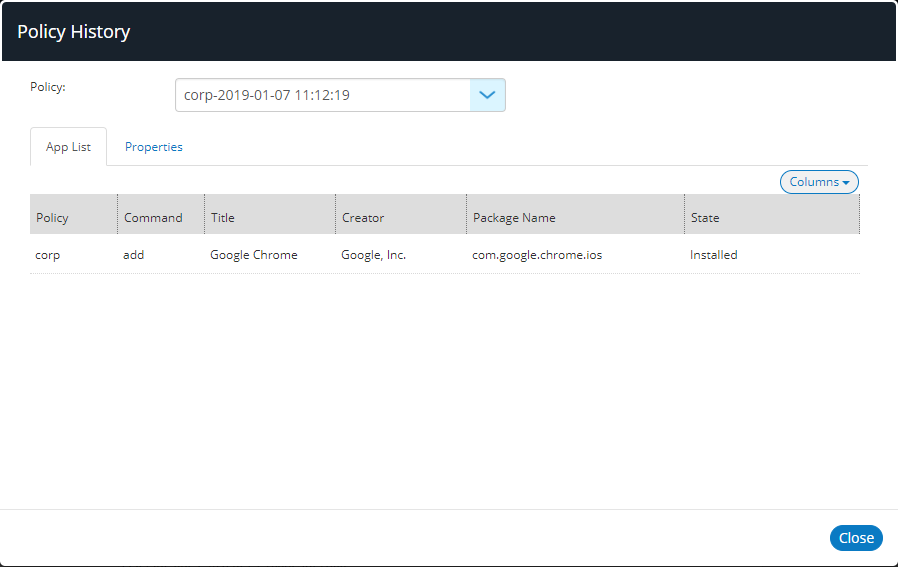
The Policy History window displays the current and previous policies applied to a Workspace.
The Actions menu displays the list of actions available for the Workspace.