This page refers to an older version of the product.View the current version of the User Guide.
Importing Screens
After capturing screens from the TE Client, you can import the screens associated with your host profile server to a project and stylize individual screen elements for a more unique appearance. For more information, see Capturing Screens from the TE Client.
If you plan on only using the automated predictive formatting, you don't need to import screens into a project. For more information on how screen elements are automatically formatted, see Predictive Formatting.
To import screens to a project:
1 Click the Screens button.
2 Click the Import button in the bottom-left corner of the application.
3 Browse for and select the desired .wltsc file.
4 Click Done.
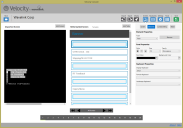
The screens are imported into the project. The black-and-green version of the first screen is displayed on the left pane, with its reformatted appearance using predictive formatting is displayed in the center pane.
For instructions on how to create your own styles for individual elements on a screen, see Editing Screen Elements.
This page refers to an older version of the product.View the current version of the User Guide.
The topic was:
Inaccurate
Incomplete
Not what I expected
Other
