Run a Report from a One-Step
You can create a One-Step Action using the Run a Report Action to run a CSM Report. For example, this One-Step Action could then be added to an Automation Process to periodically run a Report of all open Incidents assigned to a specific User.
To define a Run a Report Action for a One-Step Action:
- Open the One-Step Editor.
- Add a Run a Report Action to the Designer Board.
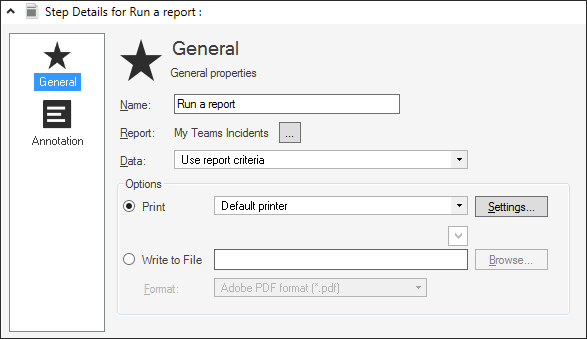
- Define properties for the Run a Report Action as follows:
- Name: Provide a display name for the Action. This is how the Action will be identified within CSM.
- Report: Click the Ellipses button
 to open the Report Manager, and then select a Report to run.
 - Data: In the drop-down, select the data to use for the Report:
Data Source Action Use Report Criteria Run the Report exactly as designed (example: against a particular Search Group). Current Record Run the Report against the active record (the single record selected in CSM before running the One-Step Action). Current Group Run the Report against the current group of records. For example, run a Quick Search for all Incidents containing the word "print," and then execute the One-Step Action. The search results become the data for the Report.
- Select an output option:
Output Output Specific Options Print Choose a connected printer from the drop-down. Click Settings to open Print Options and define the number of copies to print and whether or not to collate them. Write to File Enter a filename; click the Selector button  to insert Tokens (example: Fields, System Functions, Prompts, Expressions, Stored Values, Metrics, and Counters) directly into the filename.
 or
Click the Browse button to open the Select File window and select an existing file.
If an existing filename is entered or selected, running the One-Step will overwrite the existing file. If a new file name is entered, a new file will be created.
Select a file format from the Format drop-down. The following formats are supported:
- Adobe PDF
- Bitmap
- CSV
- EMF
- Excel
- HTML
- JPEG
- Plain Text
- PNG
- Rich Text
- TIFF
- Click Save
 .
.