Mapping e-mail message attributes to business object attributes
Before Mail can process your inbound e-mails, you need to set up how you want to map information from the e-mail message attributes to attributes in the Incident, Problem, Change and Call processes.
For information about creating processes, see the Process Designer section in the Designer Guide. For information about modifying business object and attributes, see the Object Designer section in the Designer Guide.
Creating a new mapping for inbound e-mail
You can map inbound e-mail attributes to the attributes of any existing process. For example, you can map the inbound e-mail Title attribute to the Incident Summary attribute.
If you have created any templates against the selected process module (for example, the Incident module), then you can also specify which template you want to use in conjunction with the process.
You must first create the templates using the Template Designer component before you can select them in Mail. For information about Templates, see the Designer Guide.
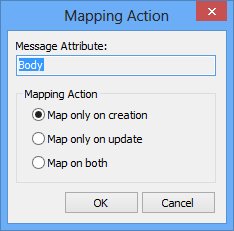
Information is copied according to the mapping action that you set up. There are three mapping actions to choose from:
|
Mapping Action Type |
Icon |
Transfers the information to the required attributes... |
|---|---|---|
|
Map only on creation |

|
only when the process is first created by the inbound e-mail. |
|
Map only on update |

|
each time an inbound e-mail updates the relevant Process. |
|
Map on both |

|
when the process is first created by inbound e-mail, as well as every time an inbound e-mail updates the process. |
You can change the mapping action using the Actions list after you have created a new mapping.
To create a new mapping:
- Start the Mail component (
 ).
). - On the E-mail Setup tree, click the Mappings folder, then in the Actions list, click New Mapping.
The Mapping window appears. - Type a relevant Title for the new mapping, then in the Process list, select the existing process against which you want to map e-mail attributes.
- If required, in the Template list, select the relevant template.
The Business Attributes list updates. If the template populates any of the listed attributes with default information, then a green tick appears alongside that attribute. For example: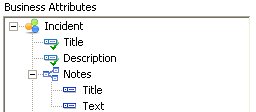
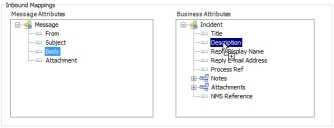
Only local attributes – attributes specific for this business object, and not related attributes – are listed. In addition, Notes and Attachments are also listed to cope with additional information or attachments that are attached to the e-mail message.
For inbound e-mails that include an e-mail as an attachment, the attached e-mail is added as a .eml attachment on the process, with the Title of the attachment set to the Subject of the attached e-mail. You can then open this attachment using your e-mail client.
If the e-mail body is mapped to an HTML field, then any images in the e-mail body are included in the HTML field. If the e-mail body is mapped to a non-HTML field, then any images in the e-mail body are added to the process as attachments. For information about creating HTML fields, see the Designer Guide.
- In the Send Reply On drop-down list, select from the following list to generate a reply message to inbound e-mail:
None – sends no reply message
Creation – sends a reply message when a new process is logged
Update – sends a reply message when an existing process is modified
Both – sends a reply message when a new process is logged and each time it is updated
You set up the Reply Messages using Action Settings. For more information, see Inbound e-mail Action Settings.
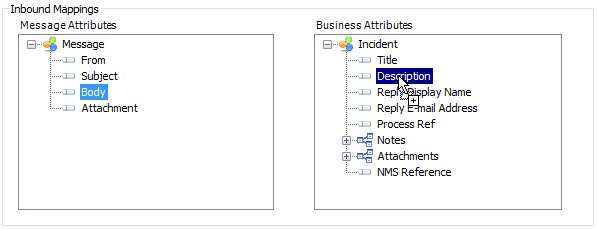
- Drag the e-mail attribute that you want to map from the Message Attributes tree to the relevant attribute on the Business Attributes tree.
The Mapping Action dialog appears.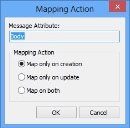
- Select the relevant Mapping Action, then click OK.
The Mapping Action dialog box closes and the mapping icon updates on the Business Attributes tree. - Repeat from step 6, as necessary.
- Click
 to save the new mapping.
After you have saved the new mapping, you cannot change the process selected for the mapping. You can create additional mappings for the same process – but you need a separate Mail Box for each mapping (see Configuring a mail box for each mapping).
You can delete or change a mapping action on an existing mapping by right-clicking it to display a context menu.