User portal information for your users
This section presents the information that your users need to use the user portal.
The user portal displays:
- Icons for each device management action the user is allowed to perform.
- User and device information, including:
- device type (iPod touch, 4th gen in the example)
- status (Active, for example)
- last check-in (example, 2 hours ago)
- phone number
- OS and version (to 3 digits, iOS 7.1.1, for example)
- carrier (for example, AT&T)
- manufacturer
- date the device was registered with Core
- Accounts settings and certificates uploaded by the device user.
- Helpdesk contact information configured by the Core administrator.
User portal showing user's device information
Logging in to the user portal with user name and password
Device users can log in to the user portal to register and manage their devices.
Procedure
-
Go to https://<MobileIron server>, where <MobileIron server> is the address of your MobileIron server.
Contact your administrator if you do not have this address.
-
If you are not logged in, provide your user name and password, when prompted, and then select Sign In with Password.
The user portal displays on your device. You can:
- click the icon for one of the available device management actions available to you.
- view your device information.
Logging in to the user portal on a desktop computer with a certificate
If set up by the Core administrator, device users can log in to the user portal on a desktop computer using an identity certificate on a smart card.
Procedure
-
Attach your smart card reader with your smart card to a USB port on the desktop computer.
If your computer has a built-in smart card reader, insert your smart card.
-
Go to https://<MobileIron server>, where <MobileIron server> is the address of your Core server.
Contact your administrator if you do not have this address.
-
If you are not logged in, select Sign In with Certificate.
A prompt appears to select your certificate
- Select the certificate from the smart card.
-
If prompted, enter the password of the private key of the identity certificate on your smart card.
The user portal displays. You can:
- Select the icon for one of the available device management actions available to you.
-
View your device information.
What users see after they login
Depending on the user portal role enabled, device users may have a different view of the user portal.
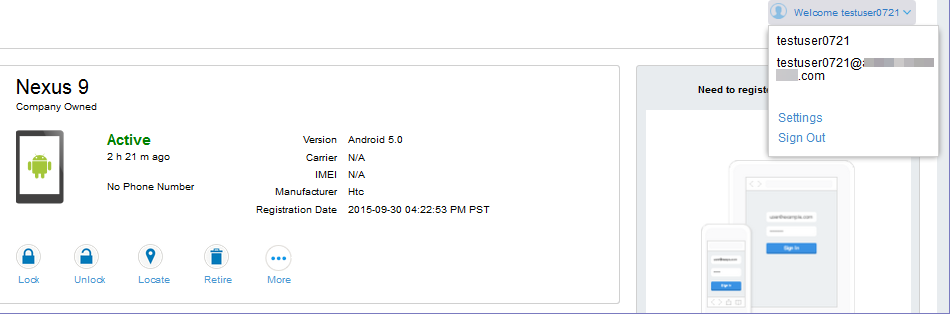
Welcome menu
The Welcome menu is in the top-right of the user portal. From this menu, you can perform the following actions:
- View Activity - See a list of all device activity. See Viewing device history logs from the self-service user portal.
- Helpdesk - Configure the help desk contact information to display in the user portal. See Configuring help desk contact information.
- Settings - View user portal settings.
- Sign Out - Sign out of the self-service user portal.
If Register Device role is enabled
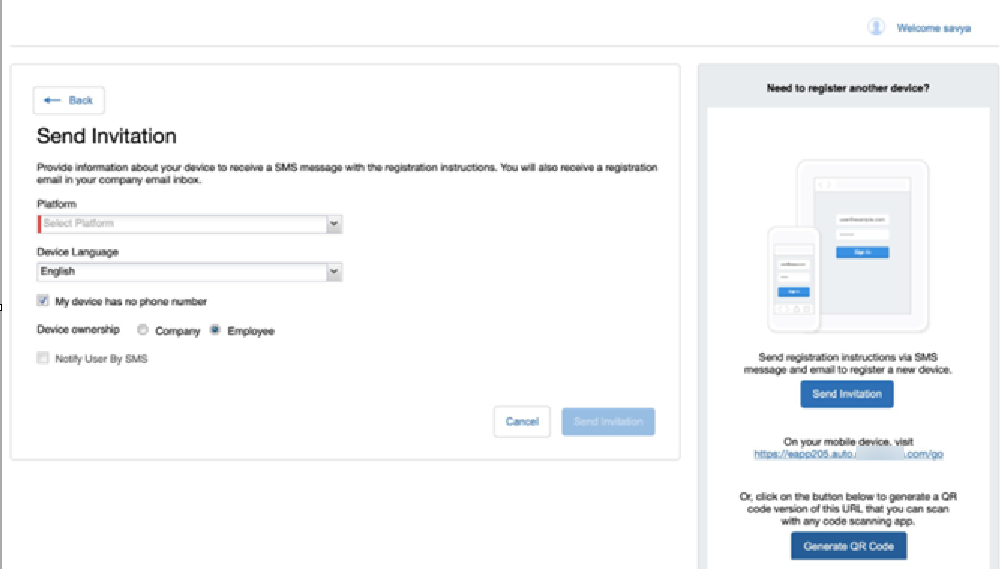
If the Register Device role is enabled, device users will be able to send an invitation from the user portal to register their device.
Send invitation to register
After the invitation is sent, the device status is seen as Pending.
Registration pending for device

Device users can complete the registration on their mobile device at https://<Core_Server_FQDN>/go.
Complete device registration

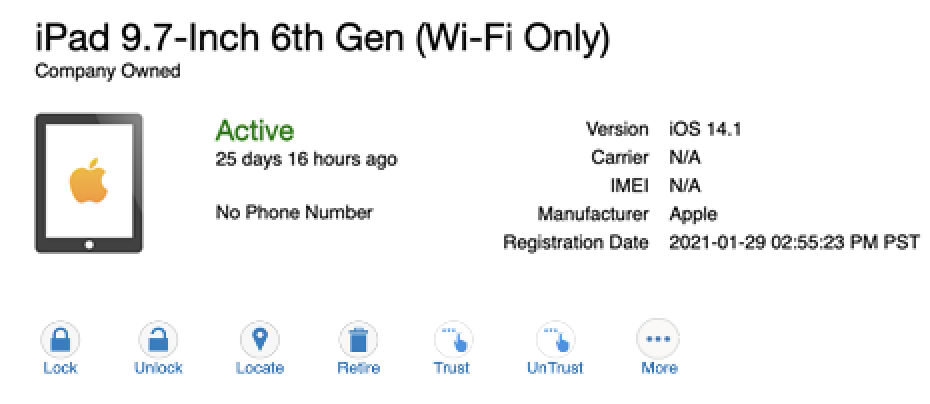
After registration is completed on the mobile device, the status for the device is changed to Active.
Active device status
Registration instructions
On iOS devices, Mobile@Work is installed only if it was set up for distribution through Core. If not, users can download Mobile@Work from the Apple App Store. Instructions for downloading Mobile@Work from the Apple App Store are provided in the email sent to the device user.
If PIN-based registration is enabled
If PIN-based registration is enabled, device users will see Request Registration PIN. Clicking on Request Registration PIN allows device users to send an invitation for registration as well as generate a PIN.
Registration with pin
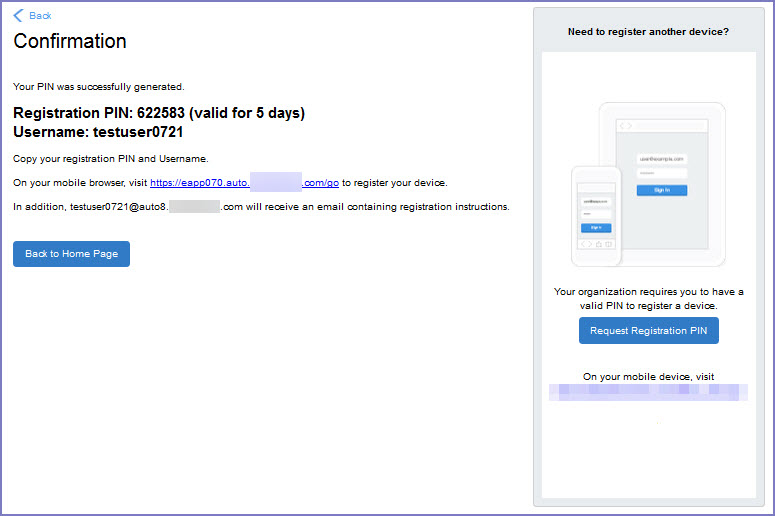
Device users can complete the registration on their mobile device at https://<Core_Server_FQDN>/go. They will have to enter the PIN if prompted.
If QR-code registration is enabled
If Quick Response (QR) code-based registration is enabled, device users will see Generate QR Code. Clicking on Generate QR Code allows device users to complete the device registration process.
When users log into the Self-service portal (SSP) home page, they can click one of two registration buttons:
- Send Invitation – Receive registration information by SMS message and email.
- Generate QR Code – Scan to be redirected to the appropriate registration page.
Users scan the QR code and are redirected to a browser to enter their pin or password:
-
iOS users: Once authenticated, iReg profile installation starts, completing device registration.
-
Android users: Once authenticated, the user is redirected to Google Play to download the registration app. Users open the app to complete device registration.
Registration with QR code

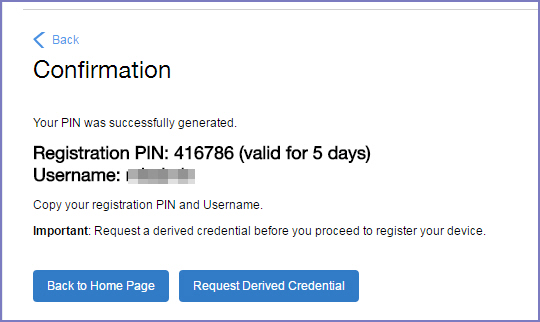
If getting an Entrust derived credential is enabled
Request derived credentials
If Change Device Ownership role is enabled
If the Change Device Ownership role is enabled, device users will see the option to change the device ownership.
Change device ownership option
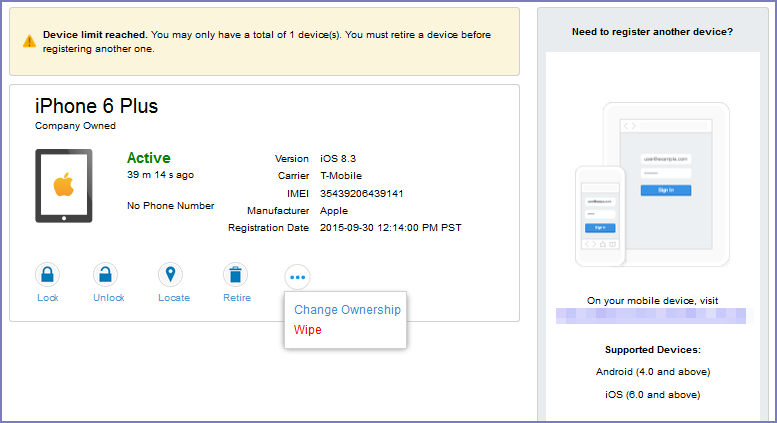
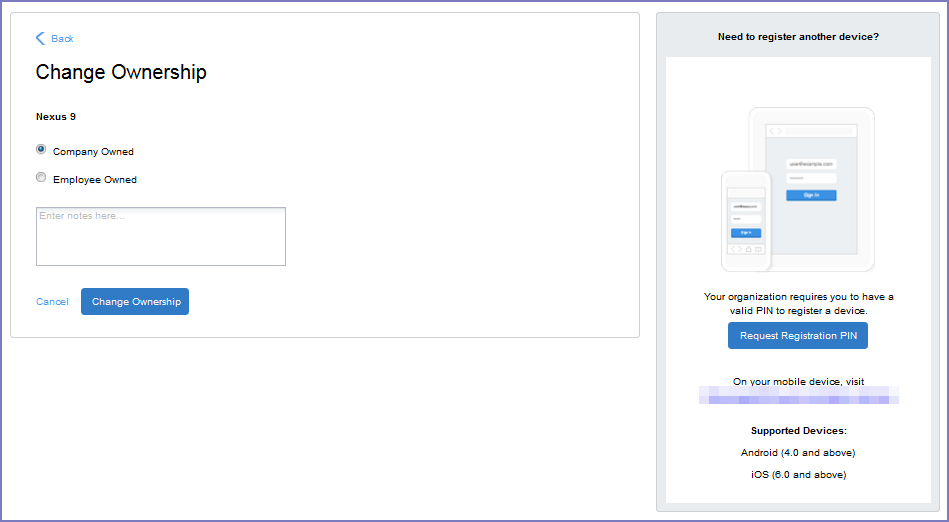
Clicking on Change Ownership allows the user to change the device ownership.
change device ownership settings
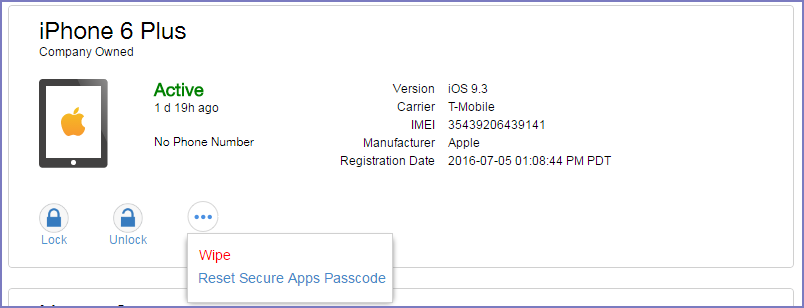
If generating a one-time PIN for resetting the secure apps passcode is enabled
Reset secure apps passcode
Procedure
Trust and Untrust options
You can enable the Trust and UnTrust options to give iOS client users the ability to protect company data and applications in risky locations.
Trust and UnTrust options in self-service portal

-
UnTrust: Users select this option to temporarily remove confidential information and applications from their device. Use this option before entering a location where device security may be at higher than normal risk, such as in airports.
-
Trust: Users select this option to restore confidential information and applications on their device. Use this option when no unusual device security risks exist.
Before you begin
An admin must enable Trust and UnTrust options for device users. See Enabling the iOS Trust/UnTrust option.
Procedure
To enable Trust and Untrust options on the device:
-
From a supported iPhone, click the MobileIron icon. The following pop-up message displays:
Untrusted Enterprise Developer
"iPhone Distribution: MobileIron" has not been trusted on this iPhone. Until this developer has been trusted, their enterprise apps will not be available for use." -
Click Cancel to close the window.
-
Click Settings > General > Device Management. The MobileIron app will display there under Enterprise App.
-
Click the MobileIron icon. A confirmation window displays.
-
Click Trust. The Trust/Untrust option is enabled.
-
When in an insecure location, click UnTrust. Your company assets will be removed from the device until the device is once again Trusted.
Uploading certificates in the user portal on a desktop computer
This feature is not supported on macOS devices.
Device users can upload a certificate in the user portal on a desktop computer (available only if at least one user-provided certificate enrollment setting has been created).
Procedure
- Go to https://<Core_Server_FQDN>/user.
-
Click on the device user’s name in the top right corner.
-
Click on Settings in the drop down menu.
User provided certificate management
- Click Upload New Certificate.
-
In the Configuration field, select a value from the drop-down list that corresponds with how you want to use the certificate.
NOTE: If you select a configuration for which you have already uploaded a certificate, the previously uploaded certificate will be replaced. - Click Browse next to the User-Provided Certificate File field.
- Select a PKCS 12 file to upload. You can use an alias or "friendly name" for the files.
- If a Password field displays, enter the password of the certificate’s private key.
Viewing, replacing, and deleting certificates in the user portal
Device users can view, replace, or delete certificates in the user portal.
Procedure
- Go to https://<Core_Server_FQDN>/user.
- Click on the device user’s name in the top right corner.
- Click on Settings in the drop down menu.
The User-Provided Certificate Management page appears. - To view information about an uploaded certificate, click the “i” next to the certificate.
- To replace a certificate, click the edit icon next to the certificate.
- To delete a certificate, click the delete icon next to the certificate.
When a user-provided certificate is deleted
The user can delete the private key from the PKCS 12 file, and password if provided, from the Core file system using the user portal. A web services API is also available to delete them. Whether you want the private key and password deleted from Core depends on your security requirements.
WARNING: This action means that the certificate and private key in the PKCS 12 file (and password if provided) are still available and usable on existing devices that already had received them from Core. Because the private key was deleted from the Core file system, the certificate is not available to newly registered devices or to re-provisioned devices.
Because the certificate without the private key is still available on Core, you can view information about the certificate, such as its expiration date. This information can help you manage devices still using the certificate.
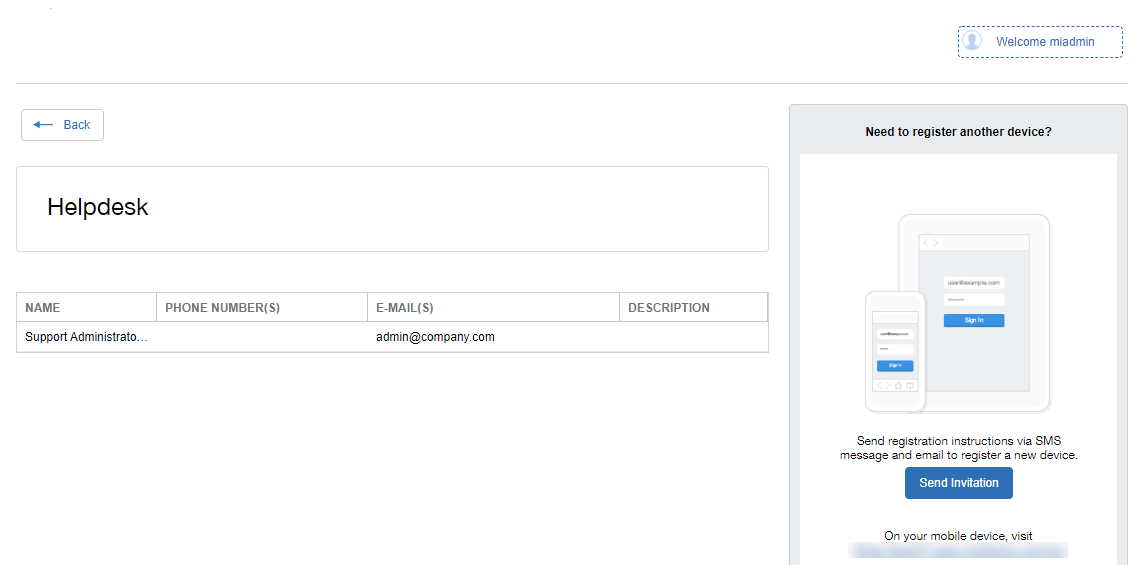
Viewing the help desk contact information
If the help desk contact information is configured in the Core Admin Portal, device users can view the contact information in the self-service user portal.
For information about configuring the help desk contact information see, Configuring help desk contact information
Procedure
- Go to https://<Core_Server_FQDN>/user.
- Click on the device user’s name in the top right corner.
-
Click Helpdesk in the drop down menu.
The Helpdesk page appears.Helpdesk contact information