Configuring VPN On Demand
VPN On Demand (VOD) enables individual apps to connect automatically to a VPN when they are launched.
VPN On Demand is also supported for Managed Clients, see Configuring Managed Clients.
Configuring VPN On Demand on iOS Devices
This section describes the configuration and use of VPN On Demand (VOD) for iOS devices.
Overview: iOS VPN On Demand
The Apple VPN framework supports per-application level layer-4 tunneling.
•Traditional VPN - All network traffic - including personal emails, connections to social and gaming networks, and personal web browsing - is through the corporate network's secure tunnel. This is created between a user's device and the VPN server. It impacts the user by reducing the network performance and the corporate by using corporate bandwidth that routes the employee’s personal data.
•Per App VPN - Apps can be configured to automatically connect to VPN when they are launched. Using this feature, only the corporate-managed apps will transfer the data over the VPN, and the employee's other personal data - such as personal web browsing, and connections to gaming and social networks - will not use the VPN. Apple recommends using the configurations applied through an MDM Server.
When the Per-App VPN rule is applied to the device, VPN will be started automatically in the following circumstances:
•When the user launches an application.
•When the user launches the Safari browser.
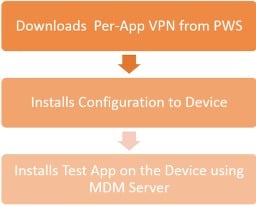
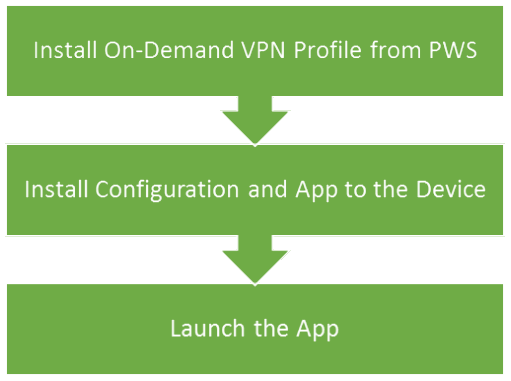
After the device is configured and a test app is installed, the user can start the VPN as follows. Either by:
•Manually launch the Pulse Client and start the VPN, OR
•Manually launch the 3rd Party APP, which automatically starts the VPN.
The VPN Framework contacts the Pulse Client VPN Plug-in (VPNFlow API), which enables the VPN Framework to intercept the network traffic at the application layer.
Configuring the Pulse Connect Secure Server
This section provides step by step instructions to configure Pulse Connect Secure.
It is assumed that the administrator has a basic understanding of the Pulse Workspace and PCS VPN solution. For additional details, please refer to the Pulse Connect Secure documentation.
To configure Pulse Connect Secure:
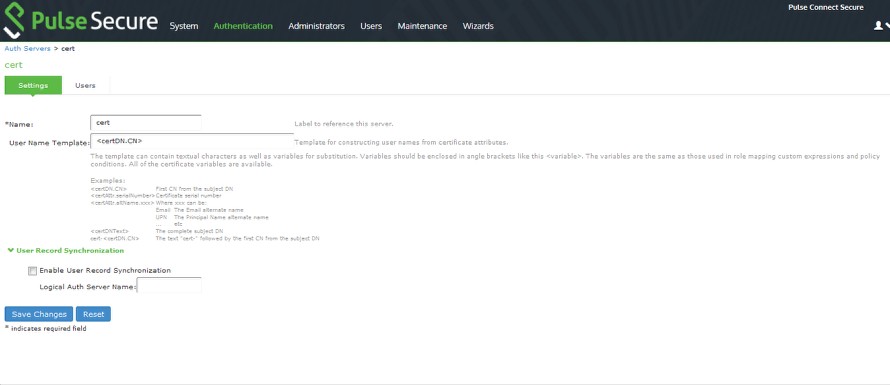
1.Log in to PCS Admin Console as an admin user.
2.Navigate to Authentication > Auth. Servers > <auth_server> > Settings, and create a certificate authorization configuration.
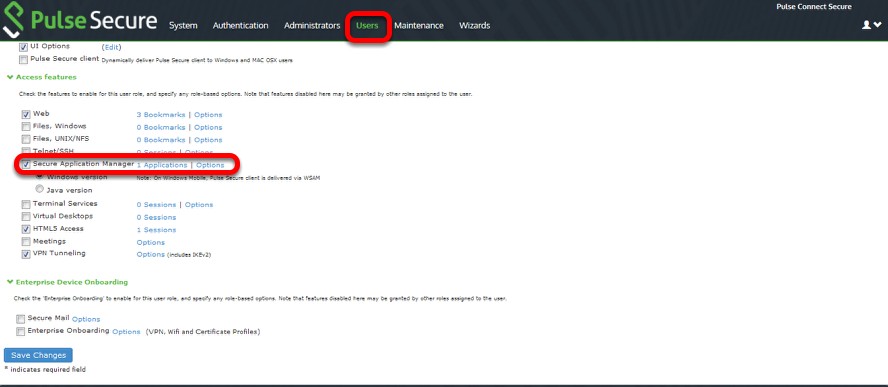
3.Navigate to the Roles page, create a new role, and under Access Features, enable WSAM.
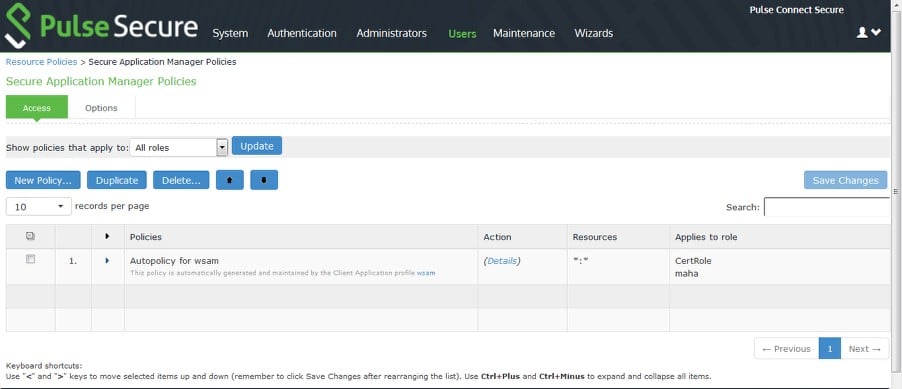
4.Navigate to the SAM applications page, and create a WSAM supported application and a WSAM-enabled server with Allow all settings.

5.Navigate to Users > Resource Policies > SAM > Access control, create a SAM ACL with an Allow All option, and assign it to required Roles.
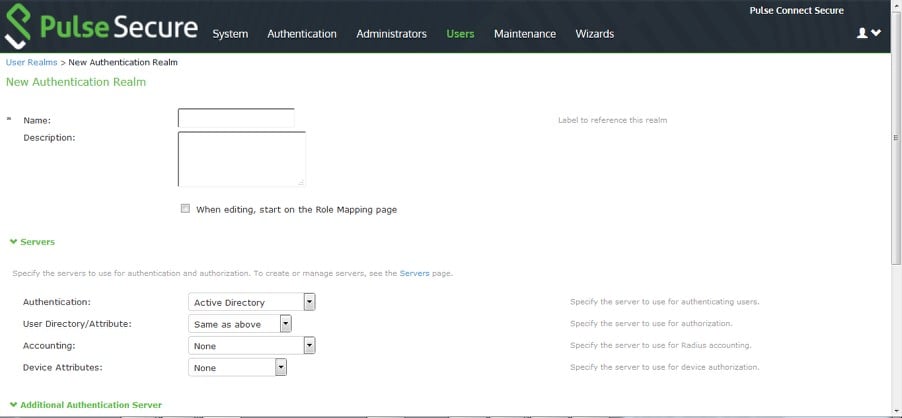
6.Navigate to Users > User Realms, create a new Realm and assign it with one of the supported Authentication Servers.
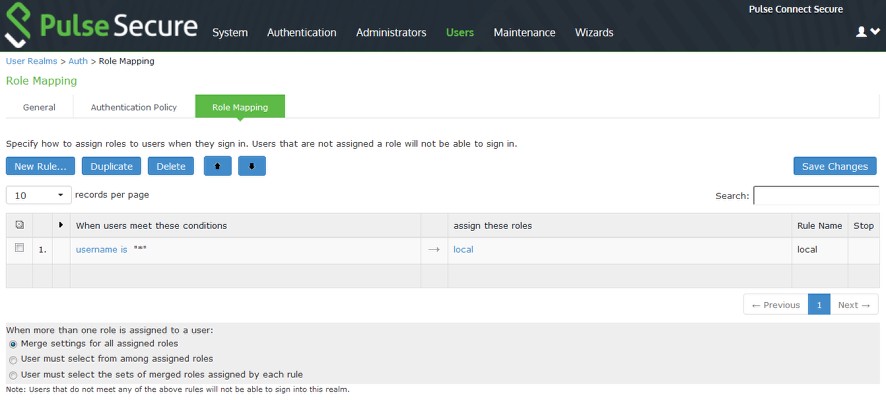
7.Navigate to Users > User Realms > <select user> > Role Mapping, create a Role mapping rule and assign it to the corresponding Role.
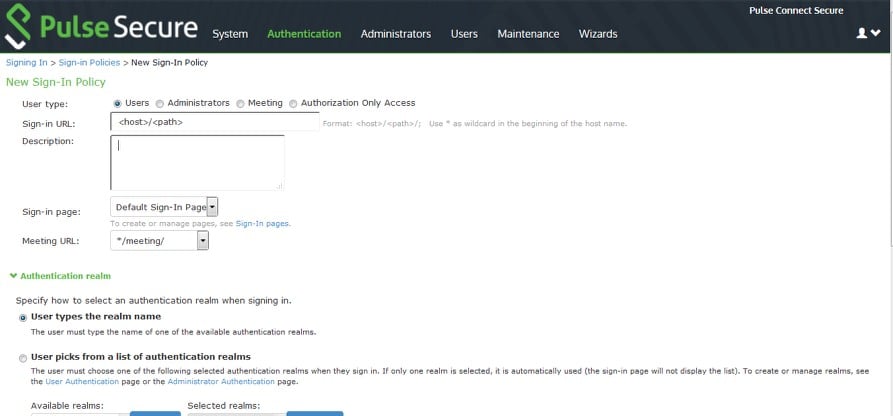
8.Navigate to Authentication > Signing In > Sign In Policies, create a new Sign-In URL and assign it to the corresponding realm.
For more details about PCS configuration, refer to PCS Administration Guide.
Configuring the Pulse Workspace Per App VPN
This section describes the configuration of Per App VPN.
Adding an iOS MDM Certificate
An Apple MDM push certificate allows your Workspace management console to push policies, updates and actions to your managed iOS devices.
1.Click the settings icon on top-right-corner of the page and select Apple MDM Cert.
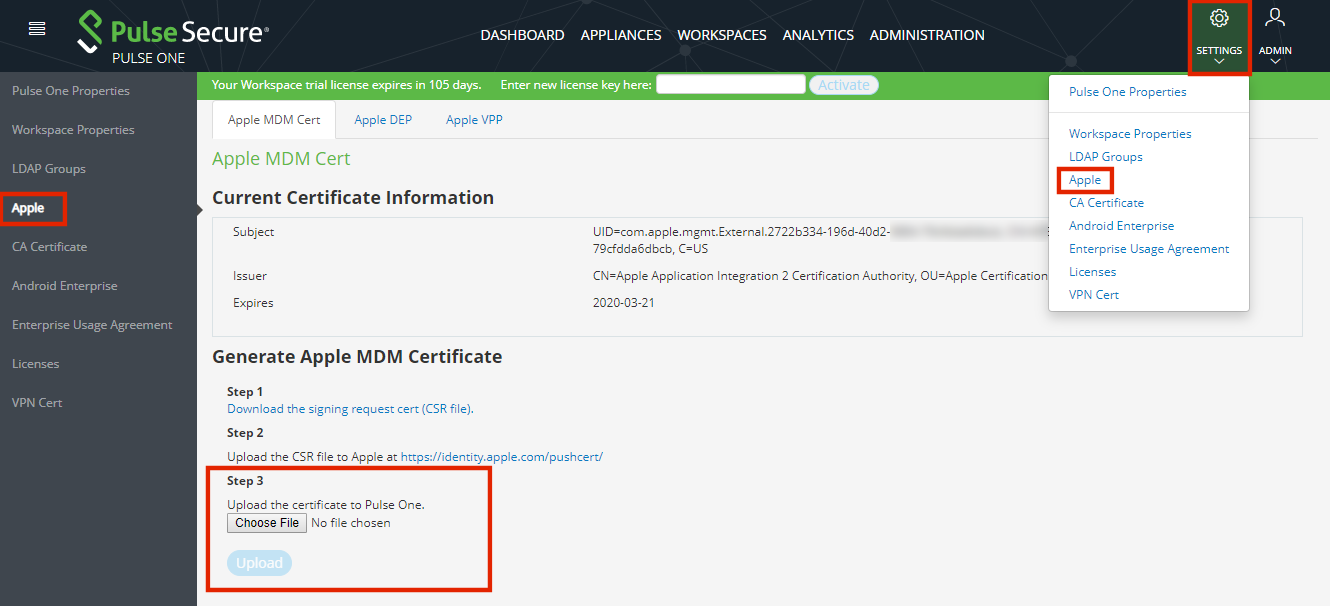
The Apple MDM Cert management page appears.
2.Upload the MDM certificate to Pulse One.
3.Click the Workspaces menu and then the Policies tab.
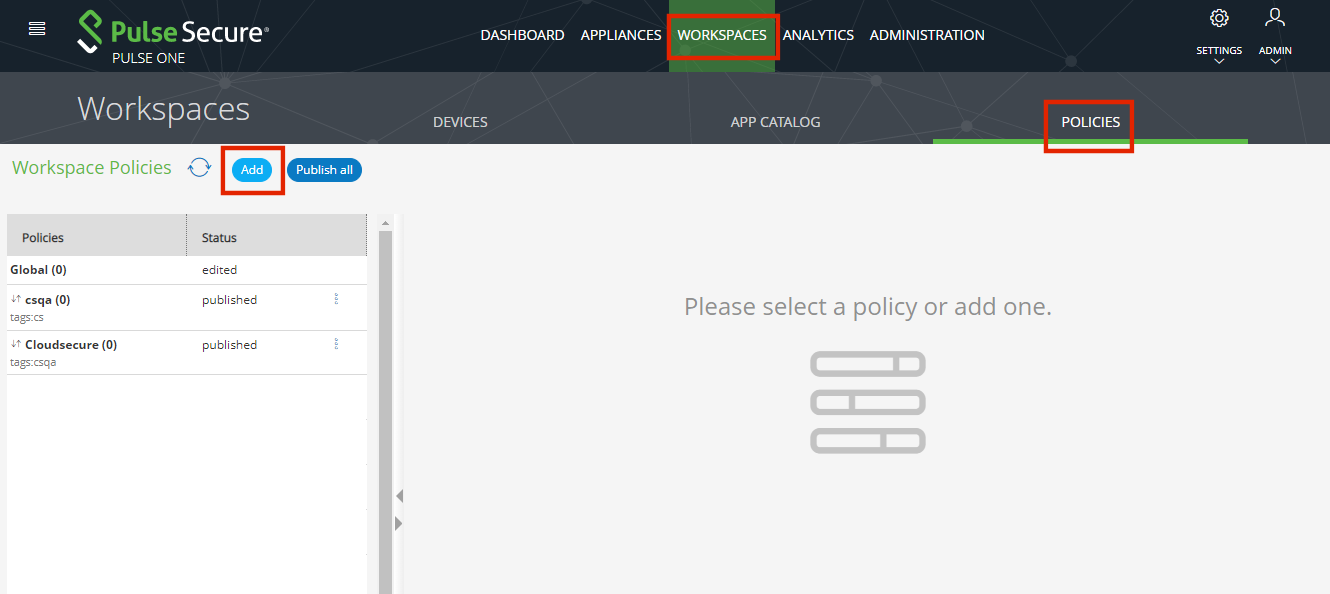
4.In the Workspace Policies section, click Add.
The Add Policy dialog appears.
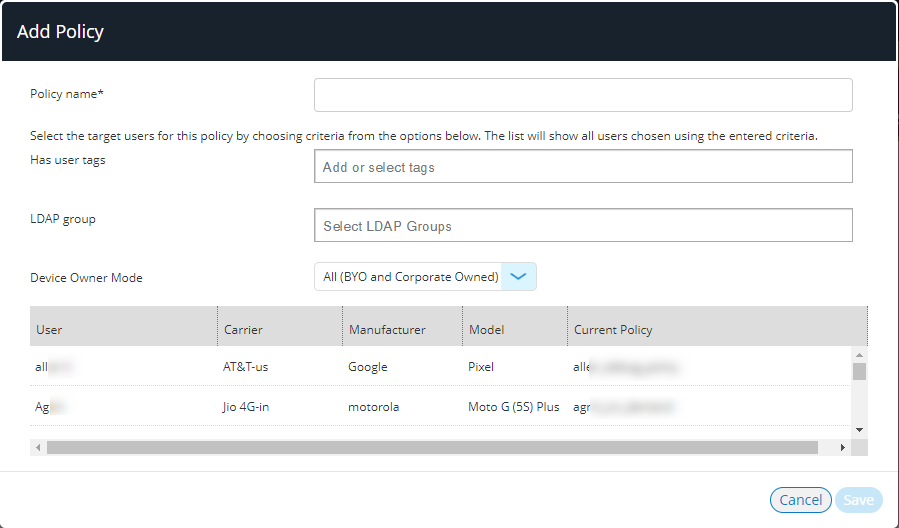
5.Set a Policy name. This is a label for you to identify the policy.
6.Add tags to Has user tags.
7.Set the policies target criteria and LDAP group.
8.Click Save.
The generated Host URL and Code will be used later to register your appliance.
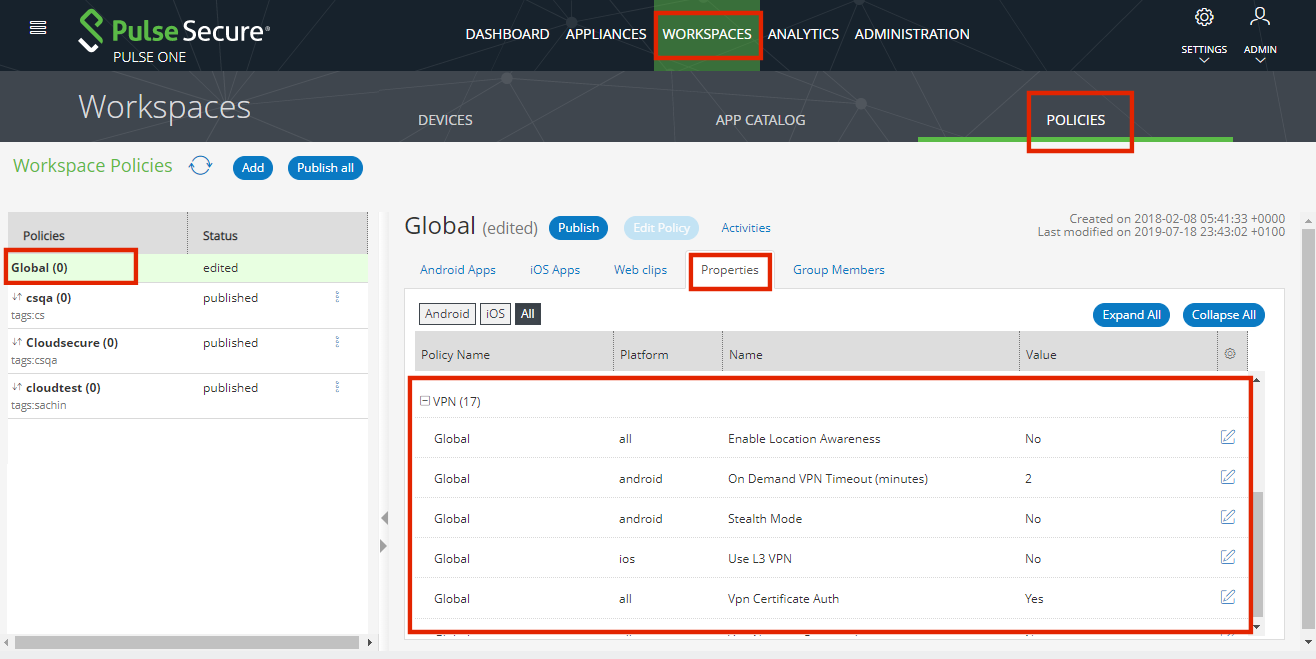
9.Select the Properties tab and define a VPN Profile.
10.Select the iOS Apps tab.
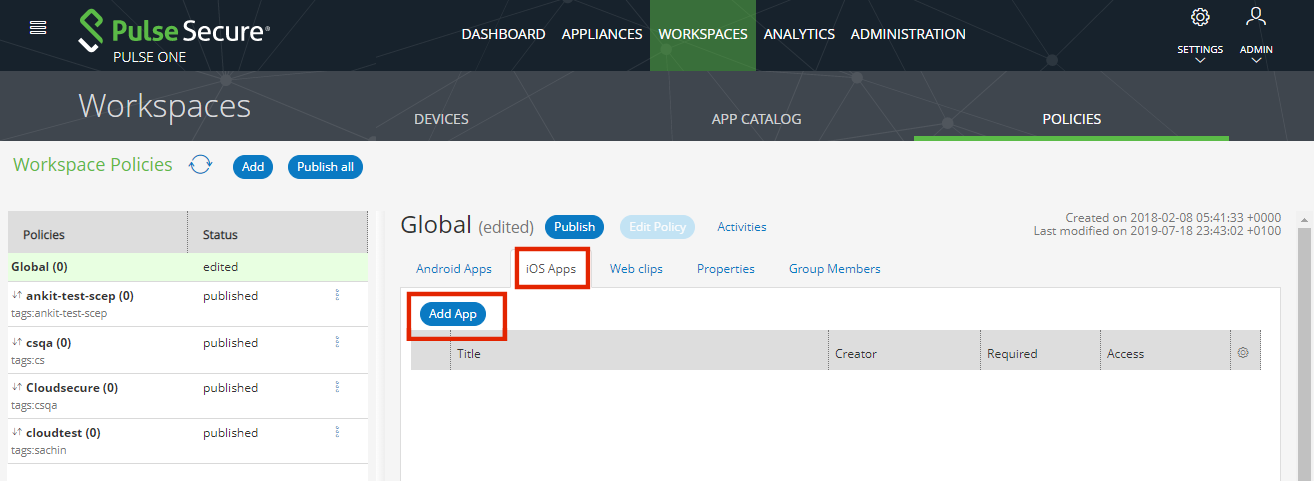
11.Click Add App.
The Add App from App Catalog dialog appears.
12.Select the required app and click Add.
The app is added to the list of iOS apps for the policy.
13.In the list, select the app, click its menu and select Edit app rule.
The Configure App Details dialog appears.
14.Select the Network access as Per app VPN.
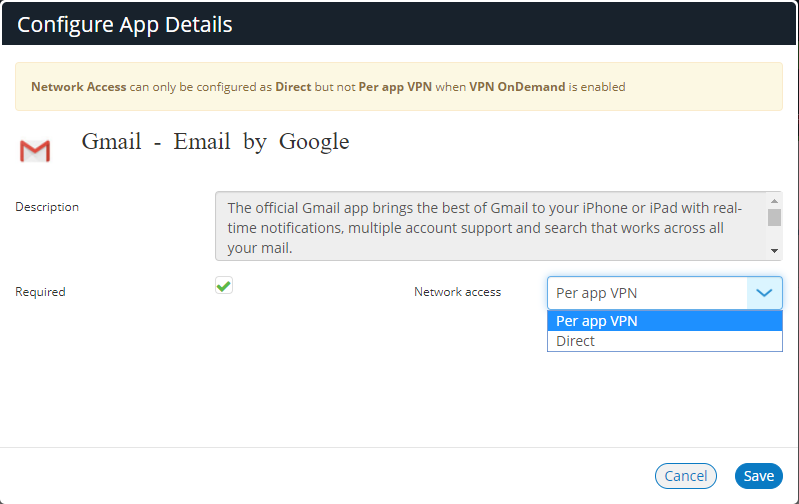
15.Click Save.
When a policy is created, it starts in the edited state. You can now add applications and properties to the policy before applying the policy to your mobile devices.
After you have completed editing the policy, click Publish. You will see the policies state change to publishing and then published. This will apply the policy to the mobile devices.
Downloading a VPN Certificate
The Workspace Management Server includes an integrated Certificate Authority (CA) and an Online Certificate Status Protocol (OCSP) servers.
These can be used to issue certificates to Workspaces for client certificate based VPN authentication.
You can use the VPN Cert window to download your Workspace Root CA certificate. This will be used when configuring your VPN.
To download VPN certificate:
1.Click the settings icon on top-right corner of the page.
2.Select VPN Cert.
The VPN Cert page appears.
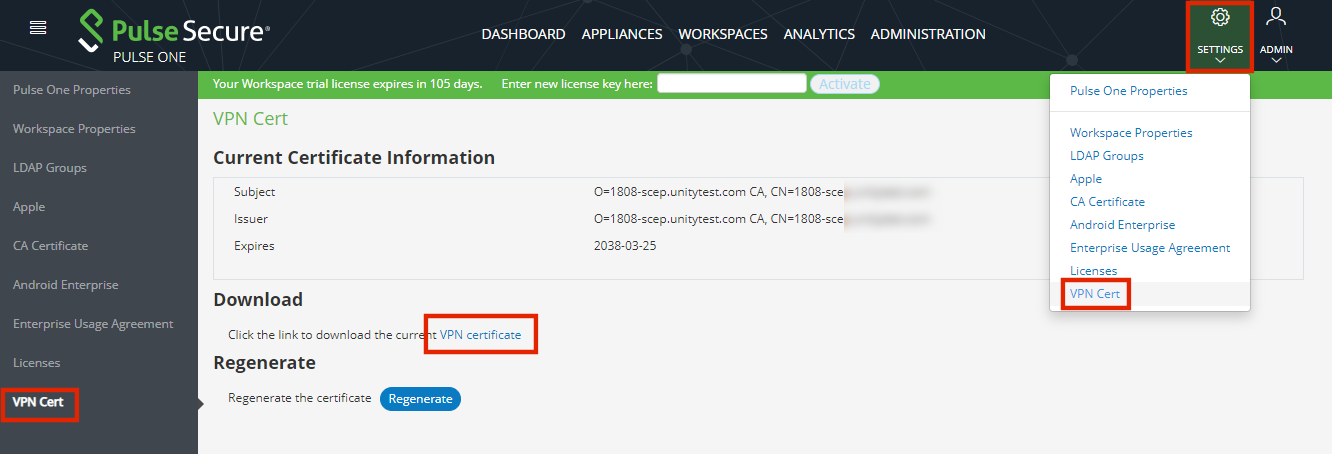
3.In the VPN Cert page, under Download, click VPN Certificate.
4.Download the Workspace CA cert from the Pulse One server.
5.Log into Pulse Connect Secure, access the Certificates > Trusted Client CAs tab.
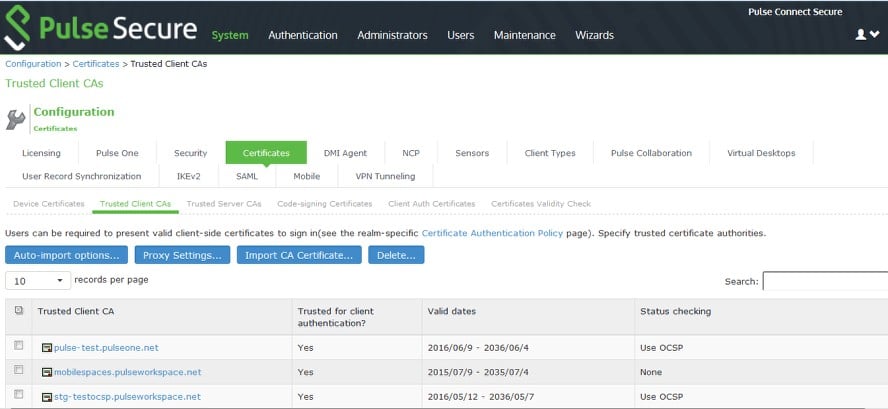
6.Click Import CA Certificate to upload the certificate.
Registering iOS Devices and Installing Pulse Secure Client App
To register an iOS BYOD device and install the Pulse Secure Client app, perform the procedures described in Onboarding iOS BYOD Devices.
Configuring VPN On Demand on Android Devices
This section describes the configuration and use of VPN On Demand (VOD) for Android devices.
Overview: Android VPN On Demand
VPN on Demand (VOD) is supported for Android mobile devices.
•Traditional VPN – After the corporate network's secure tunnel is created between a user's device and the VPN server, it remains connected even if there is no traffic through the tunnel. It impacts the user as it consumes more licenses since a given endpoint will always be connected. Also, there will be more battery drain due to the unnecessary VPN connection.
•VPN On Demand – Apps can be configured to automatically connect to VPN when they are launched. This feature is intended to be used only within the Android work profile, since it is predominantly being used at an app level and only Pulse Workspace is aware of the apps in the work profile. Using this feature, only the corporate managed apps will transfer the data over the VPN and the employee's other personal data like personal web browsing, connections to gaming and social networks will not use the VPN.
When the VPN On Demand profile is applied to the device, VPN will be started automatically in the following two conditions:
•When user launches the application.
•When the application sends traffic in the background.
In VPN On Demand, a blocking interface is set up on the device which monitors the VPN configured apps for the network traffic. Whenever an application whose network access type is "require VPN", tries to perform any network activity, the blocking interface detects this. It thereafter authenticates the user, tears down the blocking interface and establishes the VPN connection.
Configuring VPN On Demand on Pulse Workspace
Before you proceed with the configuration, ensure Android for Work is enrolled within your EMM console. For the enrollment details, see Configuring Android Enterprise.
Also ensure that the required apps are added to the App Catalog in the EMM console. For adding apps to the EMM console, see Adding an Android App to the App Catalog.
This section describes the procedures involved in VPN On Demand configuration. These include:
•Configuring On-Demand VPN related attributes in the policy.
•Adding apps which require VPN in the policy.
To configure VPN On Demand related attributes in the policy, perform the following steps:
1.Log in to Pulse One admin console.
2.Select the Workspaces menu, and then select Policies.
3.Create a new policy (if required), see Creating a Policy.
4.Select the required policy.
5.Click the Properties tab.
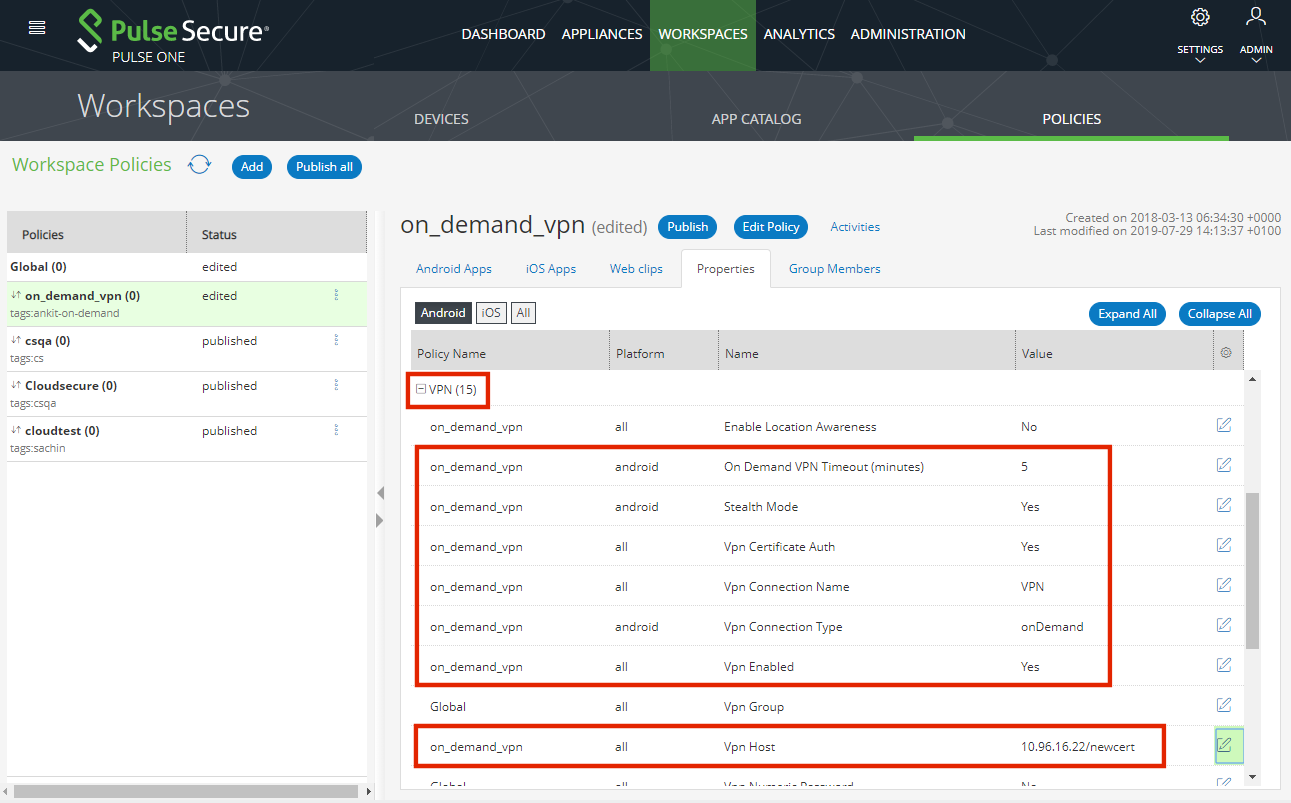
6.Expand the VPN category and configure the following properties:
•On Demand VPN Timeout (minutes): (Optional) For example, 5.
•Stealth Mode: True.
•Vpn Certificate Auth: Yes.
•Vpn Connection Name. For example: VPN.
•Vpn Connection Type: onDemand.
•Vpn Enabled: Yes.
•Vpn Host. For example: https://10.11.12.13/newcert.
•Vpn Verify Certificate: Yes.
7.Click Publish.
To add the apps from App Catalog to the policy with Network Access as Require VPN and publish, see Adding an Android App to a Policy.
Registering an Android Device and Installing the Pulse Secure Client App
To register an Android BYOD device and install the Pulse Secure Client app, perform the procedures described in Onboarding Android BYOD Devices.