Working with the App Catalog
You can add iOS and Android apps to the App Catalog. From there, you can add them to a policy.
This section describes:
The addition of Android apps to the App Catalog is described in Adding an Android App to the App Catalog.
The addition of Android apps to a Policy from the App Catalog is described in Configuring Policy Settings.
Working with the Apple Volume Purchase Program
The Apple Volume Purchase Program (VPP) enables customers to buy bulk licenses for iOS apps.
Pulse Workspace supports Apple VPP for device-based licensing only. Device-based licensing uniquely identifies a device using serial numbers. Every user does not require an Apple ID. Rather, the administrator assigns apps directly to devices using Pulse Workspace.
You can assign VPP-licensed apps to policies, and then apply those policies to iOS devices.
To use VPP on Pulse Workspace:
1.Click the Settings icon on top-right-corner of the page and select Apple.
2.Select the Apple VPP tab.
The Apple VPP management page appears.

3.Under VPP Token, click the link to access the Apple Deployment Program (ADP) portal.
4.On the ADP portal, enroll your business.
You require the Data Universal Numbering System (D-U-N-S) number for your business.
If you have previously registered your business on ADP to use Apple web page, the same ADP account can be used for Apple VPP.
5.Verify your account using the two-step email verification process.
6.On the Apple VPP portal, purchase iOS apps in the required quantities. For example:
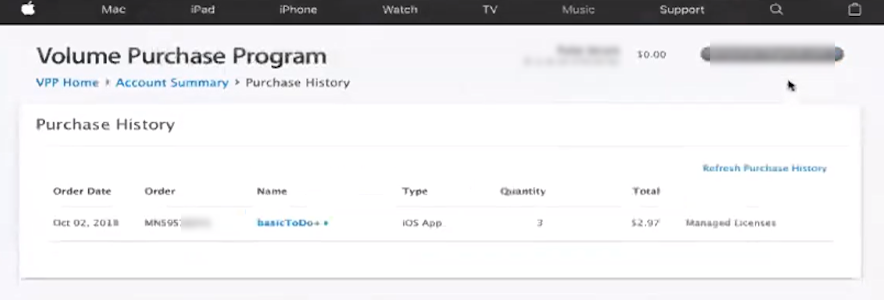
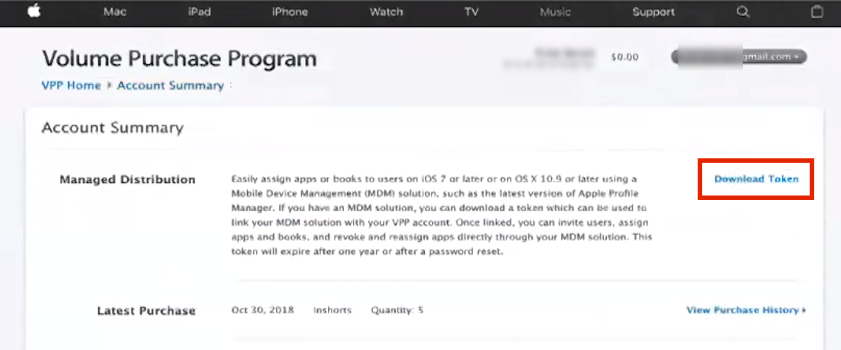
7.On the Apple VPP Account Summary page, click Download Token and save the file locally.
8.On Pulse One, under VPP Token, click Choose File and select the VPP token file.
9.Click Upload.
The Current Token Information updates.

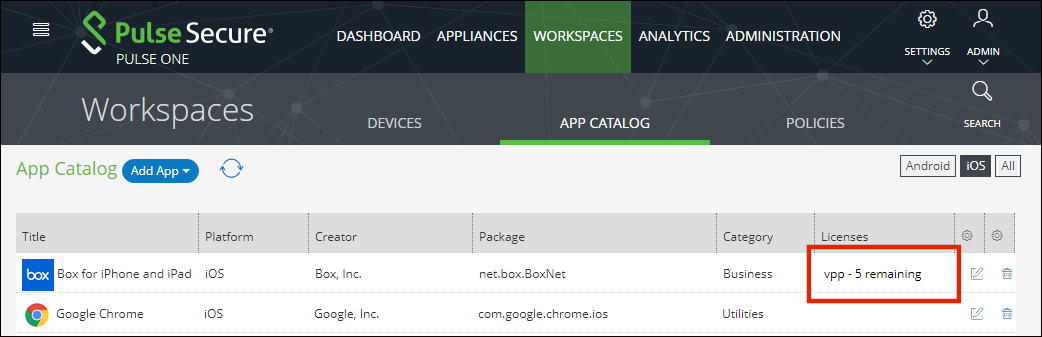
10.Click the Workspaces menu and then the App Catalog tab.
The App Catalog automatically syncs to show all VPP-purchased apps and the remaining license count for each. For example:
11.Add VPP-licensed apps to new or existing policies.
12.(Optional) If the policies are in use, publish the policies.
The VPP-licensed apps are installed on all devices that use the policy, subject to license availability.
13.(Optional) Create new devices to install the VPP-licensed apps
The VPP-licensed apps are installed on all devices that use the policy, subject to license availability.
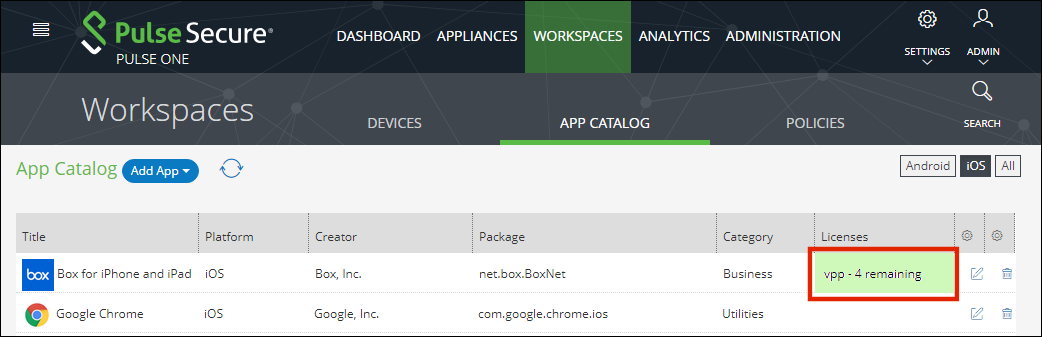
As licenses are consumed, the Licensing column of the App Catalog updates.
Adding iOS Apps to the App Catalog
You can add iOS apps to the App Catalog in two ways:
•From the App Store, see Adding an iOS App From the App Store to the App Catalog.
•Manually, from a third-party source, see Adding an iOS App to the App Catalog Manually.
Adding an iOS App From the App Store to the App Catalog
To add an iOS App from the App Store to the App Catalog:
If the iOS app requires an app config schema, then request this from the application vendor.
1.Select the Workspaces menu.
2.Select the App Catalog tab.
The App Catalog page appears.
Ensure the app you are going to add is not listed.
3.In the App Catalog page, click Add App and then select Add App From Store.
The From Public App Store dialog appears.
4.In the From Public App Store dialog, select iOS App Store.

5.Type the name of the app in the Search box and press Enter.
A list of apps is displayed based on the search criteria.
6.Select the required app from the apps list and click Next.

The Configure App Details dialog appears.
7.In the Configure App Details dialog:
•Change the Description if required.
•Select the Required check box if the app should be pushed automatically upon enrollment.
•If you access the app through VPN, then then set Network access to Per app VPN.

•If you have an app config schema from the app vendor, click Upload and select the schema file.
•Click Add.
The iOS app is added to the App Catalog.
Adding an app to the App Catalog does not automatically deliver apps to the user's device. The app must also be added to an appropriate policy.
All configuration changes made to the app in the App Catalog are the defaults for the app. However, you can overwrite these after adding the app to a specific policy.
The next step is to add the app to a specific policy. For details, see Adding iOS Apps to a Policy from the App Catalog.
Adding an iOS App to the App Catalog Manually
Before proceeding with manual adding of iOS app, ensure you have the following details:
•The application package name. For example: com.microsoft.office.word
•The application title. For example: Microsoft Word
•The application creator. That is, the provider of the app. For example: Microsoft
Two manual methods are available:
•You can source the app from a third-party URL. In this case, you will also need the location of the manifest.plist file that was created by the app distributor.
•You can upload the app from a local copy of the iOS app in .ipa format.
To add an iOS app to the App Catalog using either manual method:
1.Select the Workspaces menu.
2.Select the App Catalog tab.
The App Catalog page appears.
Ensure the app you are going to add is not listed.
3.In the App Catalog page, click Add App and then select Add App Manually.
The Add App Manually dialog appears.

4.In the Add App Manually window, select Upload iOS App and click Next.
The Add iOS App Manually dialog appears:

5.Specify the app Package. For example: com.demo.word.
6.Specify the app Title. This will be the name of the app in the App Catalog.
7.Specify the app Creator. That is, the provider of the app.
8.(Optional) If you want to source the app from a third-party URL:
•Select Enter Download URL. The dialog updates to include a Download URL property:

•Specify the Download URL.
This URL must be accessible by the end user’s devices.
9.(Optional) If you want to upload the app from a local copy:
•Select Upload IPA File. The dialog updates to include an App Location property:

•Click Choose File and locate the file.
•Click Upload IP File.
10.Click Add.
The app is added to the App Catalog.
The next step is to add the app to a specific policy. For details, see Adding iOS Apps to a Policy from the App Catalog.
Adding iOS Apps to a Policy from the App Catalog
To add the app to a policy:
1.Select the Workspaces menu.
2.Select the Policies tab.
A list of policies is displayed.
3.Select a policy from the list, select the iOS Apps tab, and click Add App.

The Add App from App Catalog dialog appears.
4.Select the app from the app catalog list and click Add.

5.In the iOS Apps tab, select the app and click Edit app rule.

The Configure App Details dialog appears.
6.In the Configure App Details dialog, make appropriate changes and click Save.

7.Select the app and click Publish.

A confirmation prompt appears.
8.Click Yes to confirm the publication.
This completes the process.