Creating a Secure Access Policy
Introduction
A Secure Access Policy is central to the configuration of your Ivanti Neurons for Zero Trust Access (nZTA) services.
The Controller enables you to create and publish complete Secure Access Policies to a ZTA Gateway. Each policy is based on four main components:
Applications: The application (or application group) to which this policy applies.
User Rule Groups: The user rule group you want to apply to access requests for this application.
Device Policies: The device policy you want to apply to access requests for this application.
Gateways: The ZTA Gateway governing access to the application, and to which this policy is to be published.
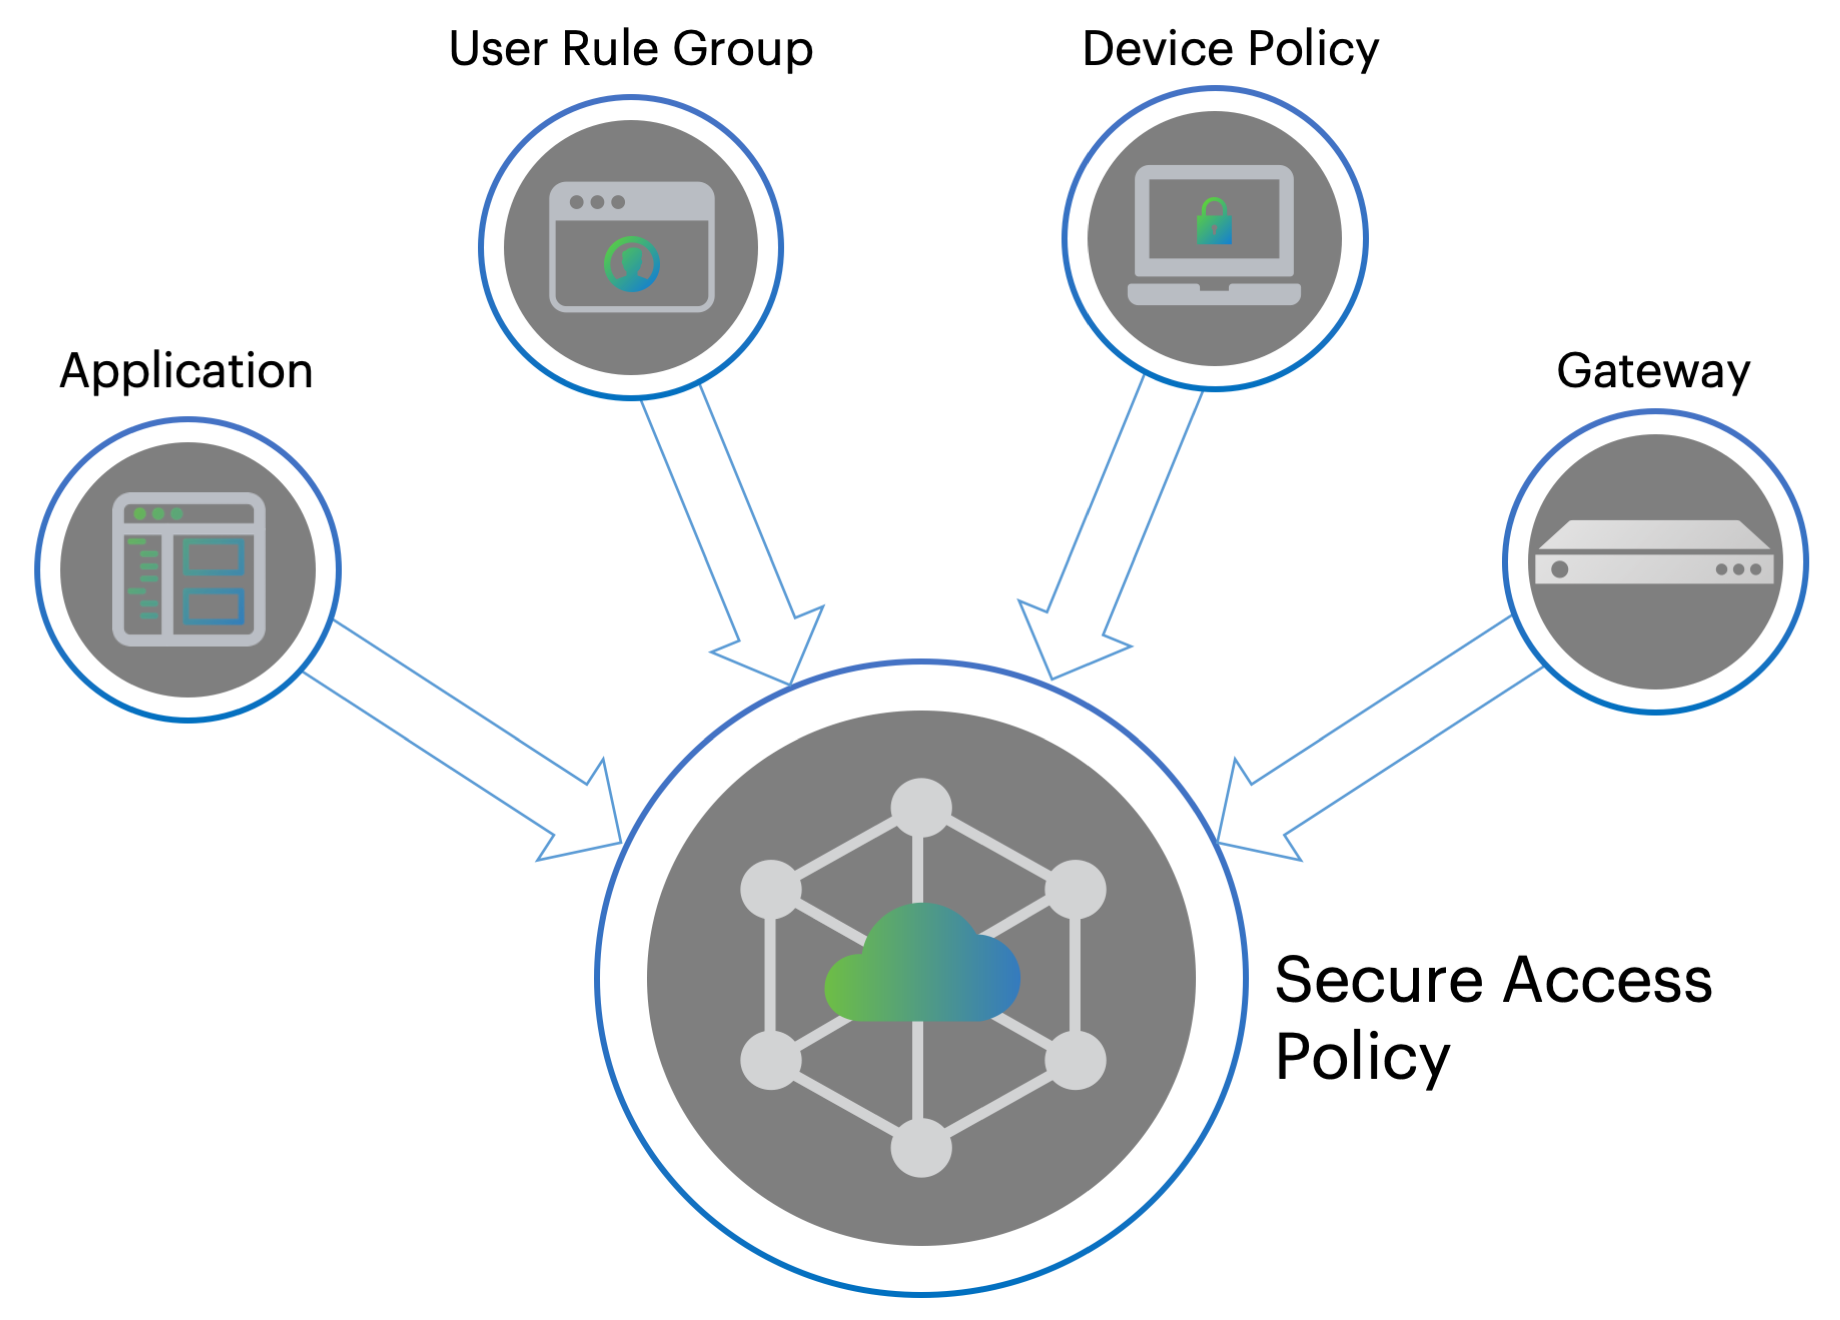
FIGURE 88 Creating a secure access policy
Note
nZTA has one built-in secure access policy, Application discovery. This policy, when enabled and configured, directs any request from an application that is not referenced by a secure access policy to a default Gateway. See the Tenant Admin Guide for details.
Through this page, you can:
Create a new secure access policy (see Workflow: Creating a Secure Access Policy).
Edit an existing secure access policy.
Enable or disable a secure access policy. Use the checkboxes at the left to select the policies you want to enable/disable, then select the corresponding link at the top of the page.
Delete a secure access policy. Use the checkboxes at the left to select the policies you want to delete, then select the Delete link at the top of the page.
Perform Search term highlighting for occurrences of named applications, application groups, gateways, gateway groups, device policies, user groups and enabled status (yes/no) for the policies listed on this page.
Filter the policies displayed on the page by application/application group, gateway, user, device policy, or status. When you select the Filter icon, a side panel dialog appears within which you can select specific criteria to filter the display to show only matching policies. Applied filters remain in place until you select Clear All from the side-panel, or until you leave the page.
To find more details about nZTA, including full descriptions of each feature, function and ability, see the Tenant Admin Guide.
Workflow: Creating a Secure Access Policy
Before you begin creating your Secure Access Policy, make sure you have completed all tasks required in creating the policy components. Each chapter in this guide is dedicated to providing an overview of, and instructions in creating, each element.
To learn more about creating user rules, see Creating User Authentication Services.
To learn more about registering Gateways, see Configuring Gateways.
To learn more about creating device policies, see Creating Device Policies and Device Rules.
To learn more about defining applications, see Creating Applications and Application Groups.
To see an overview of nZTA, see Getting Started with Ivanti Neurons for Zero Trust Access.
After you have created all your application definitions, user authentication rules, device policies, and registered your Gateways, you can proceed to create a Secure Access Policy. Each policy publishes one or more applications with the associated users rules and device policies to the selected Gateway, ready for use by your organization’s end-users.
To create a Secure Access Policy:
Log into the Controller as a Tenant Admin.
From the nZTA menu, select the Secure Access icon, then select Secure Access Policies.
The Secure Access Policies page appear. This lists all current secure access policies.

FIGURE 89 Viewing the list of existing Secure Access Policies
Click Create:
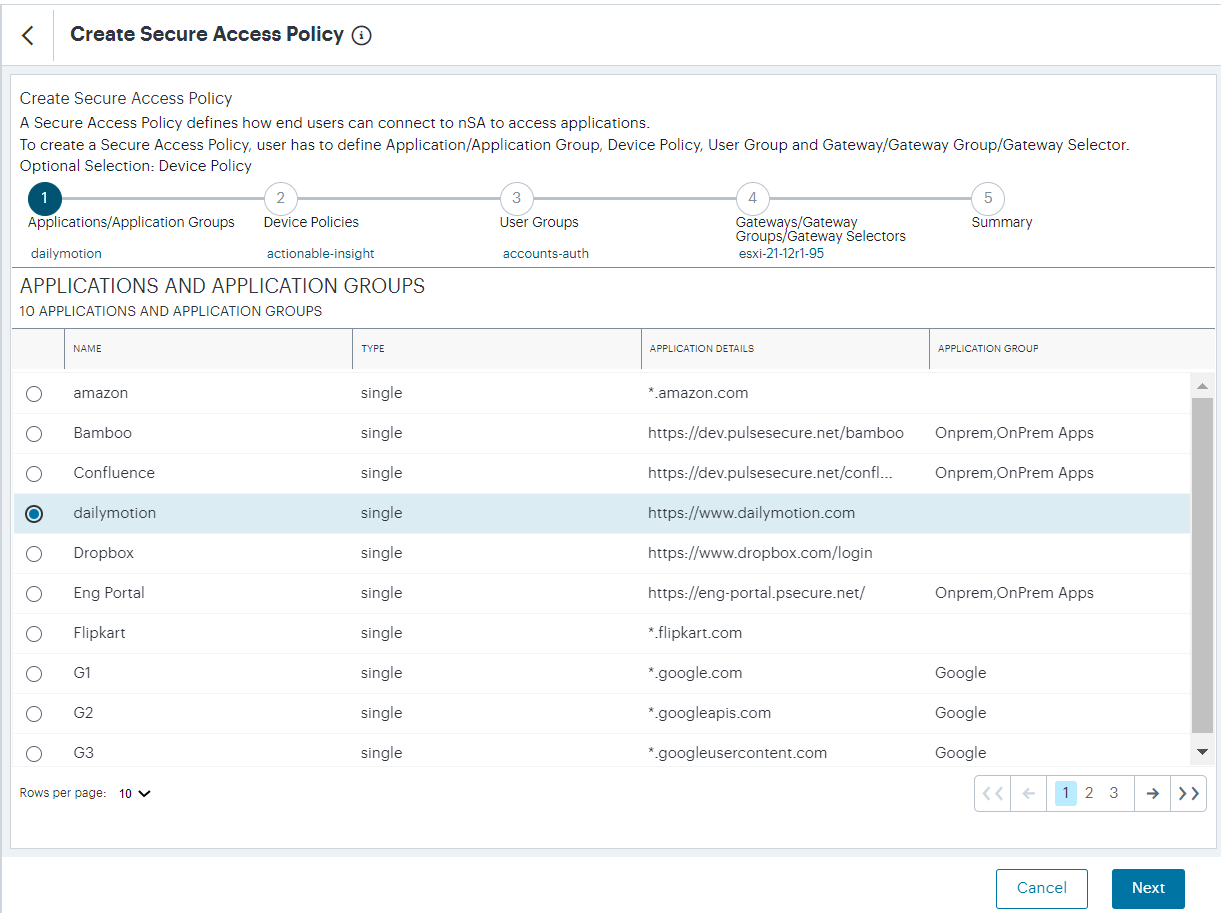
FIGURE 90 Creating a new Secure Access Policy
Note
At any point during this process, you can reset the form data by selecting Reset. You can also view existing secure access policies in a pop-up dialog by selecting View Secure Access Policies.
Select the application, or application group, for the policy. Click Next.
Note
An application, or application group, can be associated with only one secure access policy.
From the Device Policies list, select the device policy to apply to your Secure Access Policy. Click Next.
From the User Groups list, select the user group to apply to your Secure Access Policy. Click Next.
From the Gateways, Gateway Groups and Gateway Selectors list, select the ZTA Gateway/Gateway Group to which you want to publish your Secure Access Policy. Click Next.
Verify the Summary details and then click Create.
The policy is created and added to the list of secure access policies.
(Optional) To edit a listed secure access policy, select the adjacent three dots and then select Edit. After the secure access policy is updated, it is automatically applied to the ZTA Gateway that it references.
(Optional) To enable a disabled secure access policy, use the toggle button. After the secure access policy is enabled, it is automatically applied to the ZTA Gateway that it references.
(Optional) To disable an enabled secure access policy, use the toggle button.
(Optional) To delete an unused secure access policy, select the adjacent three dots and then select Delete. Confirm the deletion in the subsequent dialog.
After the secure access policy is created, it is automatically downloaded and applied to the ZTA Gateway that it references.
Note
Secure Access Policies can take several minutes to reach their destination Gateway(s). If an entered policy contains configuration that fails to apply properly due to a compatibility or validation problem, nZTA displays an error message that the applied configuration is incorrect. nZTA attempts to re-apply the configuration in the policy at 15 minute intervals, and repeats this process until such a time as the policy is corrected or deleted.
After you have published applications to your Gateways, users can enroll their desktop and mobile devices. For more details, see the Tenant Admin Guide.
Next Steps
After you have created your Secure Access Policies and deployed them to your Gateways, you can enroll your end-user devices. To learn more, see the Tenant Admin Guide.