Getting Started with Ivanti Neurons for Zero Trust Access
This guide is intended as an introduction to using Ivanti Neurons for Zero Trust Access (nZTA), a component part of Ivanti Neurons for Secure Access. It contains a brief description of the elements that make up the complete service, including a summary of the steps you need to follow to set everything up at a basic level. To obtain further details regarding any of the concepts discussed in this guide, refer to the Tenant Admin Guide available from the documentation link in the Ivanti Neurons for Secure Access Tenant Admin Portal.
What is nZTA
nZTA is a cloud-based SaaS (software as a service) application that provides fully-managed zero-trust authentication and access control for an organization’s application infrastructure. nZTA enables administrators to define end-to-end authorization and authentication policies that control application visibility, access, and security for all users and their devices.
An administrator can use the nZTA admin portal to define secure access policies for any combination of users, devices, applications, and infrastructure.
Deploying and Using nZTA
A nZTA deployment consists of a Controller service, used to manage your secure access policies and user base, and one or more ZTA Gateway instances (referred to as Gateways in this guide) positioned at each location an organization hosts its resources and applications. This might be in a public or private cloud, within a datacenter, or inside a virtual host environment. The Gateways continually communicate with the Controller to ensure user access requests for the applications held at that location are valid and authentic.
End-users install and run Ivanti Secure Access Client on their devices in order to manage secure and encrypted access to their organization’s applications. Ivanti Secure Access Client works with the Controller and Gateways to assess authentication and authorization rights so applications that appear to the end user are only those they are authorized to use.
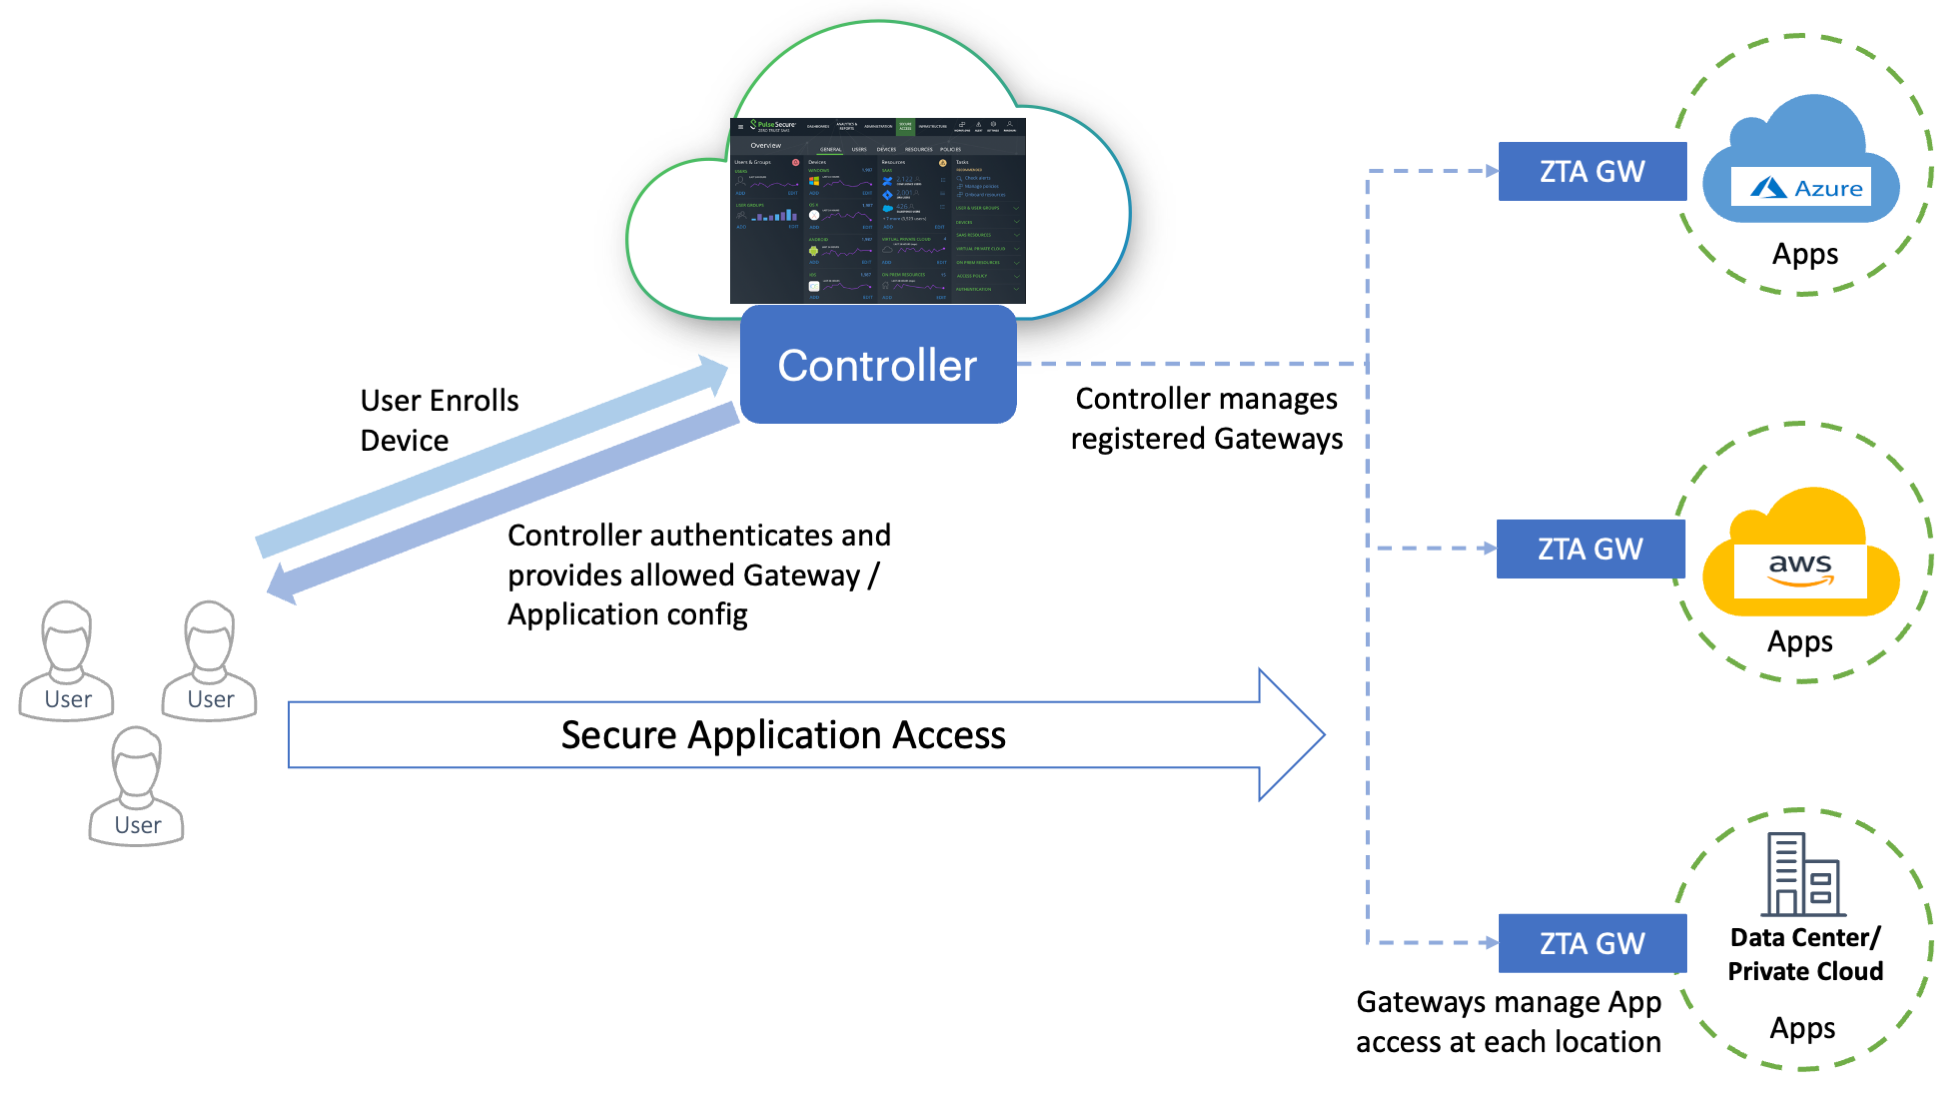
FIGURE 1 The topology of a nZTA deployment
To use and configure the Controller, nZTA provides the Tenant Admin portal. This portal allows you to perform all of the tasks required to set up and maintain a working nZTA deployment.
To login to the Tenant Admin Portal, use the credential and domain information provided in your Welcome email. Contact your support representative for more information.
Until nZTA is a configured system, a Welcome dialog appears. Accept this dialog. The Secure Access Setup (Onboarding) wizard appears.
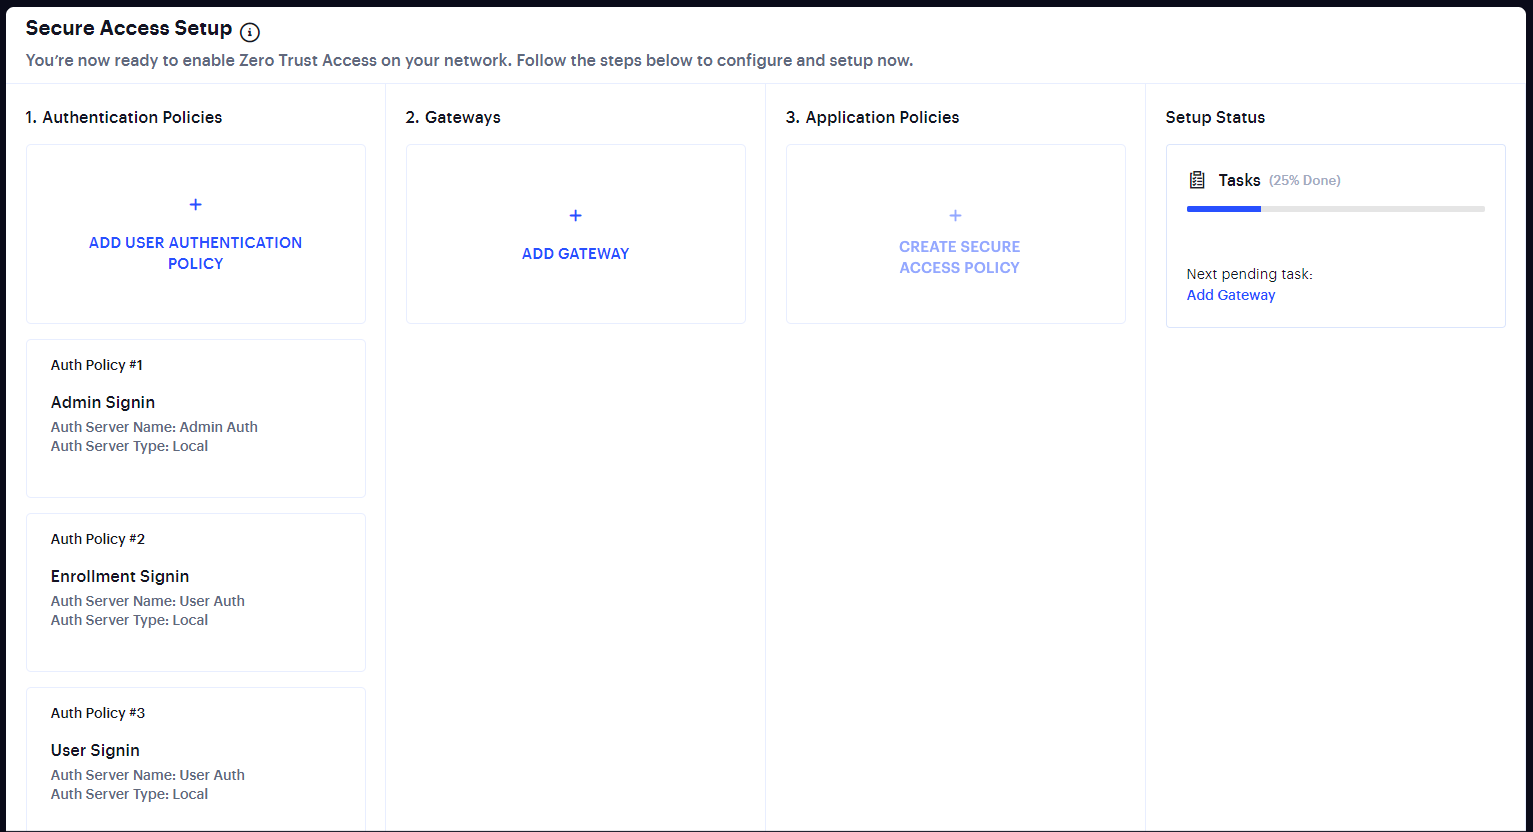
FIGURE 2 The Secure Access Setup (Onboarding) Wizard
This wizard enables you to configure the required elements of nZTA using a number of pages and workflows:
Add User Authentication Policy. This displays the User Policies page.
Local authentication policies are present by default, which can be used immediately.
If you choose to use the default local authentication policies, you can proceed directly to the Add Gateway step.
If you choose to create your own local authentication policies, or to immediately implement SAML authentication, these must be performed separately from the Onboarding wizard, see Creating User Authentication Services.
Add Gateway. This displays the Gateway Network Configuration dialog, see Configuring Gateways.
Application Policies. This displays the Create Secure Access Policy wizard.
This wizard enables you to create an publish a secure access policy as a single workflow. This involves the creation/selection of user rules/groups, applications, policies and a gateway selection.
To perform these steps individually, and finally create a secure access policy, see Manually Configuring Your nZTA Deployment.
To perform these steps using the wizard, refer to the Tenant Admin Guide.
As you complete each steps, the Setup Status indicates the percentage of Tasks that are complete.
After all tasks are complete, click Go to Dashboard.
Note
You can also start the Onboarding wizard from the nZTA menu; click the Secure Access icon, then select Onboarding.
Note
To view guidance on client device enrollment and a description of the tools you can use to monitor your nZTA services, see the Tenant Admin Guide.
Manually Configuring Your nZTA Deployment
To set up your nZTA deployment, follow these steps:
Create your user authentication methods, policies, and groups, see Creating User Authentication Services.
Create and deploy your nZTA application Gateways, see Configuring Gateways.
Create your device rules and device policies, see Creating Device Policies and Device Rules
Create your applications and application groups, see Creating Applications and Application Groups
Create a secure access policy for an application and publish this policy to your Gateways, see Creating a Secure Access Policy.