Creating Tenants in the MSP Portal
Introduction
This chapter describes how to use the MSP portal to create and edit tenants. Before you begin, make sure you have the following information for a prospective tenant:
The tenant name
The nSA services required (nZTA and/or ICS), including the maximum potential end-user count required in each case
The subdomain you want to configure for the tenant, in the form
https://<subdomain>.pulsezta.net.The username and email address of a tenant administrator. This is the individual who can login to the nSA Tenant Admin Portal and configure the Secure Access Policies governing access to an organization’s applications and resources.
To learn more about adding new tenants to the MSP portal, see Using the Add New Tenant Workflow. To learn more about editing an existing tenant, see Editing the Details of an Existing Tenant.
Using the Add New Tenant Workflow
To add a new tenant:
Log into nSA as a MSP Admin, see Logging into the MSP Portal.
From the main Dashboard page, activate the Add New Tenant workflow by selecting Add from the All Tenants panel:
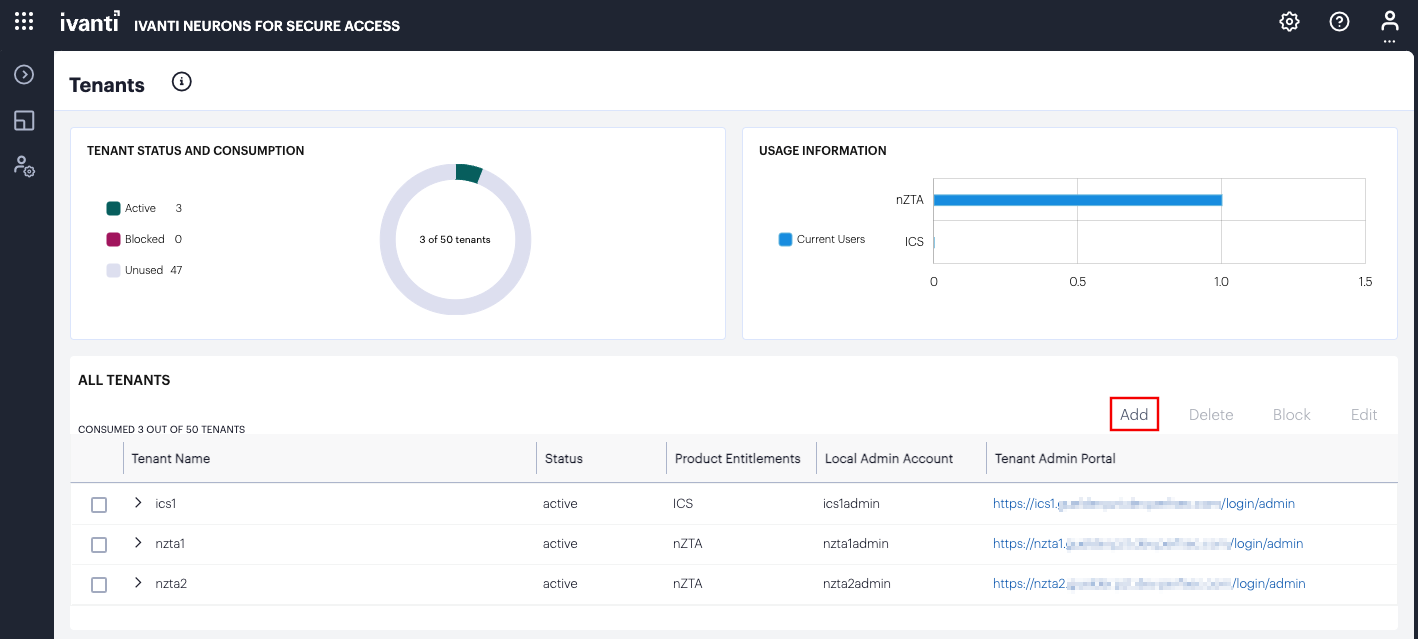
FIGURE 15 Activating the Add New Tenant worflow
The Add New Tenant workflow dialog appears:
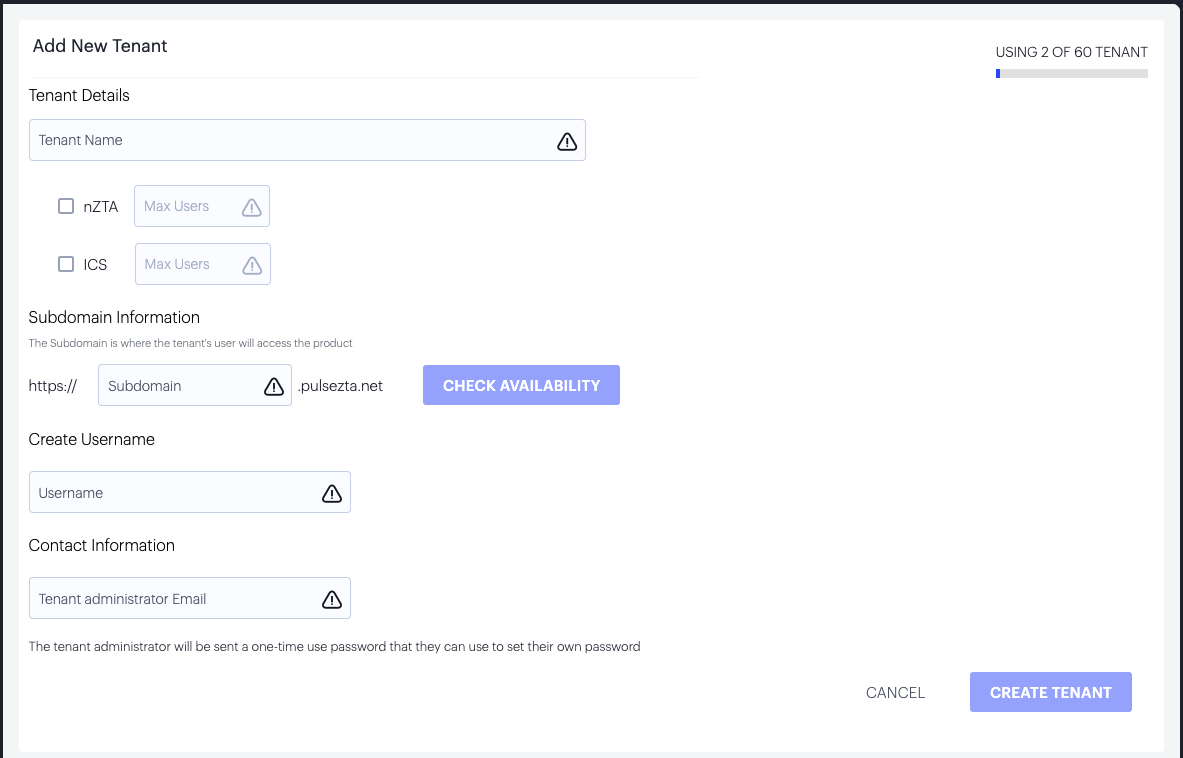
FIGURE 16 The Add New Tenant workflow
In the Tenant Details section:
Enter a tenant name.
Use the checkboxes to select the nSA services to which this tenant is entitled to access.
For each selected service, enter the Max Users allowed to access the service. This is a soft limit that does not restrict additional users from enrolling to the relevant service. Instead, a tenant exceeding this limit receives a warning in the Tenant Admin Portal enabling them to take action without any reduction in service. Furthermore, the MSP Portal dashboard is updated to indicate to a MSP Admin any tenants that have breached their user limit.
In the Subdomain Information section:
Enter the unique Subdomain you want to allocate for this tenant. This forms part of the FQDN to which all users enroll or sign-in their devices.
Your tenant FQDN must be unique and unused. To check the availability of the FQDN, enter the Subdomain and select CHECK AVAILABILITY.
nSA presents an error if the domain is unavailable:
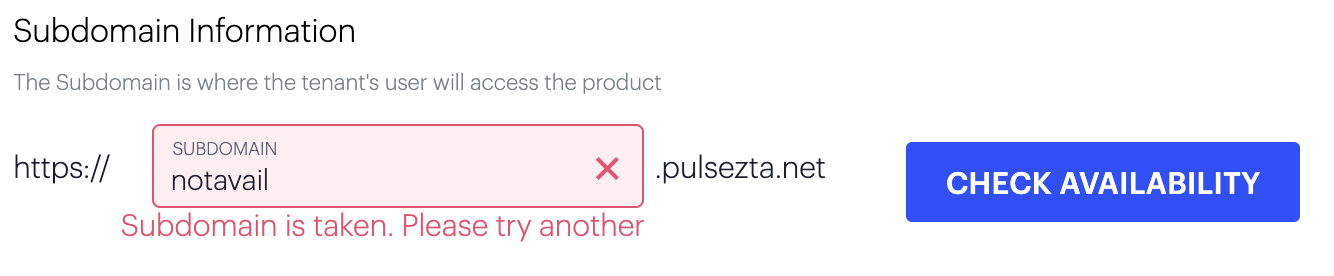
FIGURE 17 nSA showing that the subdomain you specify is not available
In the Create Username* section:
Enter the Username of the initial tenant administrator account.
In the Contact Information section:
Enter the Tenant administrator Email to which you want to send the invitation email. The recipient receives an email containing credentials and a link to login to the default nSA Tenant Admin Portal endpoint (based on the subdomain you specify for this tenant, the default endpoint is
https://<subdomain>.pulsezta.net/login/admin). This includes a one-time use password that must be changed upon login.
Make sure your tenant details are correct. A deployed tenant can only be edited to update basic details - the product entitlement and admin account details are not amendable through the MSP Admin Portal.
Note
A Tenant Admin is entitled to modify their administrative user details at any point through the Tenant Admin Portal. For more details, see the Ivanti Neurons for Secure Access Tenant Admin documentation.
To create the tenant, select Create Tenant.
The Dashboard page reappears and your new tenant is added to the All Tenants list with a status of “Initializing”. After the creation process completes, the status updates to “Active”.
Note
This process can take a few minutes to complete. If your tenant status remains as “Initializing” for some time, contact Ivanti Support for help.
Editing the Details of an Existing Tenant
To edit an existing tenant:
Log into nSA as a MSP Admin, see Logging into the MSP Portal.
From the main Dashboard page, select the checkbox adjacent to a tenant entry in the All Tenants panel, then select Edit:
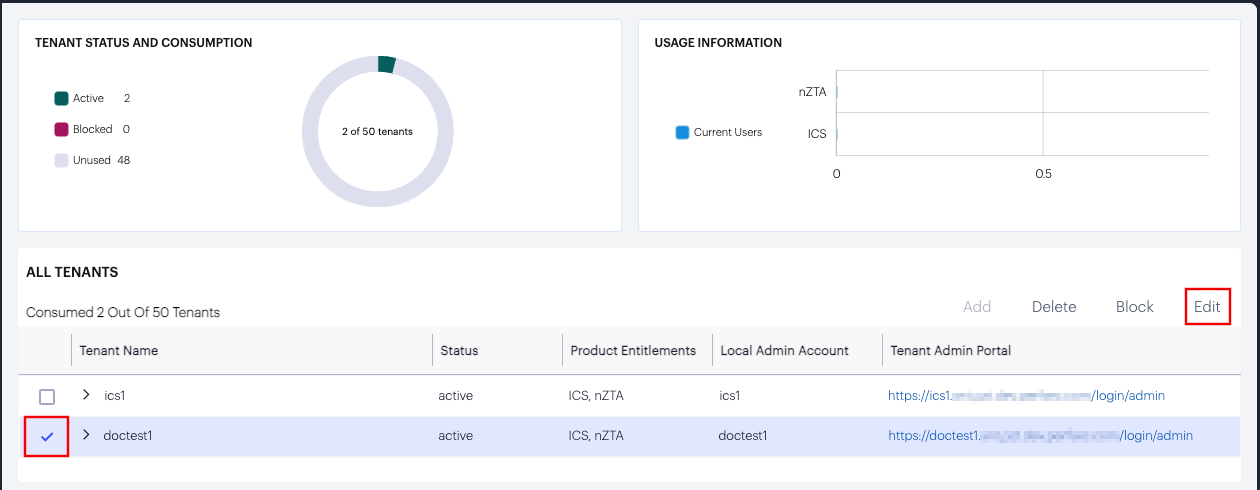
FIGURE 18 Editing a tenant
The Edit Tenant dialog appears:
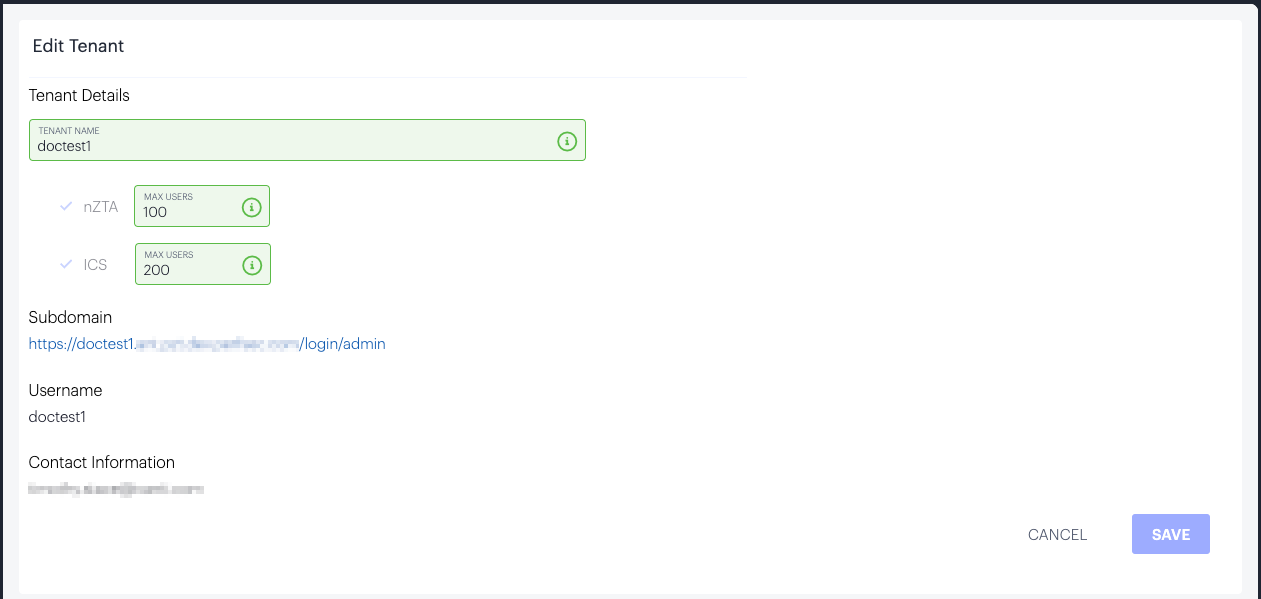
FIGURE 19 The Edit Tenant dialog
In the Tenant Details section, you can edit:
The Tenant Name
The Max Users amount for each service entitlement
Note
You cannot change the remaining details for an existing deployed tenant.
To save your changes, select Save.