Size a Control
Change the size of a form control to a specific size or to match the size of other controls.
Use the Form Editor (accessed from within a Blueprint in CSM Administrator) to define a control's size. For more information on Blueprints, see About Blueprints.
To size a control:
- Open a form in the Form Editor.
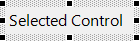
- Select a control.
Hold down Shift while sizing a control to maintain the proper aspect ratio.
Caution: If the Auto-select labels with controls (form menu bar item) and Label tied to control (right-click the label) options are enabled, both the control and label are selected when either item is selected (the control and label are grouped). Use caution when sizing "grouped" controls.
- Do one of the following:
Sizing Method Instructions Manually size a control. Drag a handle (white or black boxes) and release when you reach the desired size.
Auto-size a text control to be exactly the right size to hold all its contained text. Select the Auto-size button
 on the Form Editor toolbar.
 Auto-size is automatically set on the following controls: Check box, Label, Link Label, and Radio button.
Auto-size is useful for expression-driven labels because it automatically resizes the label's bounding box to accommodate dynamic text.
Explicitly size a control to a specified pixel height and width. Right-click the control and select Position and Size (or press Ctrl+Shift+P) to open the Position and Size window. For more information, see Form Editor Behaviors.
Size several Controls to the same width, height, or width and height. Select at least two controls (the last selected control is the controlling control, identified by black handles), and then select a button on the Form Editor toolbar:
- Make Same Width

- Make Same Height

- Make Same Size

Resize an Image control to be its original size. Select the control, and then select the Auto-size button
. - Make Same Width
- Publish the Blueprint to commit the changes, or save the Blueprint to continue making other changes.