Manually Importing and Publishing CVEs
If you prefer, you can create a scheduled task to automatically publish updates associated with CVEs on a regular basis.
Show Me!
A video tutorial is available on this topic. To access the video, click the following link:
Overview
The Common Vulnerabilities and Exposures (CVE) List is a public reference of known cybersecurity vulnerabilities. This list, maintained by the MITRE Corporation (mitre.org), continually changes as new vulnerabilities are detected. If your organization uses the CVE list, it can be difficult to determine exactly which updates you need to publish to protect your machines from the threats identified in the list.
Fortunately, Patch for Configuration Manager simplifies this process. You use a built-in feature to import a list of CVEs. Patch for Configuration Manager will automatically determine which updates are related to each CVE and it will display those updates for your review. You select which updates you want to publish and then use the normal manual publication process.
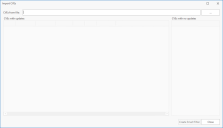
You initiate the import process within the Updates workspace by clicking the Import CVEs toolbar button. On the Import CVEs dialog, use the CVEs from file box to specify the location of your CVE file. The file can be in any text format, such as .txt or .csv.
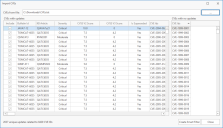
The CVEs will be extracted from the specified file and all updates that are associated with each valid CVE will be identified. CVEs that are not associated with any updates will be displayed in the pane on the right. For example:
If you want to publish updates from multiple CVE files, you should consider combining the files into one before performing the import. Otherwise you will have to repeat the entire Import > Identify > Publish process once for each CVE file.
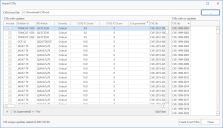
The number of unique updates related to the list of imported CVEs is shown in the lower-left corner. You may choose to publish all of the updates, but it is more likely that you will want to first filter the list. For example, you might not want to publish any update that is superseded. You can click in the Is Superseded column header and use the column filter to show only those updates that have not been superseded. In our example from the previous section, this would narrow the list of unique updates from 2637 to 100.
You can also use the Include check box to further filter the list. Clear the check box for any updates you do not want to publish.
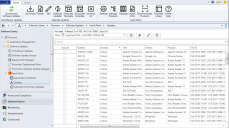
After you have identified which updates you want to publish, click Create Smart Filter. The Import CVEs dialog will close and the selected updates will be shown in the Updates grid. The new filter will be used so that only those updates you selected during the import process will appear in the grid. You can use the new filter like any other filter, including in a composite filter. The CVE ID column will show the IDs associated with each update. For example:
You now use the normal manual publication process to publish the updates.


