Using the Navigation Pane
The following program features are available using either the selection box located at the top of the navigation pane or the shortcut buttons located along the side.
Machine Groups

Machine groups are used to define the machines you want included in a particular scan. Many actions within the program are performed using machine groups. The Machine Groups list contains the following:
- My Machine: A default group consisting of only the console machine.
- My Domain: A default group consisting of the machines in the local domain.
- My Test Machines: A default group that is initially empty. You should add machines to this group that represent a 'smaller' view of your actual network environment and use the group to perform tests.
- Entire Network: A default group consisting of all machines visible on the network.
- My Machine Groups: Contains a list of your custom machine groups. To create a custom machine group, select New > Machine Group.
Agent Policies and Product Level Groups
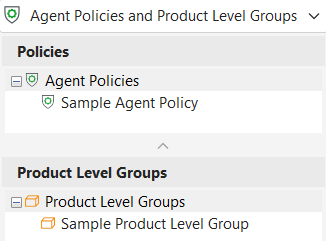
The Agent Policies and Product Level Groups list contains two types of items.
- An agent policy defines exactly what an agent can and cannot do. With Security Controls Agent you can create as many different agent policies as is needed. A policy can be used to scan for missing patches, to determine software and hardware assets, and to perform power state tasks. To create a new agent policy, select New > Agent Policy.
- A product level group is a collection of product levels that you wish to deploy using agents. Product level groups can represent required or mandatory product levels that have been approved for your organization. To create a new group, select New > Product Level Group.
Favorites

A favorite is a collection of machines to scan and a choice of how to scan them. To create a new favorite, select New > Favorite. Select the machine groups you want to scan and then select the desired scan template.
Windows Patching
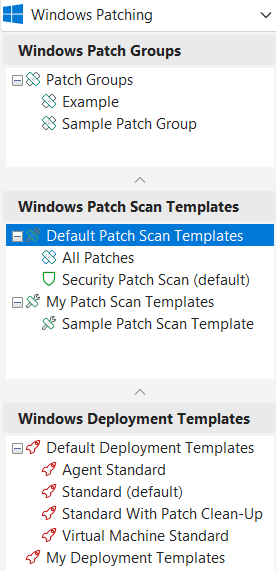
The Windows Patching list contains three types of items.
- A patch group is a collection of patches that you wish to scan for and/or deploy. Patch groups can represent required or mandatory patches that have been approved for your organization. To create a new group, select New > Windows Patch > Patch Group.
- A patch scan template defines exactly how a patch scan will be performed. The available patch scan templates are:
- Security Patch Scan: Scans for missing and installed security patches.
- All Patches: Scans for both security patches and non-security patches.
- A deployment template provides a way to save desired settings for patch deployment and have them quickly available for future deployments. To view the settings for the three default templates, click Agent Standard, Standard, or Virtual Machine Standard. To create a new template, select New > Windows Patch > Deployment Template.
To create your own custom patch scan template, select New > Windows Patch > Patch Scan Template.
Linux Patching
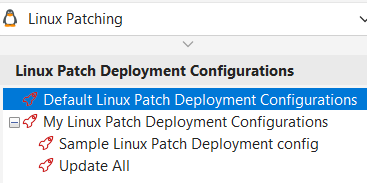
The Linux Patching list relates to the contentless Linux patching method.
- A Linux patch deployment configuration defines how an agent will perform a patch deployment. Whenever a Linux Patch Task runs, it runs a scan for all missing packages and advisories. The predefined configuration, named Update All, specifies that an agent will deploy all missing patches. To create your own custom deployment configuration, select New > Linux Patch > Patch Deployment Configuration.
Linux Patching (Content-Based)
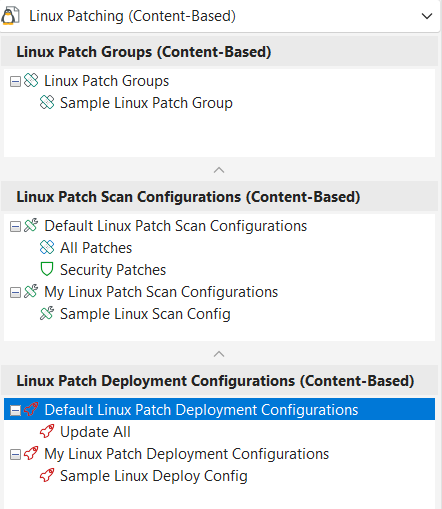
The Linux Patching (Content-Based) list contains three types of items, relating to the content-based Linux patching of earlier releases.
- A patch group is a collection of patches that you wish to scan for and/or deploy. To create a new group, select New > Linux Patch (Content-Based) > Patch Group (Content-Based).
- A Linux patch scan configuration defines how an agent will perform a patch scan. The predefined configurations are:
- All Patches: Specifies that the agent will scan for all patch types. A patch group will not be used.
- Security Patches: Specifies that the agent will scan only for security patches. A patch group will not be used.
- A Linux patch deployment configuration defines how an agent will perform a patch deployment. The predefined configuration, named Update All, specifies that an agent will deploy all missing patches. To create your own custom deployment configuration, select New > Linux Patch (Content-Based) > Patch Deployment Configuration (Content-Based).
To create your own custom patch scan configuration, select New > Linux Patch (Content-Based) > Patch Scan Configuration (Content-Based).
Asset and Operations Templates
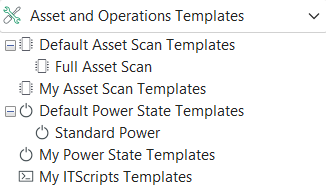
The Asset and Operations Templates list supports the use of a number of different types of templates.
- An asset scan template defines exactly how an asset scan will be performed. The default asset scan template is configured to perform a software and hardware scan.
You can also create your own unique asset scan template by selecting New > Asset Scan Template. - A power state template defines what power management tasks should be performed. The default power state template is named Standard Power and is configured to initiate a restart of the selected machines. It enables a logged on user to extend the reboot in one minute increments up to 10 minutes.
You can also create your own unique power state template by clicking New > Power State Template. - An ITScripts template specifies which script to execute and what parameter values and mode to use when executing the script. You can create an ITScripts template by clicking New > ITScripts Template.
Virtual Inventory
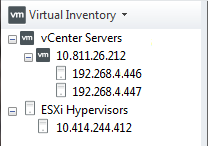
The Virtual Inventory list is used to manage and track the vCenter Servers and the ESXi hosts that are used in your organization. You can use the Virtual Inventory feature to:
- Add vCenter Servers and ESXi hosts to Security Controls
- View basic configuration information about the vCenter Servers and the ESXi hosts
- Perform a patch scan of the managed and unmanaged ESXi hosts
- View the security bulletins that have already been installed on the managed and unmanaged ESXi hosts
- View the security bulletins that are missing on the managed and unmanaged ESXi hosts
- Deploy the patches associated with each missing security bulletin
- Power on and off the virtual machines that reside on your managed and unmanaged ESXi hosts
- Add the virtual machines and virtual machine templates to a new or existing machine group
Results
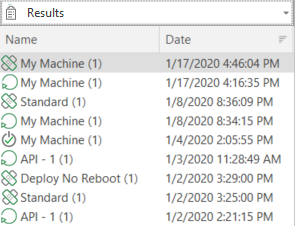
A history of the patch scans, patch deployments, and power status scans that you have performed is available in the Results list. The number of days' worth of items displayed in the Results list is configured using Tools > Options > Display.
To view the results of a scan or deployment, select the desired item. Detailed information about scans will be presented in Scan View and detailed information about deployments will be presented in Deployment Tracker.
You can right-click on an item to either delete it from the list or to rename it. Here's a quicker method for deleting many items at once from any of these lists:
- Select Manage > Database maintenance.
- On the summary screen that appears select the items you want to delete.
- Click Delete Selected.