This page refers to an older version of the product.View the current version of the User Guide.
Understanding the Console
All tasks associated with creating and editing projects, custom keyboards, host profiles, and screens are done through the Velocity Console interface. The application allows you to create custom keyboards with unique layouts and key values, associate specific host profiles with an application, set up customized HTML and CSS templates for individualized themes, and import and translate screen captures into HTML. Once a project is ready for use, you can deploy the project to a .wldep file and distribute it manually or via mobile device management software to devices containing the Velocity Client.
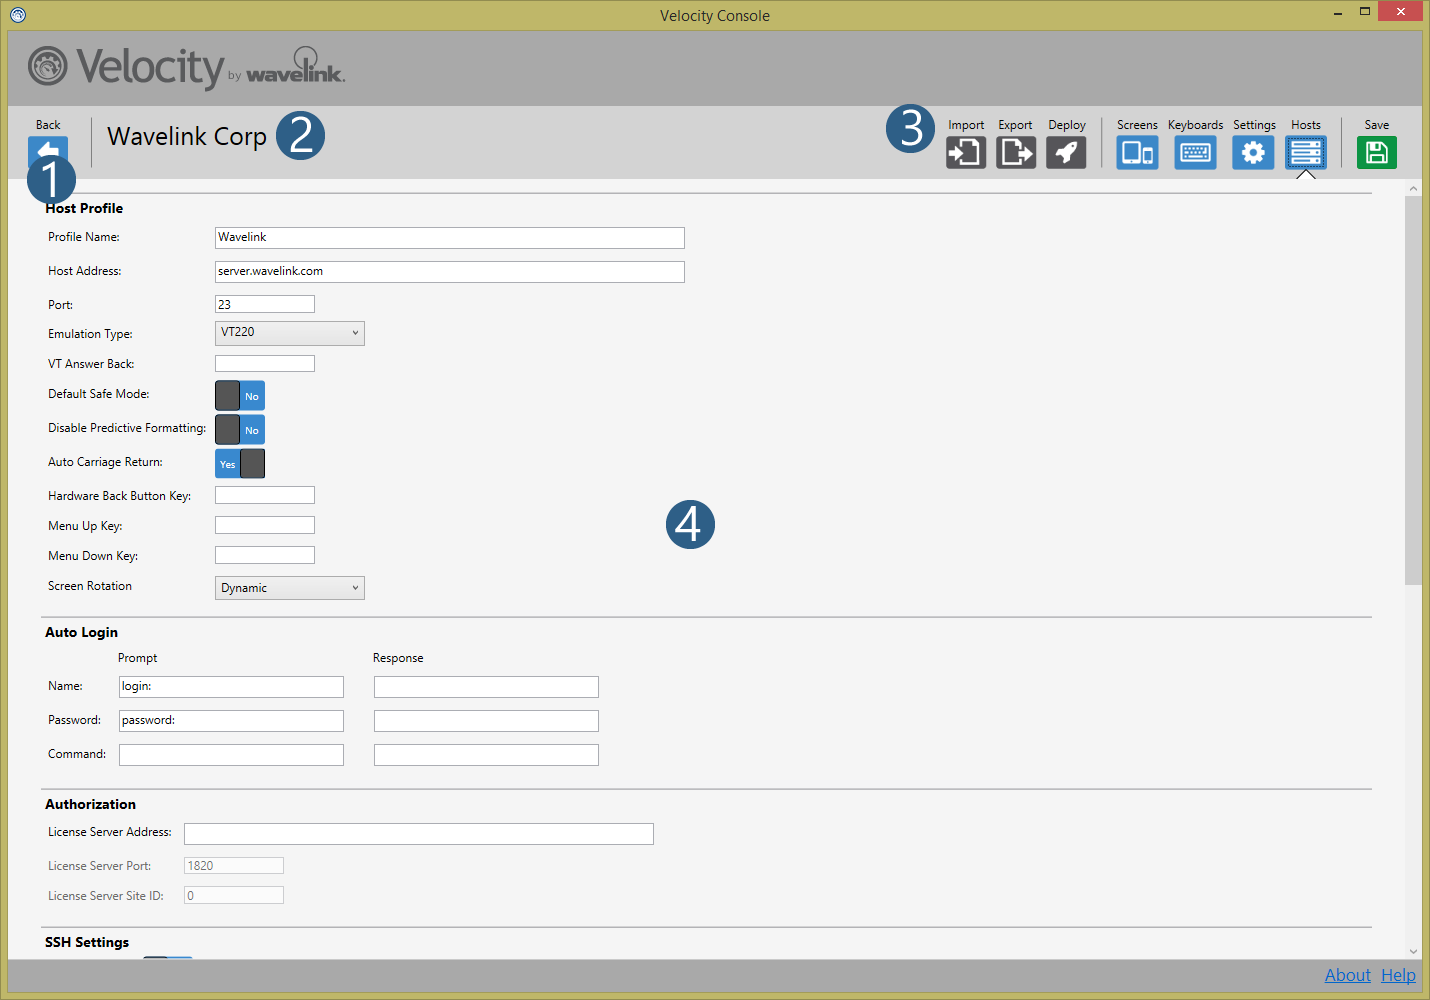
The image above shows the Velocity Console with the numbers corresponding to descriptions of each section below.
1 Back. This closes your existing project and returns you to the initial launch screen, displaying all existing projects on your computer. Prior to exiting the project, the application will prompt you to save, even if no changes have been made to the open project.
2 Project Details. This shows the current project's name and company.
3 Menu. This offers a list of icons for screens and options you can use to create, edit, and distribute a project. Each of the menu items are described further below:
• Import. Import all or parts of another exported project into your current project. For more information, see Importing and Exporting a Project.
• Export. Export all or parts of your project to a .zip file for backups or to import into another project. For more information, see Importing and Exporting a Project.
• Deploy. Allows you to package a project into a .wldep file usable by the Velocity Client on a mobile or Smart device. For more information, see Deploying Projects.
• Screens. Upload .wltsc screens and edit the HTML theme to create a unique and more modern appearance for your users on the Velocity Client. For more information, see Configuring Screens.
• Keyboards. Create multiple custom keyboards with unique layouts and keys for use within your Velocity applications. For more information, see Creating Custom Keyboards.
• Settings. Set Smart device capabilities and create custom themes for screen elements. For more information, see Configuring Project Settings.
• Hosts. Create a host profile to associate with the project. All configurations created in the project are applied to the Velocity Client when accessing this host profile. For more information, see Configuring Host Profiles.
• Save. Preserves the most recent changes to your Velocity project. Clicking on this button automatically saves the project, indicating current save progress by a pop-up screen. For more information about how projects save changes, see Creating and Saving a Project.
4 Workspace. This is where you perform tasks associated with managing a project. All options associated with the selected menu item display here. When you navigate to another screen, any changes you make in the workspace are automatically saved.
For a visual overview of the application and its individual screens, see the video below.
This page refers to an older version of the product.View the current version of the User Guide.
The topic was:
Inaccurate
Incomplete
Not what I expected
Other