This page refers to an older version of the product.View the current version of the User Guide.
Understanding the Keyboard Editor
Creating and editing keyboards is done through the Keyboards tab in the Velocity Console. This tool allows you to directly edit a keyboard within a project, create custom keys for use between multiple keyboards, edit individual key details and values, and import keyboards to another project.
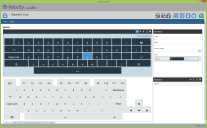
The image above shows the Keyboard Editor console with the numbers corresponding to descriptions of each panel below.
1 Editor panel. Directly edit a keyboard's individual keys to create your own labels, values, and styles. When a specific keyboard is selected from the Keyboards panel, it displays here and can be edited directly. Any changes made to a keyboard from this panel are reflected across all other projects linked to that custom keyboard. For more information, see Editor Panel.
2 Keys panel. Drag and drop keys with predefined labels, values, and styles from this panel onto the Editor panel, or create your own custom keys for use across multiple keyboards. This panel contains all common alphanumeric keys in addition to symbols and some custom keys with special actions. For more information, see Keys Panel.
3 Key Detail panel. Set attributes of individual keys such as labels, values, and styles from this panel. For more information, see Key Details Panel.
4 Keyboards panel. Import additional keyboards or edit other keyboards linked to the project from this panel. For more information, see Keyboards Panel.
For a visual overview of the Keyboard Editor and its individual panels, see the video below.
This page refers to an older version of the product.View the current version of the User Guide.
The topic was:
Inaccurate
Incomplete
Not what I expected
Other
