This page refers to an older version of the product.View the current version of the User Guide.
Keyboards Panel
The Keyboards panel allows you to import, view, and edit custom keyboards from within your project. Importing a custom keyboard only links the file from its current project to your open project. A single keyboard can be linked to and edited in multiple projects.
Within this panel, a keyboard associated with your project can be selected, and then altered in the Editor panel.
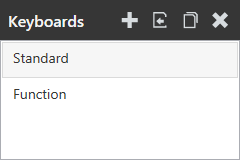
In the top-right corner of this panel you can perform the following actions:
• New. Adds a keyboard as a template to your project. When adding a keyboard you must provide a unique name for the keyboard. Once a name is entered, a custom keyboard is created based on the template and its name appears in the Keyboards panel.
• Import. Imports a local custom keyboard to your project. After adding the keyboard, it appears in the list of keyboards associated with your project. Changing an imported keyboard's name will change its name in any other projects that use the keyboard. If no other projects contain custom keyboards, you cannot import a keyboard.
• Clone. Creates a copy of the selected keyboard with a new name. This option is recommended when making changes to a custom keyboard used in other projects that you don't want to affect.
• Delete. Removes the active link to the keyboard from the project. You can also remove a keyboard from your project by navigating to Edit > Remove Keyboard. To delete a keyboard permanently, you must navigate to [User documents folder]\AppData\Local\Velocity Console\KeyboardEditor\Library\KeyboardLibrary.xml, open the file, and delete all text for that keyboard between the <layout></layout> tags that contain the name of your keyboard.
Keyboards appear in the order they are created. When a keyboard bundle is exported and used within the Wavelink Terminal Emulation Client, users can swipe left or right through all keyboards associated with the project. The order of the keyboards within the Velocity Client is based their order in this panel.
To change the order of your keyboards, click Edit > Reorder Keyboards. The Reorder Keyboards dialog appears. Drag and drop the title of the keyboard you want to move within the list of keyboards. This new order will be reflected within the Terminal Emulation client when device users swipe between keyboards.
This page refers to an older version of the product.View the current version of the User Guide.
The topic was:
Inaccurate
Incomplete
Not what I expected
Other