Creating a query
This section describes how to create a basic query; information about adding groups and criteria, and configuring the appearance of the query output are described later.
You can modify existing queries either from within Query and Report Designer, or from the query results list using the Modify Query action. You can either overwrite your original query or save a new copy with a different name.
To create a new query:
- On the Actions list, click New Query.
The New Query dialog appears. - In the Details group box, type a Title and Description for the query.
- In the Module list, select the required module, for example, Change Management.
- In the Business object list, select the business object that you want to base the query on.
- If required, in the Group list, select the shortcut group to which you want to add the query.
- Select the relevant option button to specify whether the query is available to everyone, or is available just to you.
For information about system-wide queries, see System queries.
- Click OK.
The Attributes & Preview page appears. By default, the attributes selected in the Results Attributes Settings user interface property for the object in Object Designer are automatically added to the query. For more information, see User interface properties.
In addition to attributes from the business object, you can add related attributes. For example, if you are creating a Change query, you select the Change business object. In the Attributes tree, you will see the attributes for that business object as well as all related business objects, for example, Asset, User and so on.
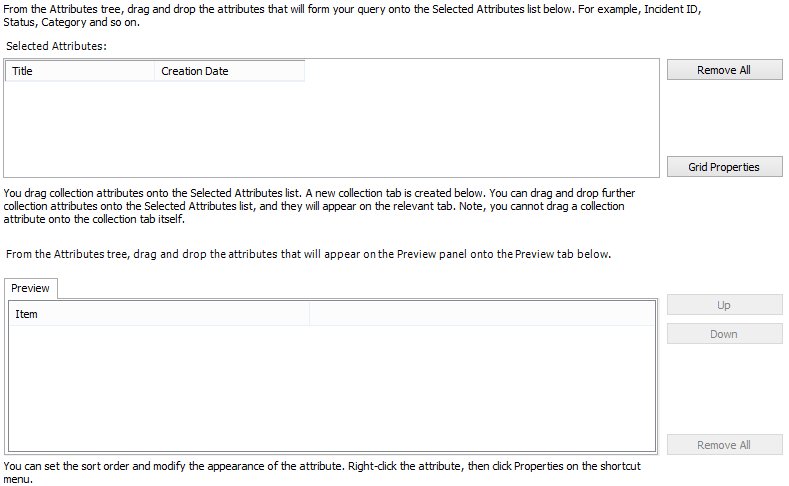
- From the Attributes tree, drag the attributes that will form your query onto the Selected Attributes list. Alternatively, you can double-click the attribute to add it to the Selected Attributes list.
To select multiple attributes to drag onto the Selected Attributes list, hold CTRL while selecting the attributes from the tree.
To remove attributes from the Selected Attributes list, right-click the required attribute, then click Remove.
To change the order of the columns that appear in the list panel, select the column, then drag it to the required position (end-users can change the order of the columns when they run the query by holding SHIFT, then dragging the column header).
To modify the properties of an attribute, such as its sort order, right-click it then click Properties. For information about modifying the properties of an attribute, for example, specifying whether it is a color field, the label of the attribute and so on, see Configuring the List panel.
- Drag the required attributes from the collections in the same way.
When you drag an attribute from a collection onto the Selected Attributes list, if it is the first attribute you have selected from that collection, a new tab is created alongside the Preview tab. You can drag further collection attributes onto the Selected Attributes list, and they will appear on the relevant tab. Note, you cannot drag a collection attribute onto the collection tab itself. If you want to remove a collection attribute, right-click it, then click Remove.
When you run the query, these collection attributes appear in separate tabs in the Preview pane.
For more information about collections, see Collections.
- From the Attributes tree, drag the attributes that will appear in the Preview panel onto the Preview tab.
For more information about configuring the appearance of the Preview panel, see Configuring the Preview panel.
To preview the appearance of the query, click Test Query. To end the test, click End Test.
- Click Next.
The Grouping page appears.
For information about query grouping, see Adding grouping to query results.
- Click Next.
The Criteria page appears.
For more information about adding criteria to a query, see Query criteria.
- Click Next.
The General Settings page appears.
For information about the General Settings page, see Configuring the general settings for the query.
- Make the required changes, then click Finish.
The Save Query dialog appears. - Click Yes to save the changes you have made.
You can delete a query if it is no longer needed, using the Delete Query action.