Edge Intelligence
Edge Intelligence gives you real-time insights, as well as remediation and alerting capabilities for your environment. Data is retrieved from devices in real-time, at the moment you request it.
You can enter your questions as you would ask them—for example, "show me the firewall status." Alternatively, there are several predefined queries available, related to Security, Health, and Inventory.
A selection of these queries can also be run against a device you selected from the Devices page. See also Device details.
After installing the Ivanti Neurons Agent with the Edge Intelligence capability enabled on a device, it will start responding to queries. For details about installing the agent, see Ivanti Neurons Agent.
Some of the features in Edge Intelligence, for example performing actions or setting alerts, are available only to users with the appropriate role.
For information about managing roles, see Roles.
You can access Edge Intelligence from the menu, at Insights > Edge Intelligence.
Landingpage
By default, and depending on settings, when you go to Edge Intelligence, the Agent Overview opens with a map displaying the locations of the agents in your environment. The map is updated when you select a predefined target (see Targeting, below).
In the top-right of the map, select the X to close the map and display the list of available predefined queries. Deselect the option Show as landingpage to skip the Agent Overview when you access Edge Intelligence.
If you have previously deselected Show as landingpage but want to enable the option again, click on the section that lists how many agents are online (xx / yy online) to the right of the Edge Intelligence query field.
Targeting

At the top right of the screen, you can select a predefined Target group, Target devices, and Target device groups, to limit queries to a subset of the endpoints in your environment.
 Target groups are a predefined group of devices configured in Edge Intelligence. For more information on configuring predefined target groups, see Targeting.
 Target devices are not predefined; instead, it is a list of devices known in Edge Intelligence that can be used as a target.
The counter for number of online endpoints changes depending on the selected predefined target group. All queries will be limited to the endpoints in the target if the target is selected. If a query was executed while a target was selected, the query widget displays the target name in its title.
To change the target that is applied to a widget, click ![]() to open the Set (parameters and) targeting window.
to open the Set (parameters and) targeting window.
For more information about setting parameters and targeting, see below at ![]() .
.
Geographic area filter
Use ![]() to select a geographic area on the map of the Edge Intelligence landingpage and use it as a filter for follow-up queries.
to select a geographic area on the map of the Edge Intelligence landingpage and use it as a filter for follow-up queries.
Location data
If you do not want to display agent location data, you can disable the location sensor in one or more Edge Intelligence Configurations that you apply using Agent Policies.
For more information, see Create a Configuration and Agent Policies.
Query widgets
The response to your query is displayed in a widget.

Click on a result label listed above the chart (e.g. Enabled in the image above) to toggle between hiding or showing the related results.
Click on a result category in the chart (e.g. Domain in the image above) to go to the list view, filtered for that category.
Query widgets retain the targeting that was set when they were first run, until you change it. See below at ![]() .
.
Depending on the widget, the following controls may be available. Some controls are only available from the list view.
-
 – Toggle between chart and list view. By default, most widgets open as a chart. Switch to the list view to see the results in more detail.
The list view also enables you to initiate actions to solve an issue you identified from the query results. For example, if the results show a device with a disabled firewall, you might use an action to enable the firewall. For details about using actions, see Edge Intelligence actions. -
 – Enable alerting. You can configure alerts based on real-time events. Alerts can also trigger one or more actions. For example, Edge Intelligence can initiate the Cleanup disk action if free disk space on drive C: drops below 10%. For details about using actions, see Alert actions.
For an overview of configured alerts, click in the Edge Intelligence search field.
-
 – Repeat the query for all currently connected endpoints.
 -
 – Define the parameters ("which query will run on the endpoints") and/or targeting ("on which endpoints will the query run") for the query. Some parameters are mandatory.
Targeting consists of selecting a predefined target group from the drop-down list (if available) and/or setting targeting conditions on the query.The relation between the predefined target group and each of the targeting conditions you set on the query is AND. You can therefore set up targeting so it does not contain any endpoints by definition.
Example:
The predefined target group has the condition 'Domain equals IVANTI', and you add the condition 'Domain equals LANDESK'.If there are parameters or targeting defined for a query, this is indicated by a badge on the icon:

When you set a query as a favorite, its parameters and target are preserved.For more information about creating predefined targets, see Targeting.
-
 – On some map-based widgets, you can define a geo target by drawing a rectangle over the desired area. A message is displayed, indicating that a filter is in effect:
To reset the filter, click at the end of the message.
 -
 – Pin a query to gather results for 24 hours. Because Edge Intelligence uses real-time information, it can only return data from agents that are online at the time the query is sent. By pinning your query, Edge Intelligence will gather responses to your query from agents that come online for a period of 24 hours.
 -
 – Copy the results that are displayed on the current page of the widget.
 -
 – Export query results to CSV. The results (up to 150.000 lines) are exported to a CSV file, which is then downloaded to your computer. Note that the export includes only results that are available at the moment the export button is selected.
 -
 – Use the current selection of agents as a filter for other queries. This allows you to limit additional investigation or remediation to a subset of devices.
When you set a query as a favorite, filters are not preserved. Example
Using the Event Log Summary query, you have identified that event ID 7034 may be causing problems on several devices and want to investigate further.
- In the Event Log Summary widget, use Search to limit the results to devices where this event was logged:

- Click to set the list of devices in the results as the filter for other queries. A message is displayed, indicating that a filter is in effect:

In the example above:
93 indicates the number of devices after applying the filter.
Event Log Summary is the query from where the filter was set.
7034 is the search phrase that was used to define the filter. - Any Edge Intelligence query you perform will only be applied to the resulting devices, in this example to the 93 devices mentioned in step 2.
Similarly, any Edge Intelligence action you select will only be applied to these devices.
To add filter criteria, click
after performing additional queries from the same widget or from other Edge Intelligence widgets.
To reset the filter, click at the end of the message indicating that a filter is active. - In the Event Log Summary widget, use Search to limit the results to devices where this event was logged:
-
 - Apply a filter to the column. Currently no filter has been applied to the column.
 -
 - Edit column filters.
 -
 - This drop-down menu displays following icons:
 -
 - Clear all column filters.
 -
 - Use Column Chooser to edit table columns. This allows you to add, remove, and reorder columns as per your preference. Once you click the column chooser, the column chooser pane appears. You can see various devices’ metadata, such as operating system, platform, location (split in country, region, city), IP address, etc. Column chooser pane displays the following options:
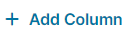 - Once you click Add Column, the column field appears. Select the drop-down to choose the metadata as per your preference.
 -Drag and drop to rearrange the columns.
 - Remove columns.
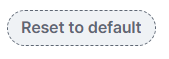 - Once you select Reset to default, it resets your changes to default columns.
 - Select Save to save your changes. The changes will be saved as per individual user so that when you log in again, you can easily re-execute the query with the changes already applied.

Favorite queries
To create a set of favorite queries, use the ![]() icon next to the query widget title. This adds the query to the favorites, preserving its current parameters and targeting (see above).
icon next to the query widget title. This adds the query to the favorites, preserving its current parameters and targeting (see above).
- You can specify a custom name to indicate what the query will return, for example 'Local Admin Users Engineering' or 'Missing Critical Patches'. If you selected a predefined target, the name of the target is used in the suggested name.
- You can store a favorite query as Private (available only to you), or as Shared (available to all members with access to Edge Intelligence).
You must have a role with Edge Intelligence > Configure permissions to create, edit and delete shared favorites. Shared favorites are available to all members with Edge Intelligence > Default Access permissions.
For more information about Roles and Permissions, see Access Control. - You can add multiple instances of a query to the favorites.
Favorite queries are listed in a separate section, displayed above the default queries.
Edit a favorite query
You can make different sorts of edits to an existing favorite query.
Change only the name, make 'Private' or 'Shared'
To change the custom name of a favorite query:
- Open the favorite query by clicking its link.
- In the widget that opens, click
, indicating that the query is stored as a favorite") next to the widget title to update the favorite.
next to the widget title to update the favorite.If the heart icon is colored black instead of red, you are viewing a shared favorite query and do not have the required permissions to edit the query.
- In the window that opens, change the name of the favorite.
If you have the required permissions, you can also change if the favorite is stored as a Private or a Shared favorite query. - Save your changes.
All changes
To make any change to a favorite query, including its name and whether it is Private or Shared:
- Open the favorite query by clicking its link.
- In the widget that opens, make the desired changes.
When you change query parameters or targeting, the heart icon changes back to its base state (, indicating that the query is currently not a favorite.") ).
). - Click the heart icon ( or , depending on your previous actions) next to the widget title to specify the name and save the favorite.
If you have the required permissions, you can also change if the favorite is stored as a Private or a Shared favorite query.If the heart icon is colored black instead of red, you are viewing a shared favorite query and do not have the required permissions to edit the query.
To use the shared favorite query as the basis for a personal query, first change a query parameter or its targeting. The heart will now change back to its base state (). - Save your changes.
This actually saves a new favorite query. If the old version of the query is obsolete, delete it.