Enrolling Mobile/Desktop Clients
Introduction
After you have created the required configuration for your Ivanti Neurons for Zero Trust Access (nZTA) service, you can begin to enroll your end user devices.
To see which devices have been enrolled, and to perform certain actions on enrolled devices, use the Enrolled Devices page. For more details, see Viewing Currently Enrolled User Devices.
Note
For security reasons, only the authorized user account used to enroll a device is subsequently permitted to sign-in to nZTA on that device.
The following desktop and mobile device types are supported:
Ivanti Secure Access Client on Windows OS desktop, see Enrolling a Windows Desktop Device.
Ivanti Secure Access Client on macOS desktop, see Enrolling a macOS Desktop Device.
Ivanti Secure Access Client on Linux desktop, see Enrolling a Linux Desktop Device.
Ivanti Secure Access Client on iOS mobile device, see Enrolling an iOS Mobile Device.
Ivanti Secure Access Client on Android mobile device, see Enrolling an Android Mobile Device.
The table below summarizes feature support for each device type:
Feature |
iOS |
Android |
macOS |
Windows |
Linux |
|---|---|---|---|---|---|
On-Demand Connection |
Yes |
Yes |
Yes |
Yes |
No |
End User Portal |
No |
No |
Yes |
Yes |
Yes (SSO,RDP,SSH not supported) |
SAML Auto Sign-in & Single Logout (SLO) |
No |
No |
Yes |
Yes |
Yes |
Simultaneous Connection |
No |
No |
Yes |
Yes |
No |
Automatic Ivanti Secure Access Client Upgrade |
Yes |
Yes |
Yes |
Yes |
No |
Browser-Based Enrollment |
No |
No |
Yes |
Yes |
No |
Dynamic Policy/CARTA |
No |
No |
Yes |
Yes |
Yes (CARTA message is not supported) |
Device Policy |
Yes |
Yes |
Yes |
Yes |
Yes (limited to support for File, Port number, and Process policy types) |
FQDN/IP based Application |
Yes |
Yes |
Yes |
Yes |
Yes (Split DNS is not supported) |
Client Disconnect |
Yes |
Yes |
Yes |
Yes |
Yes |
Log Upload |
Yes |
Yes |
Yes |
Yes |
No |
nZTA Client Settings |
No |
No |
Yes |
Yes |
No |
CNAME FQDN App |
Yes |
Yes |
Yes |
Yes |
No |
Application Discovery Default Gateway |
Yes |
Yes |
Yes |
Yes |
No |
GSLB Support |
Yes |
Yes |
Yes |
Yes |
No |
Customer PKI support (BYOC) |
No |
No |
Yes |
Yes |
No |
Multiple sign-in URL support |
Yes |
Yes |
Yes |
Yes |
Yes |
After a device is enrolled with nZTA, requests from each application are handled by the Gateway referenced in the secure access policy for the application.
A default Gateway can also be configured on the Controller, which handles requests from all applications that are not referenced by a secure access policy, see Using Application Discovery with Ivanti Secure Access Client.
Viewing Currently Enrolled User Devices
You can view a list of the user devices currently enrolled with the Controller through the Tenant Admin Portal.
To view currently enrolled user devices:
Log into the Tenant Admin Portal.
Click Secure Access > Manage Devices > Device Configuration.
The Device Configuration page appears.
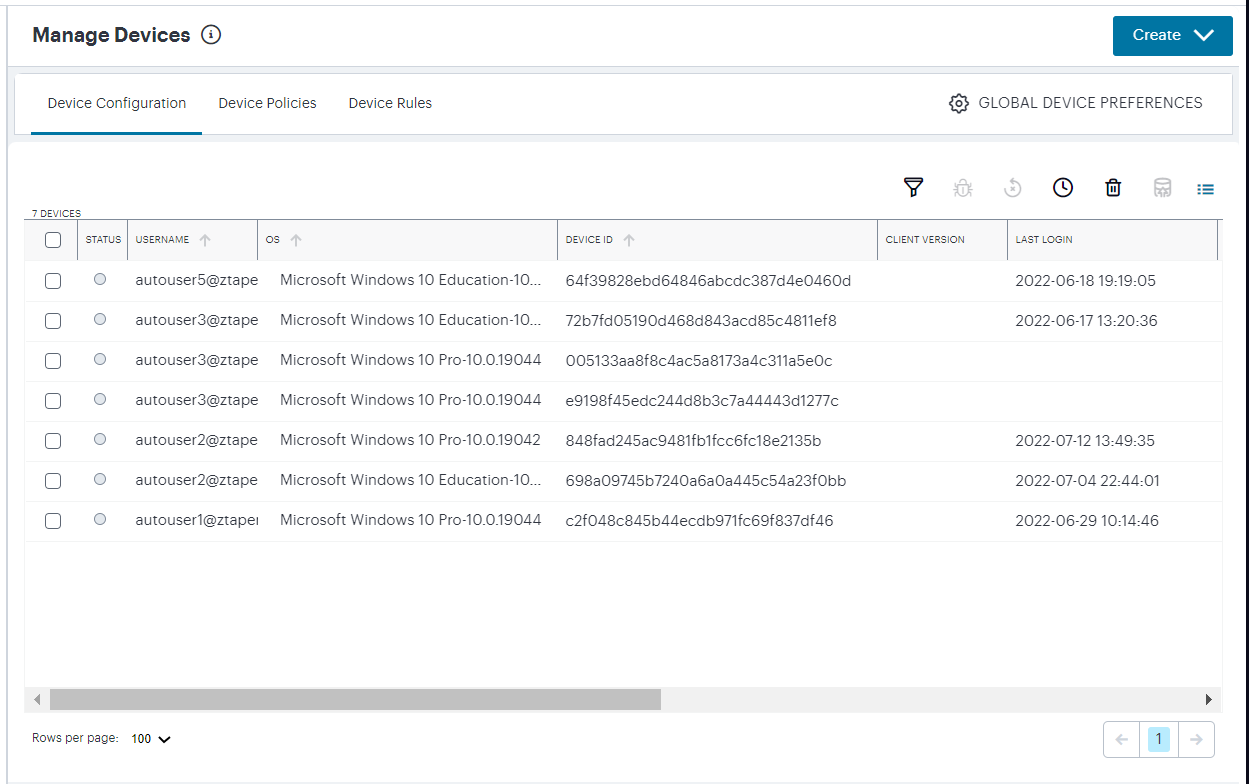
FIGURE 201 Enrolled user device list
Use this page to:
View information concerning the devices your users have enrolled to your nZTA service.
Unenroll inactive devices.
Unenroll selected devices.
Upload Ivanti Secure Access Client log files from selected devices to the Controller for analysis, see Uploading Client Logs to the Controller.
If you click within a specific row from the table of devices, nZTA displays an info-panel providing further details:
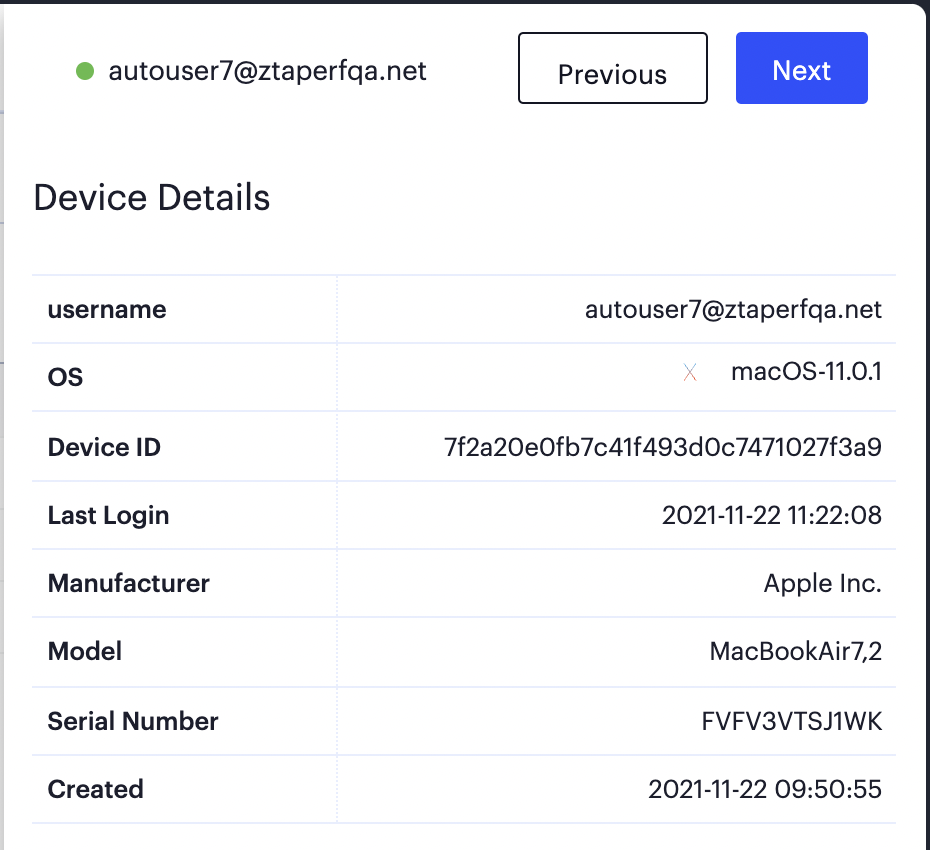
FIGURE 202 Enrolled user device info-panel
Click a row in the table to hide the info-panel.
To force-unenroll all inactive devices, click the following icon:
FIGURE 203 Unenroll inactive devices
Then, in the Unenroll Devices dialog, select an inactivity duration and click UNENROLL. All devices that have been inactive for the selected period are un-enrolled.
To unenroll selected devices from the list regardless of activity, tick the checkbox in the row for one or more chosen devices and then click the following icon:
FIGURE 204 Unenroll selected devices
To automatically unenroll inactive devices after a set time period, click the following icon:
FIGURE 205 Unenroll selected devices automatically after a period of inactivity
Then, in the Unenroll devices automatically dialog, select an inactivity duration and click Save. All devices that reach this duration limit without being logged-in are automatically unenrolled. To disable the automatic unenroll mechanism, enable Disable Unenroll Devices.
Uploading Client Logs to the Controller
To help Ivanti Technical Support teams troubleshoot and debug any issues your end user devices have when connecting to your nZTA services, you can upload logs from connected devices to the Controller for analysis. This process can be initiated remotely from the nZTA Tenant Admin portal, or from the Ivanti Secure Access Client application installed on the device.
Client connection logs are stored securely in the Controller and cannot be accessed by unauthorized users. To obtain the logs, your device must be in a connected state.
Note
Upload of client logs is not currently supported on Ivanti Secure Access Client Linux variants.
To upload Ivanti Secure Access Client logs for an enrolled device from the nZTA Tenant Admin Portal:
Log into the Tenant Admin Portal.
Click Secure Access > Devices > Enrolled Devices.
The Enrolled Devices page appears.
From the list of enrolled devices, tick the checkbox in the row for your selected device and click the following icon:

FIGURE 206 Upload client logs for the selected device
Note
Devices running Ivanti Secure Access Client versions released earlier than nZTA 20.11 do not have the upload capability and cannot respond to this feature.
Note
If your device is enrolled, but not connected, an error message is displayed “User session is not found”.
nZTA displays a confirmation dialog showing the details of the task:
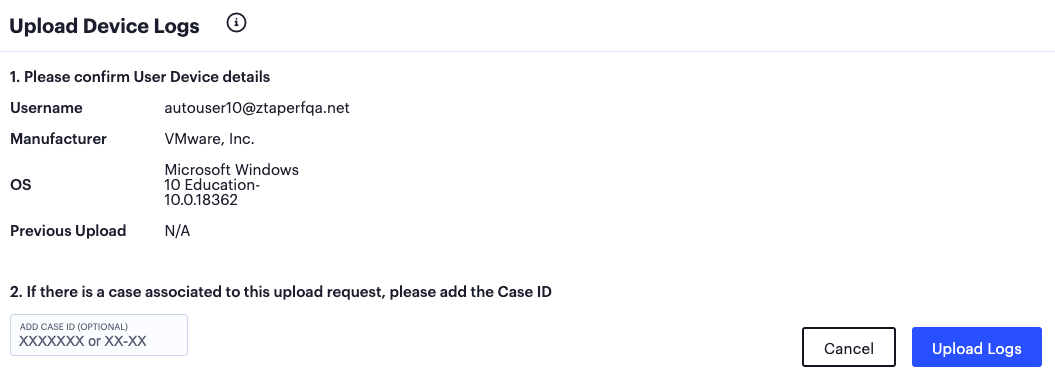
FIGURE 207 Confirming upload of the selected client logs
Confirm the details in section 1 and provide the optional case ID (if instructed to do so by your support representative) in section 2.
To initiate the upload process, click Upload Logs.
The upload process begins.
A log upload status section is added to the info-panel for that device. This shows the progress of the upload and includes a timestamp of the last upload:
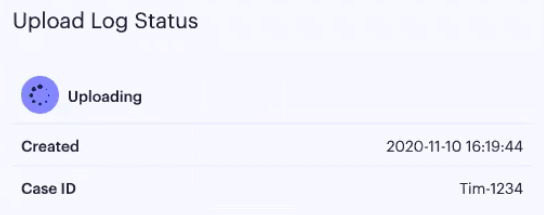
FIGURE 208 Uploaded log status for a device - in progress
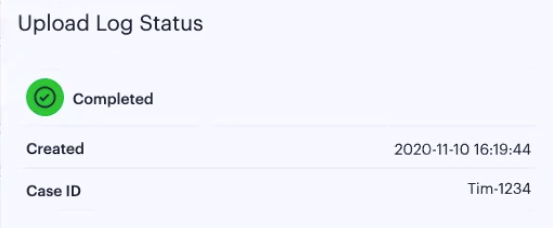
FIGURE 209 Uploaded log status for a device - complete
To upload logs from the end user device:
On the end user device, open the Ivanti Secure Access Client application.
In the Ivanti Secure Access Client application, use the Upload facility in the Logs sub-menu.
For example:
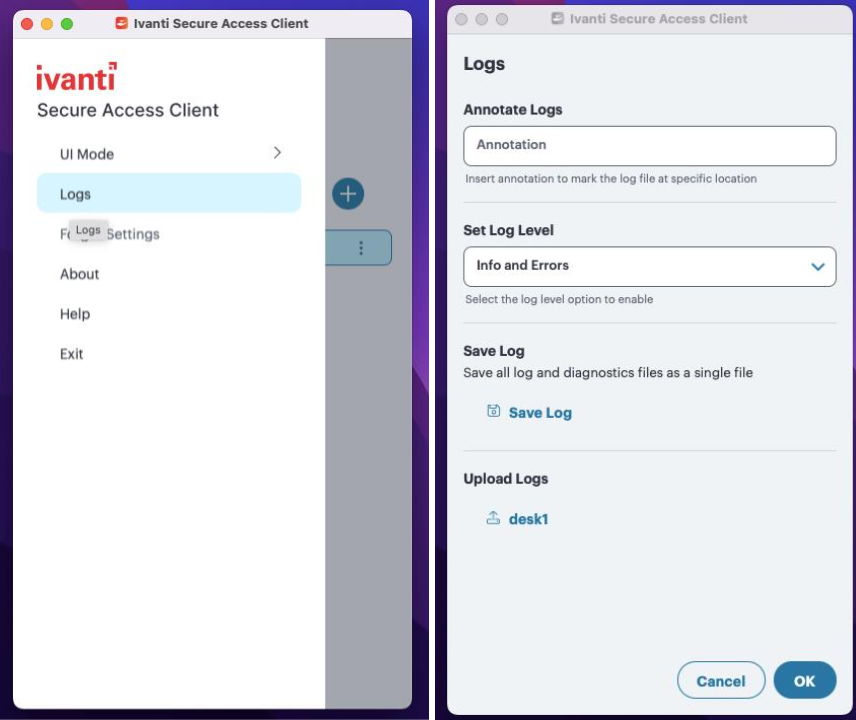
FIGURE 210 Uploading logs
Note
The log upload facility within Ivanti Secure Access Client requires the device to be enrolled with the Controller. However, a user can initiate a log upload in both connected and disconnected states.
Setting Global Device Preferences
nZTA enables a system administrator to configure settings that control and restrict the functionality available in Ivanti Secure Access Client when a user enrolls their device with the Controller. Using the settings provided, you can control if your users are able to perform functions inside the Ivanti Secure Access Client application such as adding or removing connections, disconnecting from the Controller, or exiting the application completely.
Changes are replicated out to your end user devices at the point they next connect to the Controller.
Note
To take advantage of the restriction settings described in this section, your users must be running the Ivanti Secure Access Client version applicable to nZTA 20.12 or later. To learn more about supported software versions, see the Release Notes.
Note
These setting affect Windows and macOS desktop clients only. Ivanti Secure Access Client Linux variants are currently not supported.
To configure Ivanti Secure Access Client settings for your user’s devices:
Log into the Tenant Admin Portal.
Click Secure Access > Manage Devices.
Click the Global Device Preferences tab.

FIGURE 211 Configuring Global Device Preferences
Through this page, you can configure the following settings for Ivanti Secure Access Client on your end-user devices:
Setting |
Category |
Default Value |
Description |
|---|---|---|---|
Enrollment URL |
Enrollment |
None |
A tenant-specific end-user enrollment URL. This setting is read-only, and can be used to inform your users of the correct nZTA enrollment URL. |
Override Classic VPN (PCS/PPS) Settings |
Enrollment |
No |
If your users use Ivanti Secure Access Client to simultaneously connect to classic VPN products from Ivanti, such as PCS or PPS, enable this setting to allow nZTA settings on this page to take precedence over any equivalent settings configured by the classic VPN. If you disable this option, Ivanti Secure Access Client functionality is determined by the classic VPN product you are connected to. |
Restrict Settings for Non-Admin Users Only |
Enrollment |
No |
By default, Application Control and Connection Control settings are enforced for all users. Enable this setting to apply the restrictions on this page to non-admin client device users only. Admin users are unaffected. For example, with this setting enabled, if Allow DISCONNECT connection is set to “No”, a non-admin user is not allowed to disconnect a nZTA connection in the Ivanti Secure Access Client application whereas an admin user retains this capability. |
Start With Splash Screen |
Application Control |
Yes |
Display the splash screen when launching the Ivanti Secure Access Client application. |
Disallow Pulse Application Exit |
Application Control |
No |
Prevent the end user from exiting the Ivanti Secure Access Client application. |
Enable Browser Extension |
Application Control |
Yes |
This enables PSAL to follow browser extension path. Chrome/Edge browser extension to install and launch the Ivanti Secure Access Client. |
Allow Add New Connection |
Connection control |
Yes |
Allow the end user to add new connections in Ivanti Secure Access Client. |
Allow Delete Connection |
Connection control |
Yes |
Allow the end user to delete connections in Ivanti Secure Access Client. |
Allow Disconnect Connection |
Connection Control |
Yes |
Allow the end user to disconnect a nZTA connection in Ivanti Secure Access Client. |
Save User Credentials |
Connection Control |
No |
By default, users cannot save and re-use their username and password credentials with a nZTA connection. Enable this setting to allow credentials to be saved. |
Enable Always on Mode |
Always on and Lock Down Mode |
No |
Always-on Mode allows the Ivanti Secure Access Client to establish a connection that is always active. The feature restricts the users to manually connect/disconnect ZTA connection. |
Enable Lock Down Mode |
Always on and Lock Down Mode |
No |
If the tunnel is disconnected, for any reason, the machine has limited connectivity (only traffic allowed with exception rules) required to re-establish the tunnel. Always-ON mode with Lockdown mode enabled denies all network traffic until connected via nZTA connection. Exemption rules can be setup to allow network traffic. |
Configuring Lock Down Mode
To enable Lock down this connection option, follow the below steps:
Select Secure Access > Manage Devices > Global Device Preferences.
Select Enable Always ON mode and Enable LockDown Mode option.
Click View Exceptions. When Always-on mode feature with Lockdown mode is enabled, Admin can add more exceptions to the Core Access Rules using exception rules. Exceptions already configured in the client are called Core Access Rules. DHCP, DNS, Kerberos, LDAP, SMP and Portmapper are already configured as Core Access Rules in the client. Exception rules can be configured to exempt certain types of traffic.
Click Add to add exception.
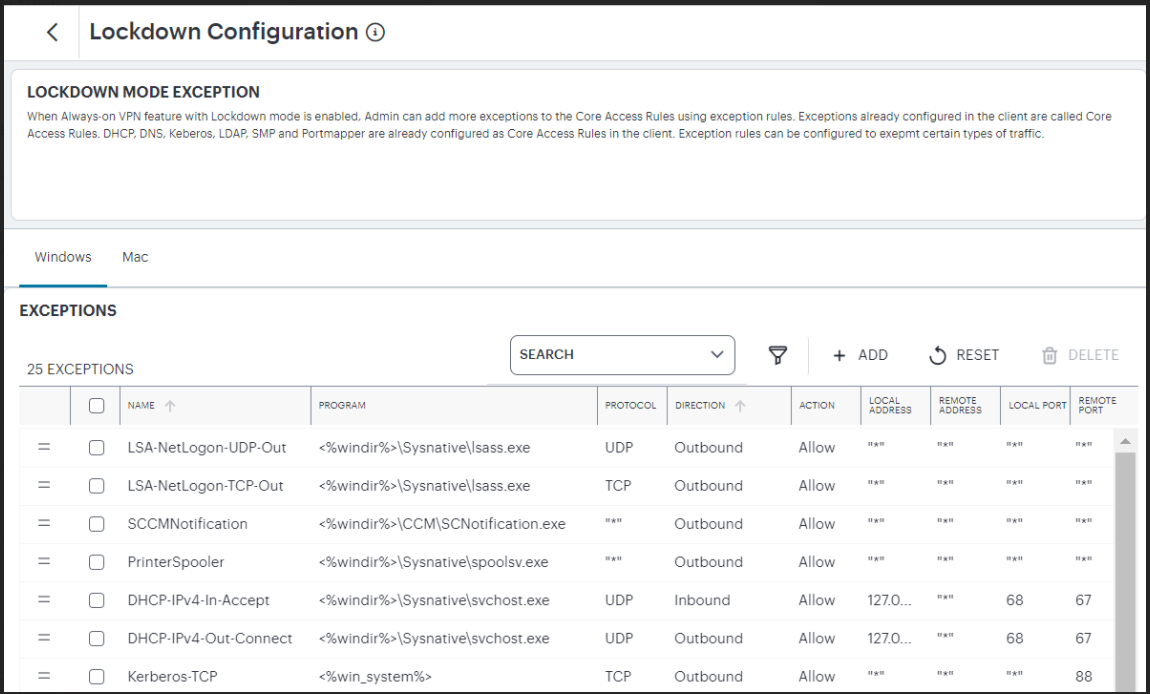
FIGURE 212 Lock Down configuration
Select the Platform (Windows/Mac).
Enter the exception Name and Description.
Select the type:
Program
Port
Custom
Select the traffic type.
Inbound traffic is always directed towards user’s machine.
Outbound traffic is always directed towards outside the machine.
Select Allow or Deny actions to configure the exception rules.
Click Add Exception.
Downloading Device Preferences for use with an External Service
nZTA provides the facility to download a file containing the device preferences and settings on the Global Device Preferences tab, in JSON format, for use with external Mobile Device Management (MDM) and Mobile Application Management (MAM) services, such as Microsoft Intune or Jamf (for Apple devices). This can be useful in enabling your end-users to receive the Ivanti Secure Access Client package from your MDM/MAM service along with preset configuration representing your specific enrollment details. Thus, your end-users need not perform post-installation configuration of Ivanti Secure Access Client, and can instead connect straight to the nZTA service.
To download the device preferences file, use the Download icon at the top of the page:

FIGURE 213 Downloading Global Device Preferences as a JSON file
This link activates a download dialog to save the device preferences file, in JSON format, to your local workstation.
To use the device preferences file with Ivanti Secure Access Client, base64-encode the JSON contents. This is necessary to enable the JSON structure to be presented as a singular string input argument to the Ivanti Secure Access Client package. Several freely-available applications such as text editors, or online services, provide this facility.
Then, to specify the configuration as a command-line argument to the Ivanti Secure Access Client package executable, copy and paste the encoded string into the JSONCONFIG argument using the following syntax:
JSONCONFIG="<base64-encoded-config>"
For example:
JSONCONFIG="eyJhcHBsaWNhdGlvbl9jb250cm9sIjp7ImRpc2FsbG93a...ddjsKa435sag"
Browser-based interfaces such as Intune provide command-line argument specifiers as part of the application definition. Enter the complete argument=value string as shown above.
Providing the JSONCONFIG argument as part of the application definition on your end-user devices means that Ivanti Secure Access Client is installed fully-configured with the enrollment details provided by the downloaded device preferences file.
Note
When using this mechanism to update an end-user device that has Ivanti Secure Access Client already installed, the Ivanti Secure Access Client software is upgraded as necessary, but pre-existing nZTA connections remain unaffected.
To learn more about how this facility might be used with your own MDM/MAM service, see your support representative.
Enrolling a Windows Desktop Device
Before you start this process, you must have an Windows sign-in URL for nZTA, based on the tenant FQDN provided by the Ivanti DevOps/Support organization.
Note
If you have an existing Ivanti Secure Access Client installed, you must first uninstall it before beginning the nZTA enrollment process.
Note
The Domain Admin must also ensure that Windows desktop machines can successfully connect to the Windows domain by updating the Trusted Root CA Certificates on all machines, see Enabling Trusted Root CA Certificate on Windows Domain.
To enroll a Windows desktop device:
Log into your Windows desktop.
Start a browser session.
In your browser, enter the nZTA enrollment URL into your address bar.
For example:
Default: “https://tenant1.mycompany.com/login/enroll”
Custom: “https://tenant1.mycompany.com/login/<custom_user_signin>/”.
A login page appears.
Provide your credentials to access nZTA enrollment.
The launcher page appears, for example:

FIGURE 214 nZTA Launcher (Windows)
Click Download and save the application launcher PulseSecureAppLauncher.msi file locally.
Note
A “HERE” hyperlink is displayed in the browser. This is required after the launcher has installed.
Run the downloaded file to install the launcher.
Confirm the completion of the launcher installation.
In the browser, click the “HERE” hyperlink to continue with the enrollment.
A browser dialog requests confirmation to start the launcher app.
Click Open Pulse Secure Application Launcher.
The launcher starts.
Accept any certificate warnings.
A progress bar indicates installation status.
Accept that the PulseSetupClientOCX.exe file can make changes to your device.
Accept that the PulseSetupClientOCX64.exe file can make changes to your device.
Accept that the Pulse Secure Component Manager Installer application can make changes to your device.
Ivanti Secure Access Client then downloads.
Accept that the Pulse Secure Component Manager can make changes to your device.
Ivanti Secure Access Client then installs and starts, and reports on a number of tasks:
Enrolling the User.
Fetching and Importing Client Certificates. You must confirm any certificate requests.
Fetching and Importing CA Certificates. You must confirm any certificate requests.
Installing the CEF (Chromium Embedded Framework) browser. This is an embedded browser used by Ivanti Secure Access Client for SAML-based login and to display the nZTA end-user portal applications page.
Onboarding is then complete.
Ivanti Secure Access Client appears as a task in the Windows task bar. For example:

FIGURE 215 Ivanti Secure Access Client Task in Taskbar (Windows)
When the Controller requests a certificate from the client, accept the request.
Log into the Controller using your Ivanti Neurons for Zero Trust Access service user credentials.
The compliance of the device is checked.
(Optional) If your sign-in authentication policy is configured for Multi-Factor Authentication, you might be required to complete a TOTP (Time-based One Time Password) secondary authentication step each time you sign in.
For a first time login, the user is presented with a TOTP registration page:
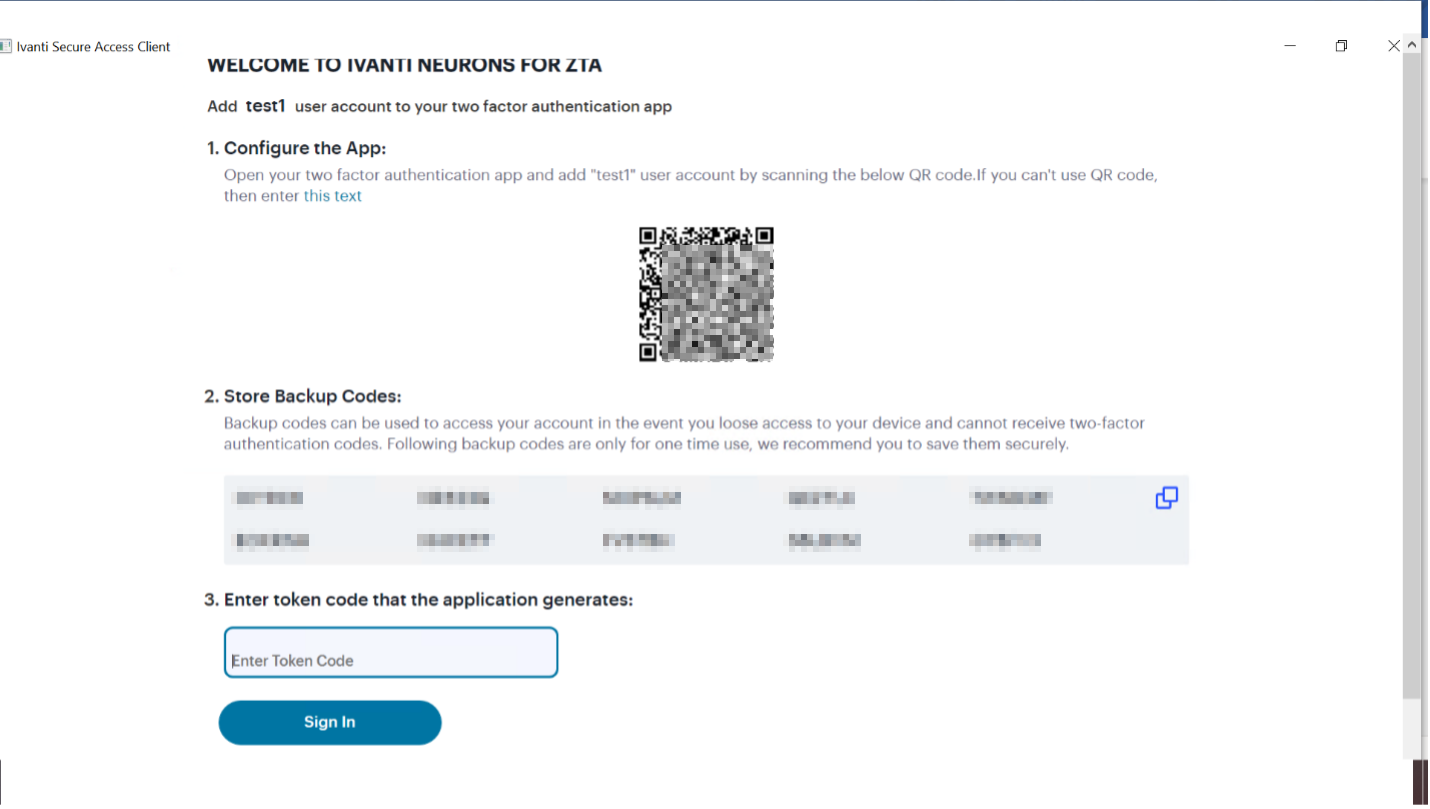
FIGURE 216 First-time login TOTP registration
Use this page to add your user details to an authenticator app on your device, such as Google Authenticator or Microsoft Authenticator. If you do not yet have such a two-factor authenticator app installed, do that now.
Scan the QR code, or enter the provided text, to add the user details to your authenticator app. Then, store the generated backup codes in a secure location for future retrieval of a lost account.
Finally, enter the token code generated by the authenticator app into the box provided, then select Sign In.
Note
For future sign-in attempts, the TOTP challenge dialog appears without the registration details or backup codes. As before, you provide the generated token code from your authenticator app into the box provided and select Sign In.
When Ivanti Secure Access Client connects, it is minimised to the taskbar.
Open Ivanti Secure Access Client from the taskbar.
Ivanti Secure Access Client appears. It shows the active connection to the Controller and presents a Connect button to access assigned applications and resources. For example:
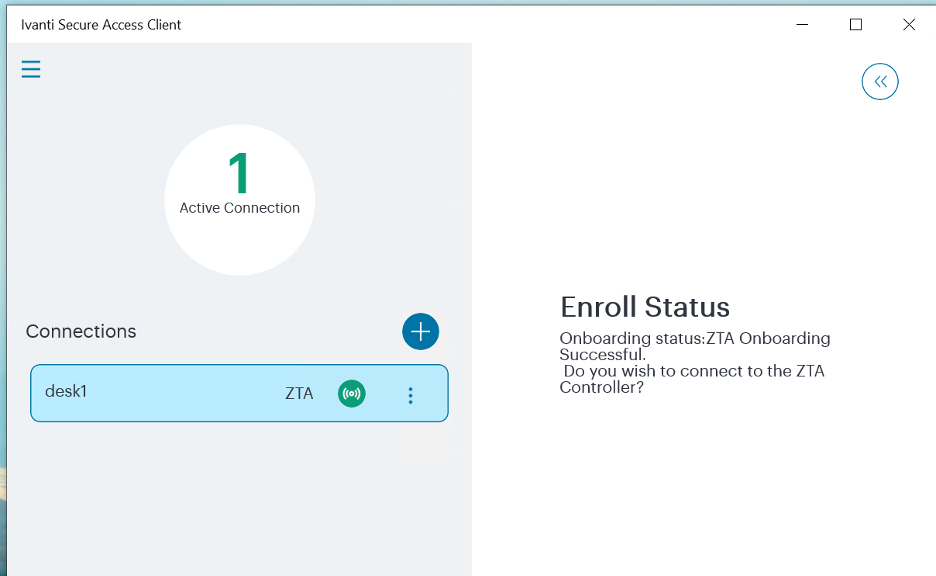
FIGURE 217 Ivanti Secure Access Client (Windows)
Note
To learn more about how Ivanti Secure Access Client maintains a connection with the Controller, and how user sessions are validated with your ZTA Gateways, see Introduction.
In a typical enrollment, upon successful authentication to the Controller, Ivanti Secure Access Client automatically shows the end-user portal applications page through an embedded browser. For example:

FIGURE 218 Assigned Applications and Resources (Windows)
After the nZTA end-user portal applications page appears, click any displayed resource to launch that item in your default system browser. To re-show the end-user portal at a future time, use the ZTA button in the Ivanti Secure Access Client nZTA connection.
Note
When you launch an SSO (Single Sign-on) application from the end-user portal for the first time in a session, nZTA presents a pop-up dialog requesting the user to select a certificate with which to authenticate this device with the Controller. This is a one-time activity at the beginning of a session, and all further SSO application accesses (to any SSO application) re-use the same certificate.
Note
If a default Gateway is configured on the Controller, and nZTA is the only active connection, the default Gateway handles all requests for unlisted applications from your Windows device. Refer to Using Application Discovery with Ivanti Secure Access Client.
Enabling Trusted Root CA Certificate on Windows Domain
To ensure that Windows desktop machines can successfully connect to the Windows domain, each machine must update its Trusted Root CA Certificates.
Ivanti recommends that the Domain Admin configures the Public Key Policies on the Group Policy Object and publishes it to all connected Windows desktops.
To add certificates to the Trusted Root Certification Authorities store for a Windows domain:
Access the Windows domain server and log in.
Note
Domain Admins is the minimum group membership required to complete this procedure.
Open the Server Manager.
Under Features Summary, click Add Features.
Select the Group Policy Management check box.
Click Next.
Click Install.
Wait until the Installation Results page shows that the installation of the Group Policy Management Console was successful.
Click Close.
Click Start, click Administrative Tools and then click Group Policy Management.
The Group Policy Management Console appears.
In the console tree, double-click to expand Group Policy Objects in the forest and domain that contains the Default Domain Policy GPO.
Right-click the Default Domain Policy object, and then click Edit.
In the Group Policy Management Console, select Computer Configuration > Windows Settings > Security Settings > Public Key Policies.
Right-click the Trusted Root Certification Authorities store.
Click Import and follow the steps in the Certificate Import Wizard to import the certificates.
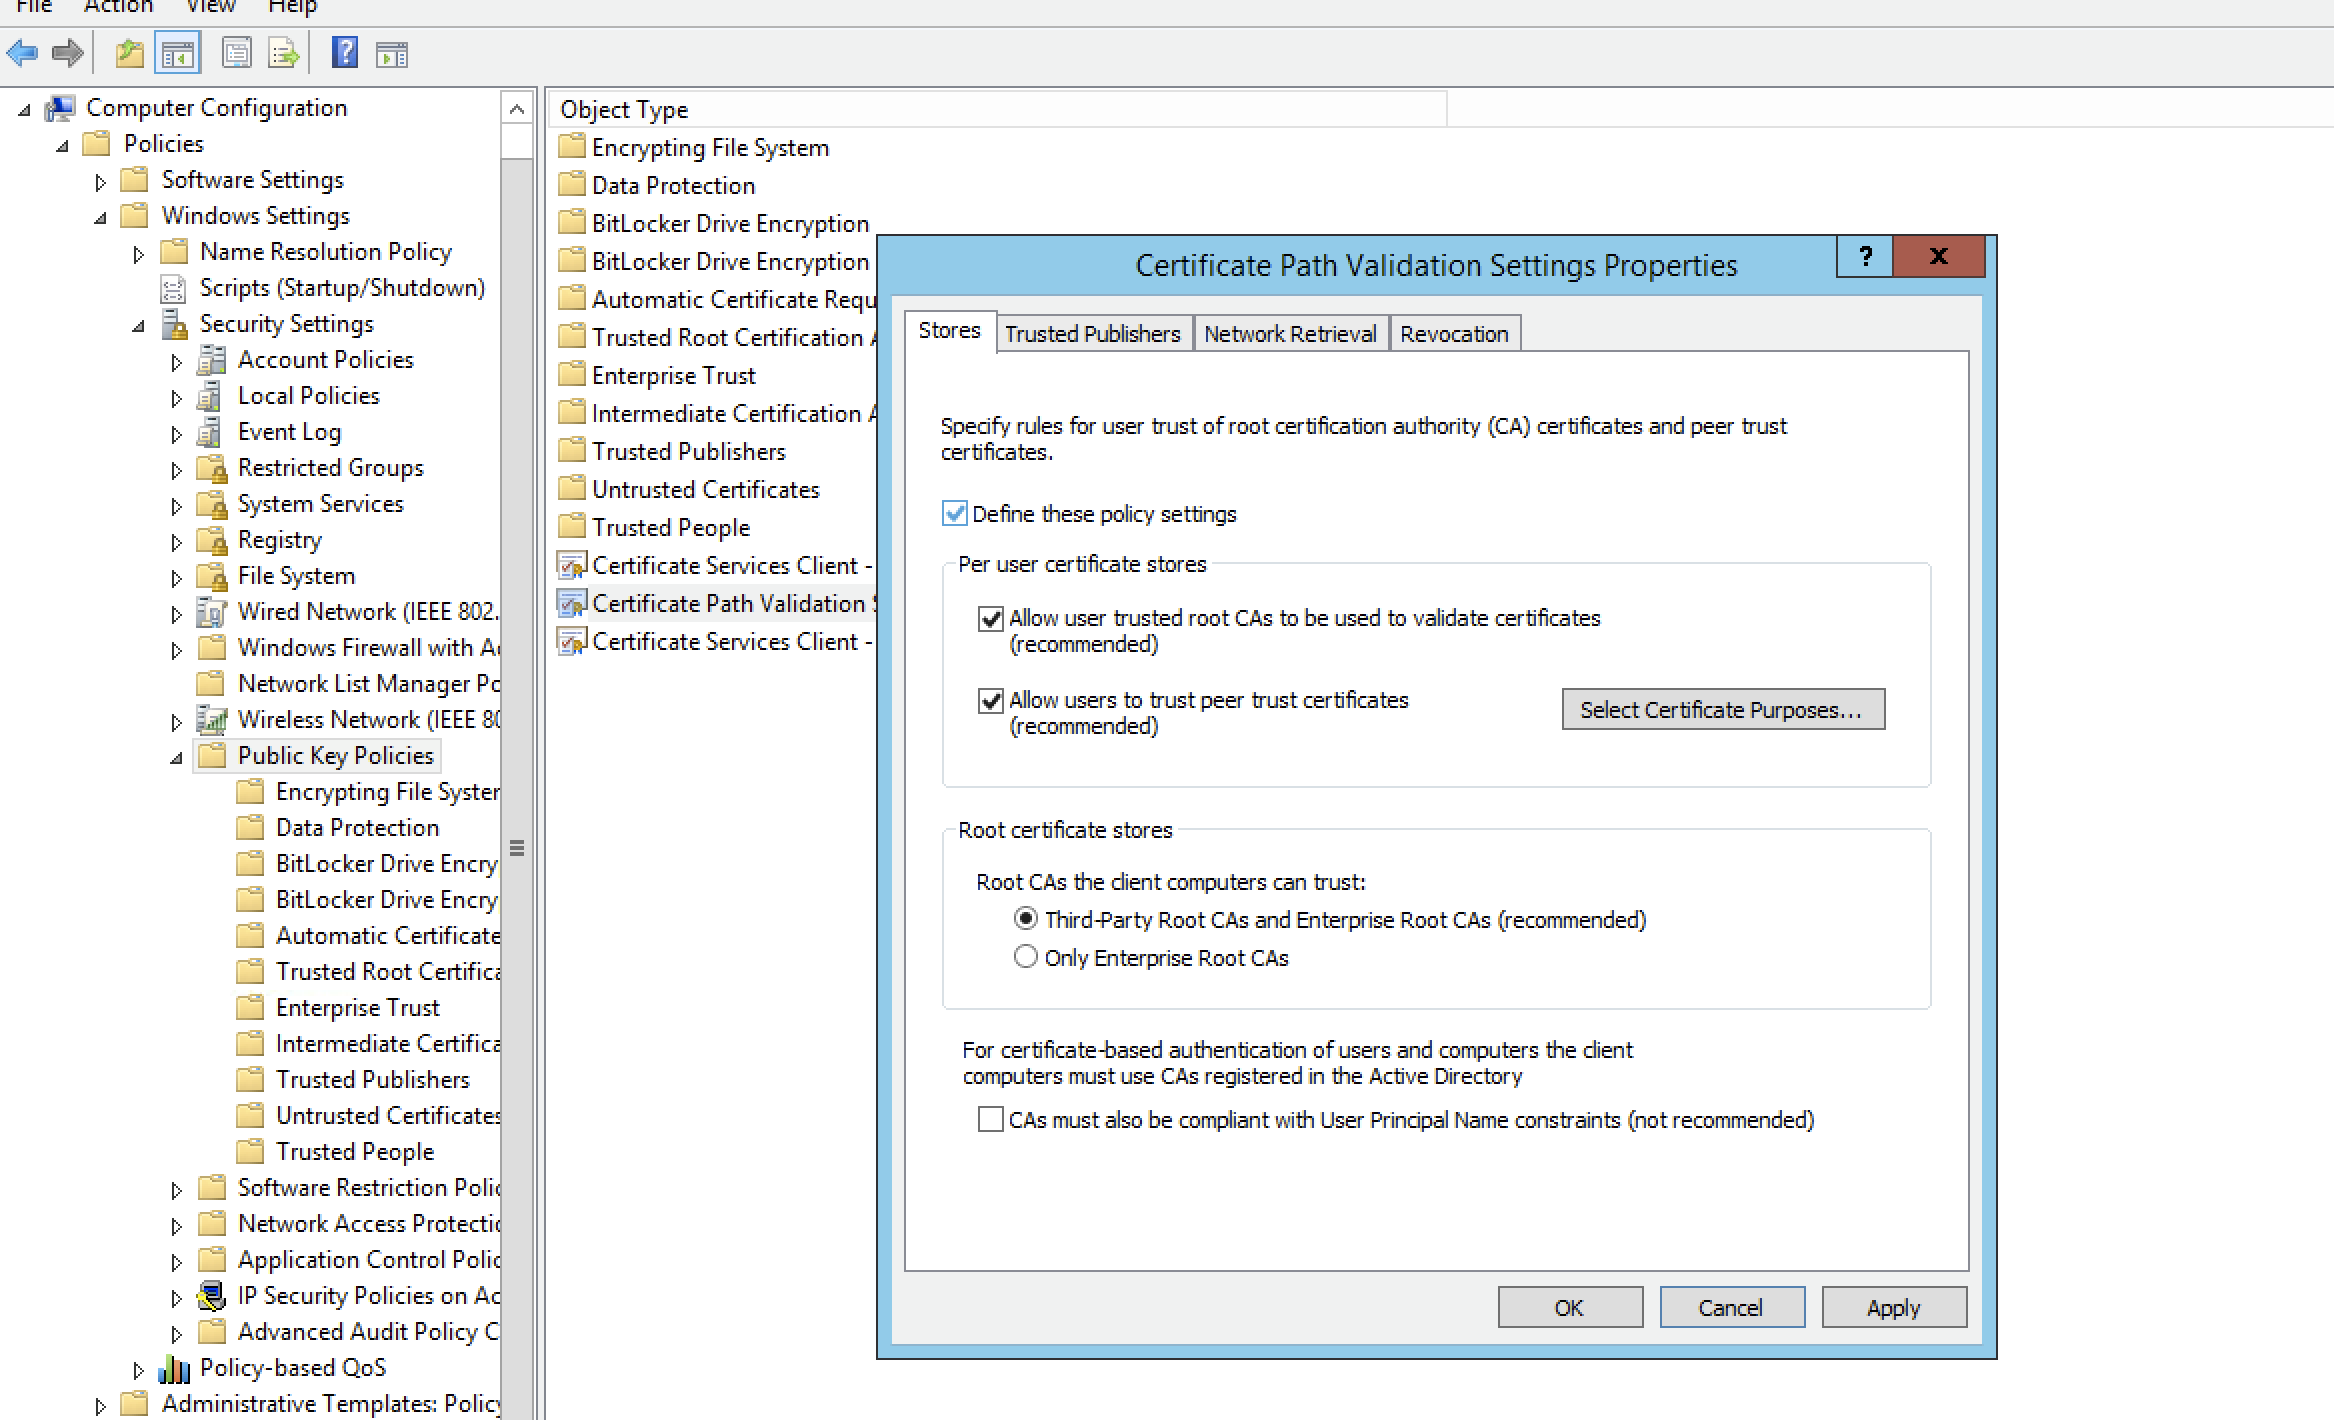
FIGURE 219 Enabling Trusted Root CA Certificate
When each Windows desktop machine next connects, the required Trusted Root CA Certificate installs automatically on the machine.
Enrolling a macOS Desktop Device
Before you start this process, you must have a sign-in URL for nZTA, based on the tenant FQDN provided by the Ivanti DevOps/Support organization.
Note
If you have an existing Ivanti Secure Access Client installed, you must first uninstall it before beginning the nZTA enrollment process.
To enroll a macOS desktop device:
Log into your macOS desktop.
Start a browser session.
In your browser, enter the nZTA sign-in URL into your address bar.
For example:
Default: “https://tenant1.mycompany.com/login/enroll”
Custom: “https://tenant1.mycompany.com/login/<custom_user_signin>/”.
A login page appears.
Provide your credentials to access nZTA enrollment.
The launcher page appears, for example:

FIGURE 220 nZTA Launcher macOS
Click Download and save the application launcher PulseSecureAppLauncher.dmg file locally.
Note
A “HERE” hyperlink is displayed in the browser. This is required after the launcher has installed.
Click the downloaded file.
The downloaded file opens, and a folder appears that contains the PulseSecureAppLauncher.mpkg file.
Double click the PulseSecureAppLauncher.mpkg file.
Click Continue when the install starts.
Wait until the install completes.
In the browser, click the “HERE” hyperlink to continue with the enrollment.
A browser dialog requests confirmation to start the launcher app.
Click Open PulseApplicationLauncher.
The launcher starts.
Confirm that you want to Open the application.
Confirm that you want the client to contact the Controller.
Ivanti Secure Access Client then downloads and installs.
Enter your macOS device credentials.
Ivanti Secure Access Client then installs and starts. The nZTA connection starts automatically. For example:
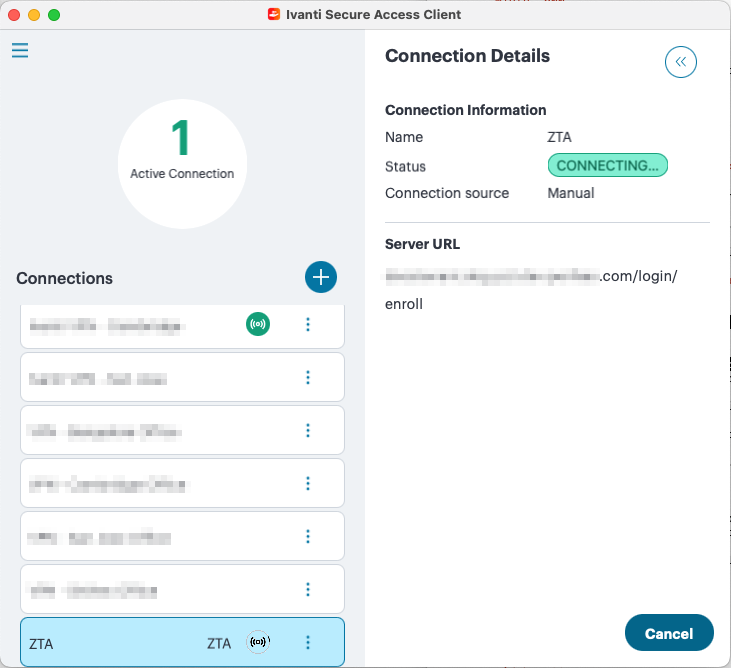
FIGURE 221 macOS Ivanti Secure Access Client
Note
To learn more about how Ivanti Secure Access Client maintains a connection with the Controller, and how user sessions are validated with your ZTA Gateways, see Introduction.
Ivanti Secure Access Client appears as an icon in the macOS system tray.

FIGURE 222 Ivanti Secure Access Client in the System Tray (indicated)
The connection activity reports on a number of tasks:
Enrolling the User.
Fetching and Importing Client Certificates. You must confirm any certificate requests.
Fetching and Importing CA Certificates. You must confirm any certificate requests.
Installing the CEF (Chromium Embedded Framework) browser. This is an embedded browser used by Ivanti Secure Access Client for SAML-based login and to display the nZTA end-user portal applications page.
Onboarding is then complete.
In a typical enrollment, upon successful authentication to the Controller, Ivanti Secure Access Client automatically signs in the user.
(Optional) If your sign-in authentication policy is configured for Multi-Factor Authentication, you might be required to complete a TOTP (Time-based One Time Password) secondary authentication step each time you sign in.
For a first time login, the user is presented with a TOTP registration page:
FIGURE 223 First-time login TOTP registration
Use this page to add your user details to an authenticator app on your device, such as Google Authenticator or Microsoft Authenticator. If you do not yet have such a two-factor authenticator app installed, do that now.
Scan the QR code, or enter the provided text, to add the user details to your authenticator app. Then, store the generated backup codes in a secure location for future retrieval of a lost account.
Finally, enter the token code generated by the authenticator app into the box provided, then select Sign In.
Note
For future sign-in attempts, the TOTP challenge dialog appears without the registration details or backup codes. As before, you provide the generated token code from your authenticator app into the box provided and select Sign In.
When Ivanti Secure Access Client connects, it is minimised to the taskbar.
Accept the request to access the private key.
Accept the request to present a certificate for access to browser-based resources.
The nZTA end-user portal applications page appears. For example:

FIGURE 224 Assigned Applications and Resources
After the nZTA end-user portal applications page appears, click any displayed resource to launch that item in your default system browser. To re-show the end-user portal at a future time, click the ZTA button in the Ivanti Secure Access Client nZTA connection.
Note
When you launch an SSO (Single Sign-on) application from the end-user portal for the first time in a session, nZTA presents a pop-up dialog requesting the user to select a certificate with which to authenticate this device with the Controller. This is a one-time activity at the beginning of a session, and all further SSO application accesses (to any SSO application) re-use the same certificate.
Note
If a default Gateway is configured on the Controller, and nZTA is the only active connection, the default Gateway will handle all requests for unlisted applications from the macOS desktop device. Refer to Using Application Discovery with Ivanti Secure Access Client.
Enrolling a Linux Desktop Device
Note
Browser-based enrollment is not supported for Ivanti Secure Access Client on Linux devices. Follow the instructions in this section to enroll the device by creating a nZTA connection through the Ivanti Secure Access Client application.
To see the full feature support list for Linux devices, see Introduction.
Before you start this process, you must have:
A Linux sign-in URL for nZTA, based on the tenant FQDN provided by the Ivanti DevOps/Support organization.
The download location URL for your required installation package, as provided by the Ivanti DevOps/Support organization.
If you have an existing Ivanti Secure Access Client installed, you must first uninstall it before beginning the nZTA enrollment process.
Ivanti Secure Access Client is fully supported for use with nZTA on the following Linux variants:
Ubuntu, see Enrolling on Ubuntu or Debian.
While not fully supported, the following Linux variants are considered compatible:
Debian, see Enrolling on Ubuntu or Debian.
Fedora, see Enrolling on Fedora or CentOS/RHEL.
Centos/RHEL, see Enrolling on Fedora or CentOS/RHEL.
To learn more, contact your support representative.
Enrolling on Ubuntu or Debian
This section describes the installation of a Ivanti Secure Access Client Linux variants on either Ubuntu or Debian. If you want to install on either Fedora or CentOS/RHEL operating systems, refer to Enrolling on Fedora or CentOS/RHEL.
To enroll a Linux desktop device on Ubuntu or Debian:
Log into your Linux device.
Obtain the required Ivanti Secure Access Client for Linux installation package and download it to your Linux device. To obtain the installation package, contact your support representative.
Start a command line interface (CLI) terminal session.
If not already installed, install the prerequisite packages
nss3-toolsandnet-tools. Make sure your package manager availability list is up to date, then run the following command for each package in turn:sudo apt-get install <dependency package name>
Repeat this step for each prerequisite package.
Start the Ivanti Secure Access Client for Linux package installation at the prompt:
sudo dpkg -i <client installation package>
The installation process reports back to the session. For example, for Ubuntu:
Selecting previously unselected package pulsesecure.
(Reading database ... xxxxxx files and directories currently installed.)
Preparing to unpack pulsesecure_9.1.R11_amd64.deb ...
Unpacking pulsesecure (9.1.R11) ...
Setting up pulsesecure (9.1.R11) ...
Created symlink /etc/systemd/system/multi-user.target.wants/pulsesecure.service → /lib/systemd/system/pulsesecure.service.
Processing triggers for desktop-file-utils (0.24-1ubuntu3) ...
Processing triggers for gnome-menus (3.36.0-1ubuntu1) ...
Processing triggers for mime-support (3.64ubuntu1) ...
Processing triggers for dbus (1.12.16-2ubuntu2.1) ...
Processing triggers for man-db (2.9.1-1) ...
Start the client. To do this, either start the PulseUI app from the Activities bar, or use the following from the command line:
/opt/pulsesecure/bin/pulseUI
The client appears:
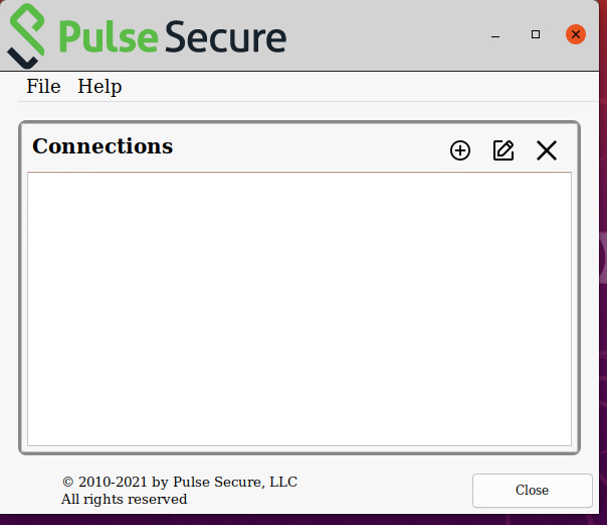
FIGURE 225 nZTA Ubuntu/Debian Linux Client
Add the required connection. To do this:
Click the plus icon in the client toolbar.
The Add Connection dialog appears.
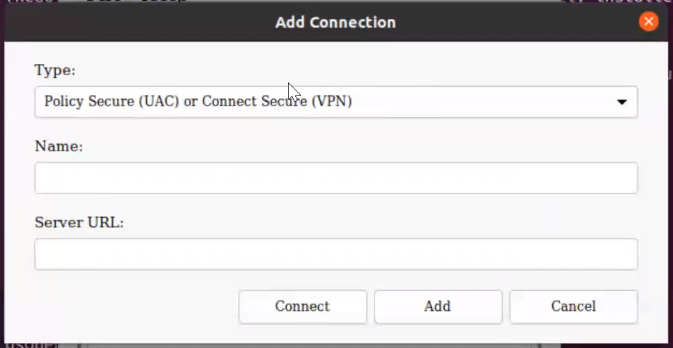
FIGURE 226 nZTA Linux Add Connection
For Type, select ZTA Connection.
For Name, enter a suitably identifying name for the connection.
For Server URL, enter the Linux sign-in URL provided by the Ivanti DevOps/Support organization.
For example:
Default: “https://tenant1.mycompany.com/login/enroll”
Custom: “https://tenant1.mycompany.com/login/<custom_user_signin>/”.
Click Add to add the connection and close the dialog.
The new connection is added to the list of connections.
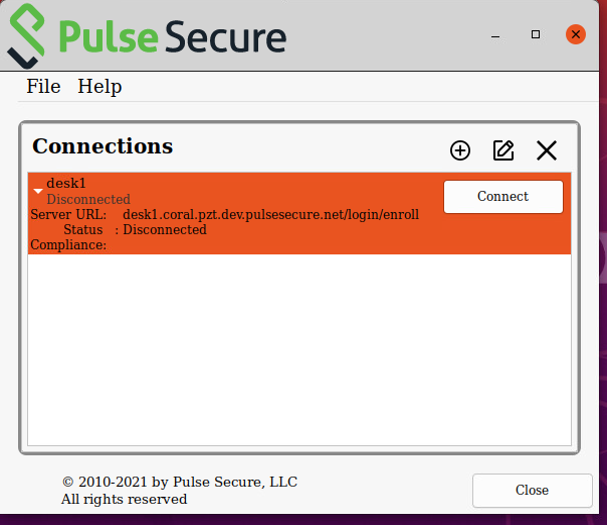
FIGURE 227 nZTA Linux ZTA Connection
For the Ivanti Neurons for Zero Trust Access connection, click Connect.
A login dialog appears. For example:
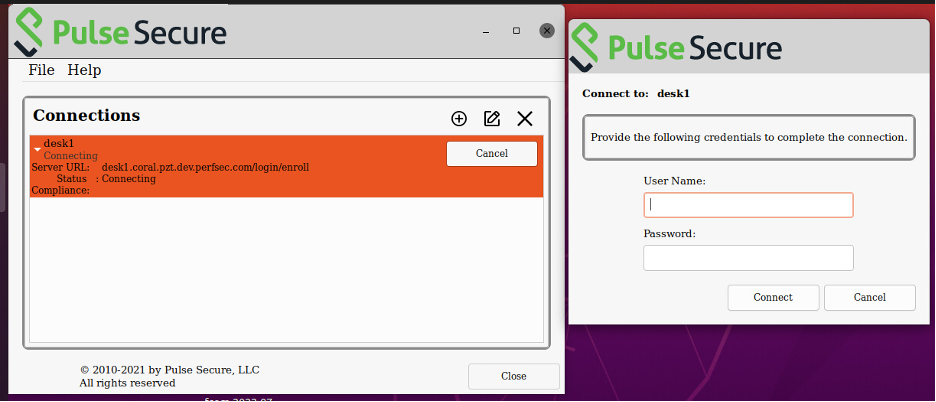
FIGURE 228 nZTA Linux ZTA Credentials
Enter your controller credentials and click Connect.
A connection activity dialog reports a number of tasks:
Enrolling the user.
Fetching and Importing of Client Certificates. You must confirm any certificate requests.
Fetching and Importing of CA Certificates. You must confirm any certificate requests.
Installing the CEF (Chromium Embedded Framework) browser. This is an embedded browser used by Ivanti Secure Access Client for SAML-based login and to display the nZTA end-user portal applications page.
Completion of the connection. For example:
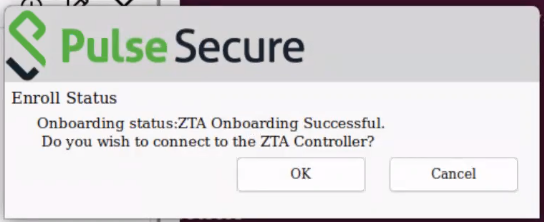
FIGURE 229 nZTA Linux ZTA Connection Success
Click OK to connect to nZTA.
When this completes, the connection updates. For example:
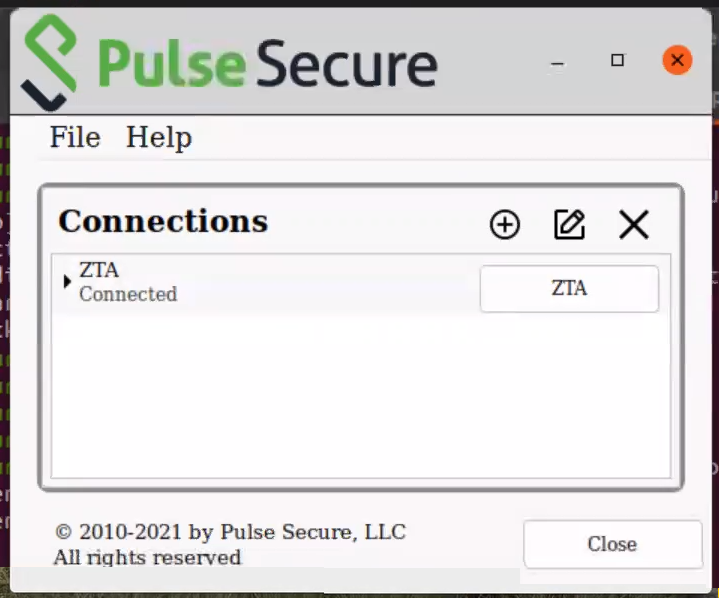
FIGURE 230 nZTA Linux ZTA Connected
Onboarding is then complete.
Note
To learn more about how Ivanti Secure Access Client maintains a connection with the Controller, and how user sessions are validated with your ZTA Gateways, see Introduction.
(Optional) If your sign-in authentication policy is configured for Multi-Factor Authentication, you might be required to complete a TOTP (Time-based One Time Password) secondary authentication step each time you sign in.
For a first time login, the user is presented with a TOTP registration page:
FIGURE 231 First-time login TOTP registration
Use this page to add your user details to an authenticator app on your device, such as Google Authenticator or Microsoft Authenticator. If you do not yet have such a two-factor authenticator app installed, do that now.
Scan the QR code, or enter the provided text, to add the user details to your authenticator app. Then, store the generated backup codes in a secure location for future retrieval of a lost account.
Finally, enter the token code generated by the authenticator app into the box provided, then select Sign In.
Note
For future sign-in attempts, the TOTP challenge dialog appears without the registration details or backup codes. As before, you provide the generated token code from your authenticator app into the box provided and select Sign In.
In a typical enrollment, upon successful authentication to the Controller, Ivanti Secure Access Client automatically shows the end-user portal applications page through an embedded browser. To re-show this portal at a future time, click the ZTA button in the Ivanti Secure Access Client nZTA connection. Alternatively, access your permitted applications from the Linux command line.
(Optional) To uninstall Ivanti Secure Access Client Linux variants, enter the following command at the prompt and provide a password:
sudo apt-get purge pulsesecure
[sudo] password for <user>:
After the process completes successfully, the Linux client has been removed.
Note
Ivanti Secure Access Client Linux variants do not support the use of default gateways.
Note
Device rule types for Ivanti Secure Access Client Linux variants are limited to File, Port, and Process. For details of these device rule types, see Creating Device Policy Rules.
Enrolling on Fedora or CentOS/RHEL
This section describes the installation of Ivanti Secure Access Client Linux variants on either Fedora or CentOS/RHEL. If you want to install on either Ubuntu or Debian operating systems, refer to Enrolling on Ubuntu or Debian.
To enroll a Linux desktop device on Fedora or CentOS/RHEL:
Log into your Linux device.
Obtain the required Ivanti Secure Access Client for Linux installation package and download it to your Linux device. To obtain the installation package, contact your support representative.
Start a command line interface (CLI) terminal session.
If not already installed, install the prerequisite packages
nss3-toolsandnet-tools. Make sure your package manager availability list is up to date, then run the following command for each package in turn:sudo yum install <dependency package name>
Repeat this step for each prerequisite package.
Start the Ivanti Secure Access Client for Linux package installation at the prompt:
sudo rpm -ivh <client installation package>
The installation process reports back to the session. For example, for Fedora:
Verifying...                          ################################# [100%]
Preparing...                          ################################# [100%]
Updating / installing...
   1:pulsesecure-2:9.1-R11            ################################# [100%]
rpm post../
Created symlink /etc/systemd/system/multi-user.target.wants/pulsesecure.service → /lib/systemd/system/pulsesecure.service.
Created symlink /etc/systemd/system/pulsesecure.service → /lib/systemd/system/pulsesecure.service.
Start the client. To do this, either start the PulseUI app from the Activities bar, or use the following from the command line:
/opt/pulsesecure/bin/pulseUI
The client appears:
FIGURE 232 nZTA Ubuntu/Debian Linux Client
Add the required connection. To do this:
Click the plus icon in the client toolbar.
The Add Connection dialog appears.
FIGURE 233 nZTA Linux Add Connection
For Type, select ZTA Connection.
For Name, enter a suitably-identifying name.
For Server URL, enter the Linux sign-in URL provided by the Ivanti DevOps/Support organization.
For example:
Default: “https://tenant1.mycompany.com/login/enroll”
Custom: “https://tenant1.mycompany.com/login/<custom_user_signin>/”.
Click Add to add the connection and close the dialog.
The new connection is added to the list of connections.
FIGURE 234 nZTA Linux ZTA Connection
For the Ivanti Neurons for Zero Trust Access connection, click Connect.
A login dialog appears. For example:
FIGURE 235 nZTA Linux ZTA Credentials
Enter your controller credentials and click Connect.
A connection activity dialog reports a number of tasks:
Enrolling the user.
Fetching and Importing of Client Certificates. You must confirm any certificate requests.
Fetching and Importing of CA Certificates. You must confirm any certificate requests.
Installing the CEF (Chromium Embedded Framework) browser. This is an embedded browser used by Ivanti Secure Access Client for SAML-based login and to display the nZTA end-user portal applications page.
Completion of the connection. For example:
FIGURE 236 nZTA Linux ZTA Connection Success
Onboarding is then complete.
Note
To learn more about how Ivanti Secure Access Client maintains a connection with the Controller, and how user sessions are validated with your ZTA Gateways, see Introduction.
(Optional) If your sign-in authentication policy is configured for Multi-Factor Authentication, you might be required to complete a TOTP (Time-based One Time Password) secondary authentication step each time you sign in.
For a first time login, the user is presented with a TOTP registration page:
FIGURE 237 First-time login TOTP registration
Use this page to add your user details to an authenticator app on your device, such as Google Authenticator or Microsoft Authenticator. If you do not yet have such a two-factor authenticator app installed, do that now.
Scan the QR code, or enter the provided text, to add the user details to your authenticator app. Then, store the generated backup codes in a secure location for future retrieval of a lost account.
Finally, enter the token code generated by the authenticator app into the box provided, then select Sign In.
Note
For future sign-in attempts, the TOTP challenge dialog appears without the registration details or backup codes. As before, you provide the generated token code from your authenticator app into the box provided and select Sign In.
In a typical enrollment, upon successful authentication to the Controller, Ivanti Secure Access Client automatically shows the end-user portal applications page through an embedded browser. To re-show this portal at a future time, click the ZTA button in the Ivanti Secure Access Client nZTA connection. Alternatively, access your permitted applications from the Linux command line.
(Optional) To uninstall Ivanti Secure Access Client Linux variants, enter the following command at the prompt and provide a password:
sudo rpm -e pulsesecure
[sudo] password for <user>:
After the process completes successfully, the Linux client has been removed.
Note
Ivanti Secure Access Client Linux variants do not support the use of default gateways.
Note
Device rule types for Ivanti Secure Access Client Linux variants are limited to File, Port, and Process. For details of these device rule types, see Creating Device Policy Rules.
Enrolling an iOS Mobile Device
Note
For mobile devices, Ivanti Neurons for Zero Trust Access compliance requires iOS v12.0 or later.
Note
Application discovery and the use of a default Gateway is not supported from iOS mobile devices.
Before you start this process, you must have an iOS sign-in URL for nZTA, based on the tenant FQDN provided by the Ivanti DevOps/Support organization. The procedure to enroll your iOS device differs depending on whether you have an existing Ivanti Secure Access Client app installed and configured with a connection to a classic VPN product.
To enroll an iOS device that has a previous connection to a classic VPN product:
Start your iOS device and access its home page.
Locate and start the Ivanti Secure Access Client app.
In the main app menu, select Enroll To ZTA:
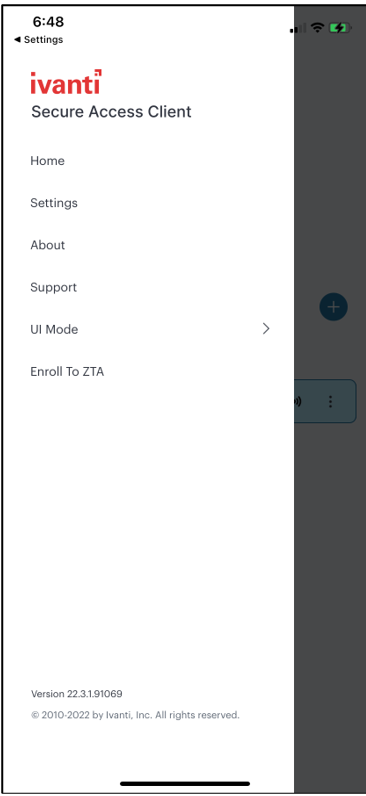
FIGURE 238 The Ivanti Secure Access Client app menu
The Enroll with ZTA screen appears.
In the text box provided, enter your corporate email or sign-in URL and tap Submit:
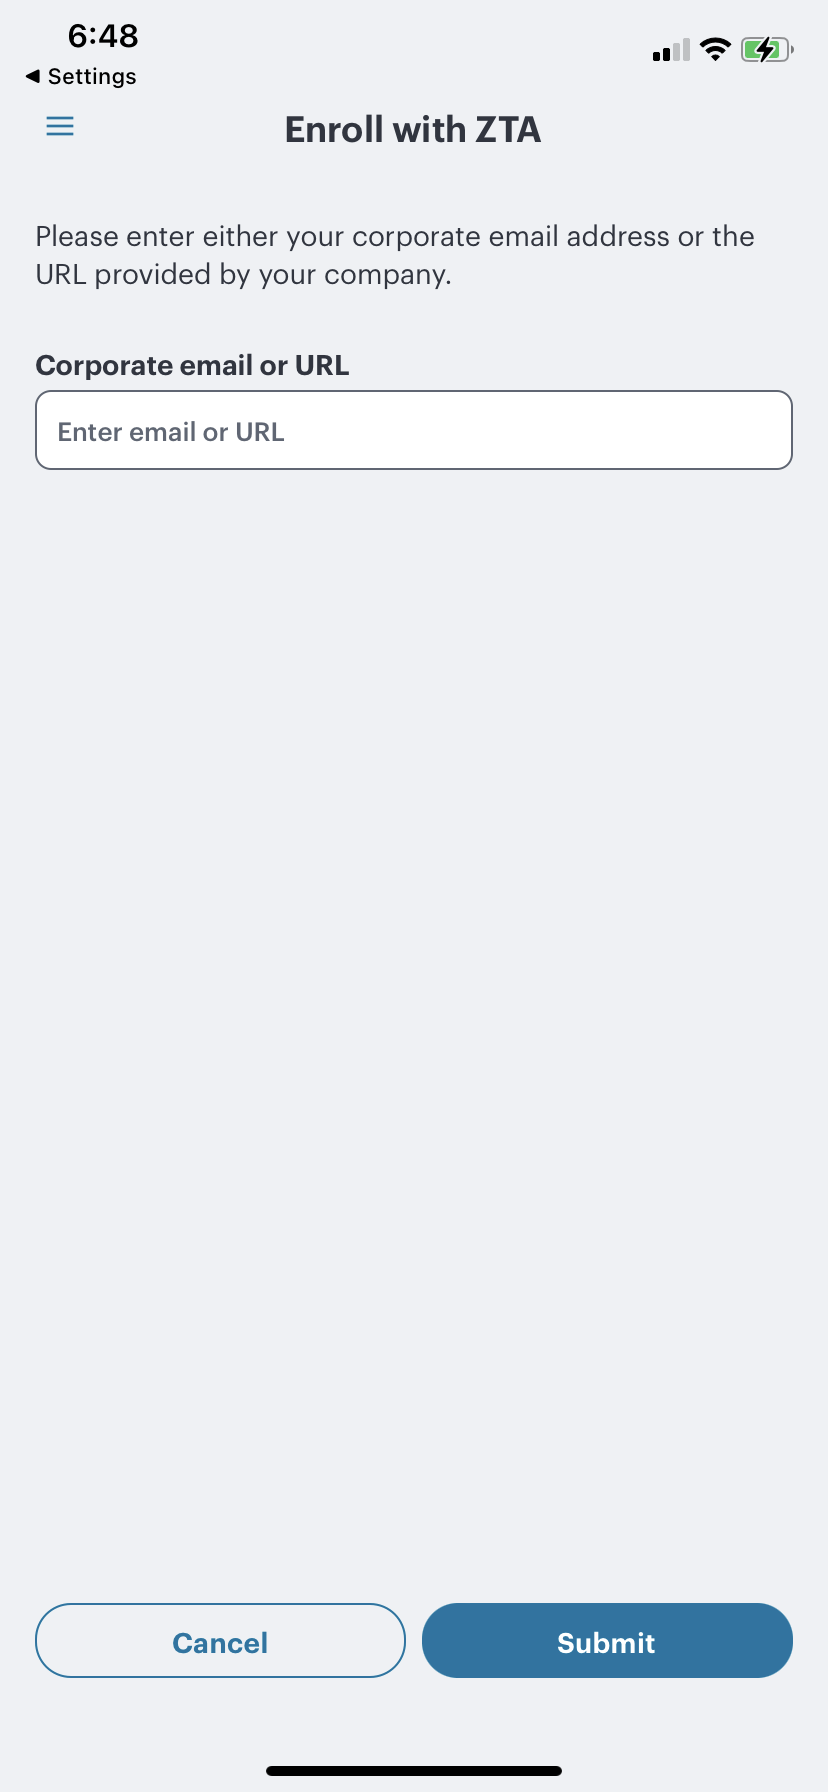
FIGURE 239 Enter sign-in URL
To complete the enrollment procedure, follow the remaining steps below.
To enroll an iOS device with no previous Ivanti Secure Access Client installation:
Start your iOS device and access its home page.
Open the App Store application.
In the search function, enter “Ivanti Secure Access Client”.
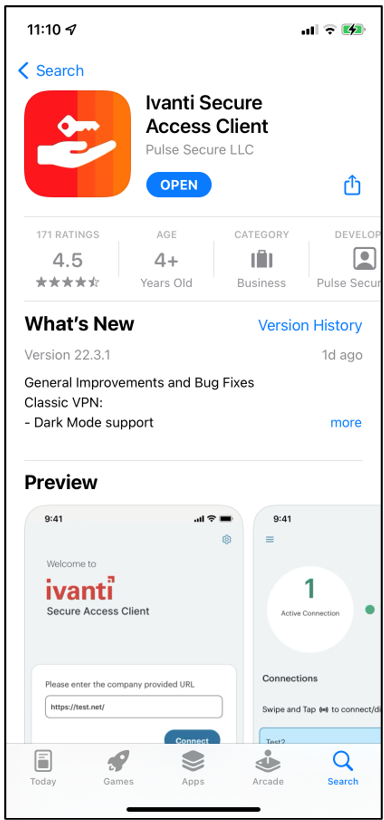
FIGURE 240 Searching the iOS App Store for Ivanti Secure Access Client
From the search results, locate, download, and install the Ivanti Secure Access Client app.
The Ivanti Secure Access Client app is installed on your device and added to the interface. For example:
FIGURE 241 Ivanti Secure Access Client App Icon
Start the Ivanti Secure Access Client app.
The welcome screen appears. For example:
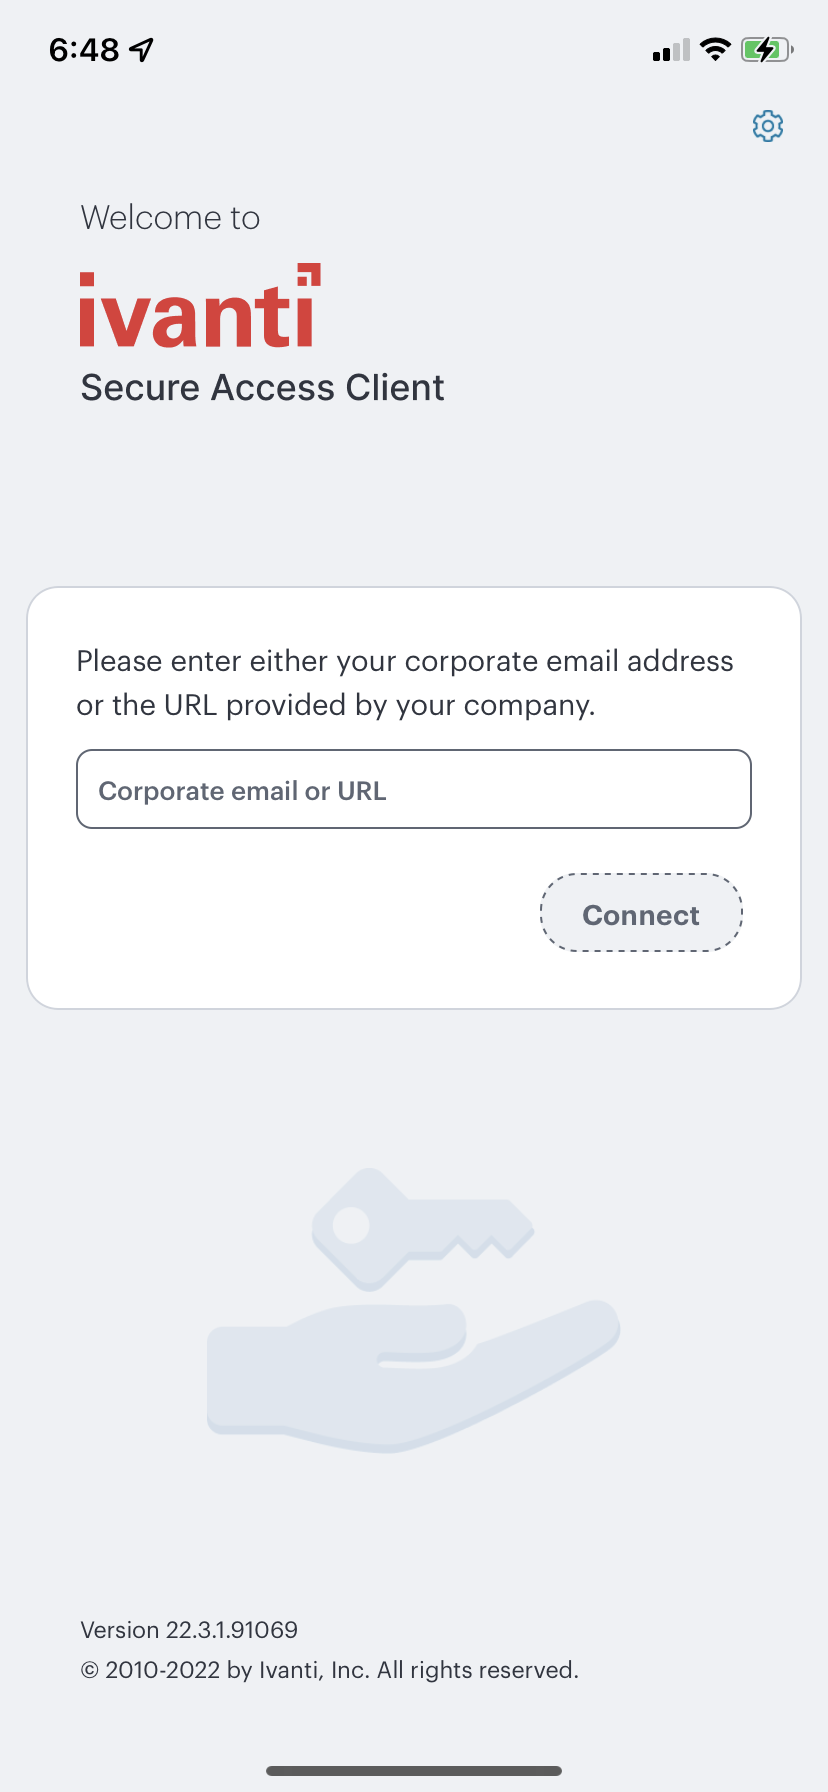
FIGURE 242 Ivanti Secure Access Client Welcome Screen
On the welcome screen, enter the nZTA sign-in URL provided in your invitation email.
For example:
Default: “https://tenant1.mycompany.com/login/enroll”
Custom: “https://tenant1.mycompany.com/login/<custom_user_signin>/”.
Click Connect.
To complete the enrollment procedure, follow the remaining steps below.
For both of the previous iOS device procedures, continue with the following steps:
Perform any required authentication for enrolling. (Local or Azure AD credentials)
The Connections screen appears.
Accept any request to download a VPN configuration from the Controller. For example:
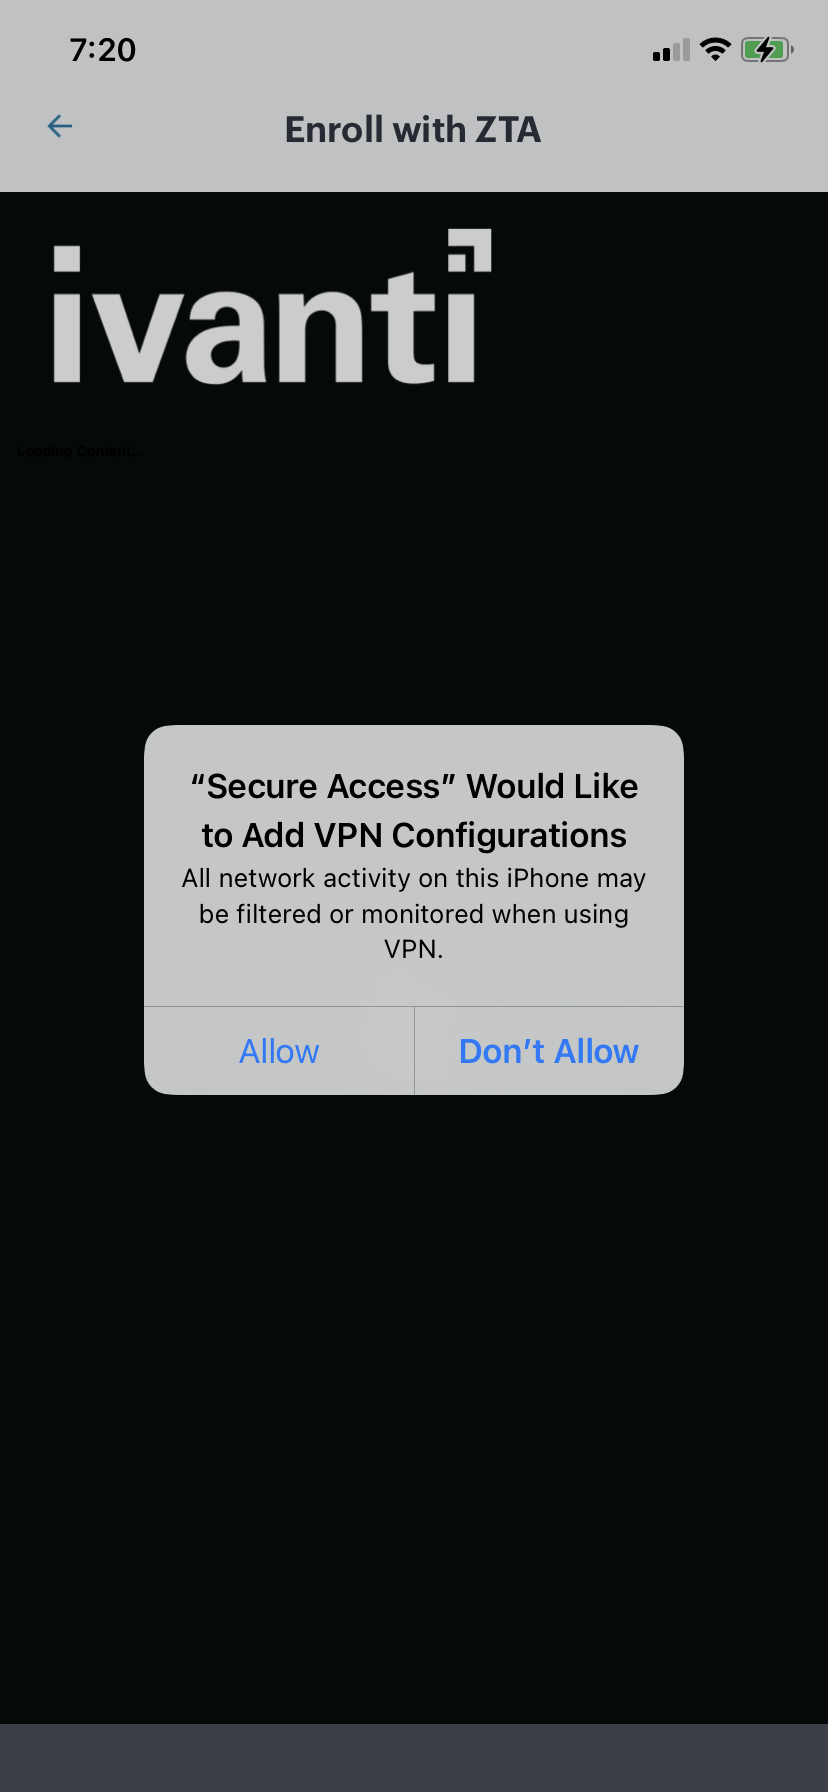
FIGURE 243 Adding VPN Configuration
After the nZTA profile is added to your Client configuration, the compliance of the device is checked. Then, session information is gathered and a VPN tunnel to the Controller is created automatically. This is indicated in the iOS status bar.
The Connections screen shows the active Controller connection:
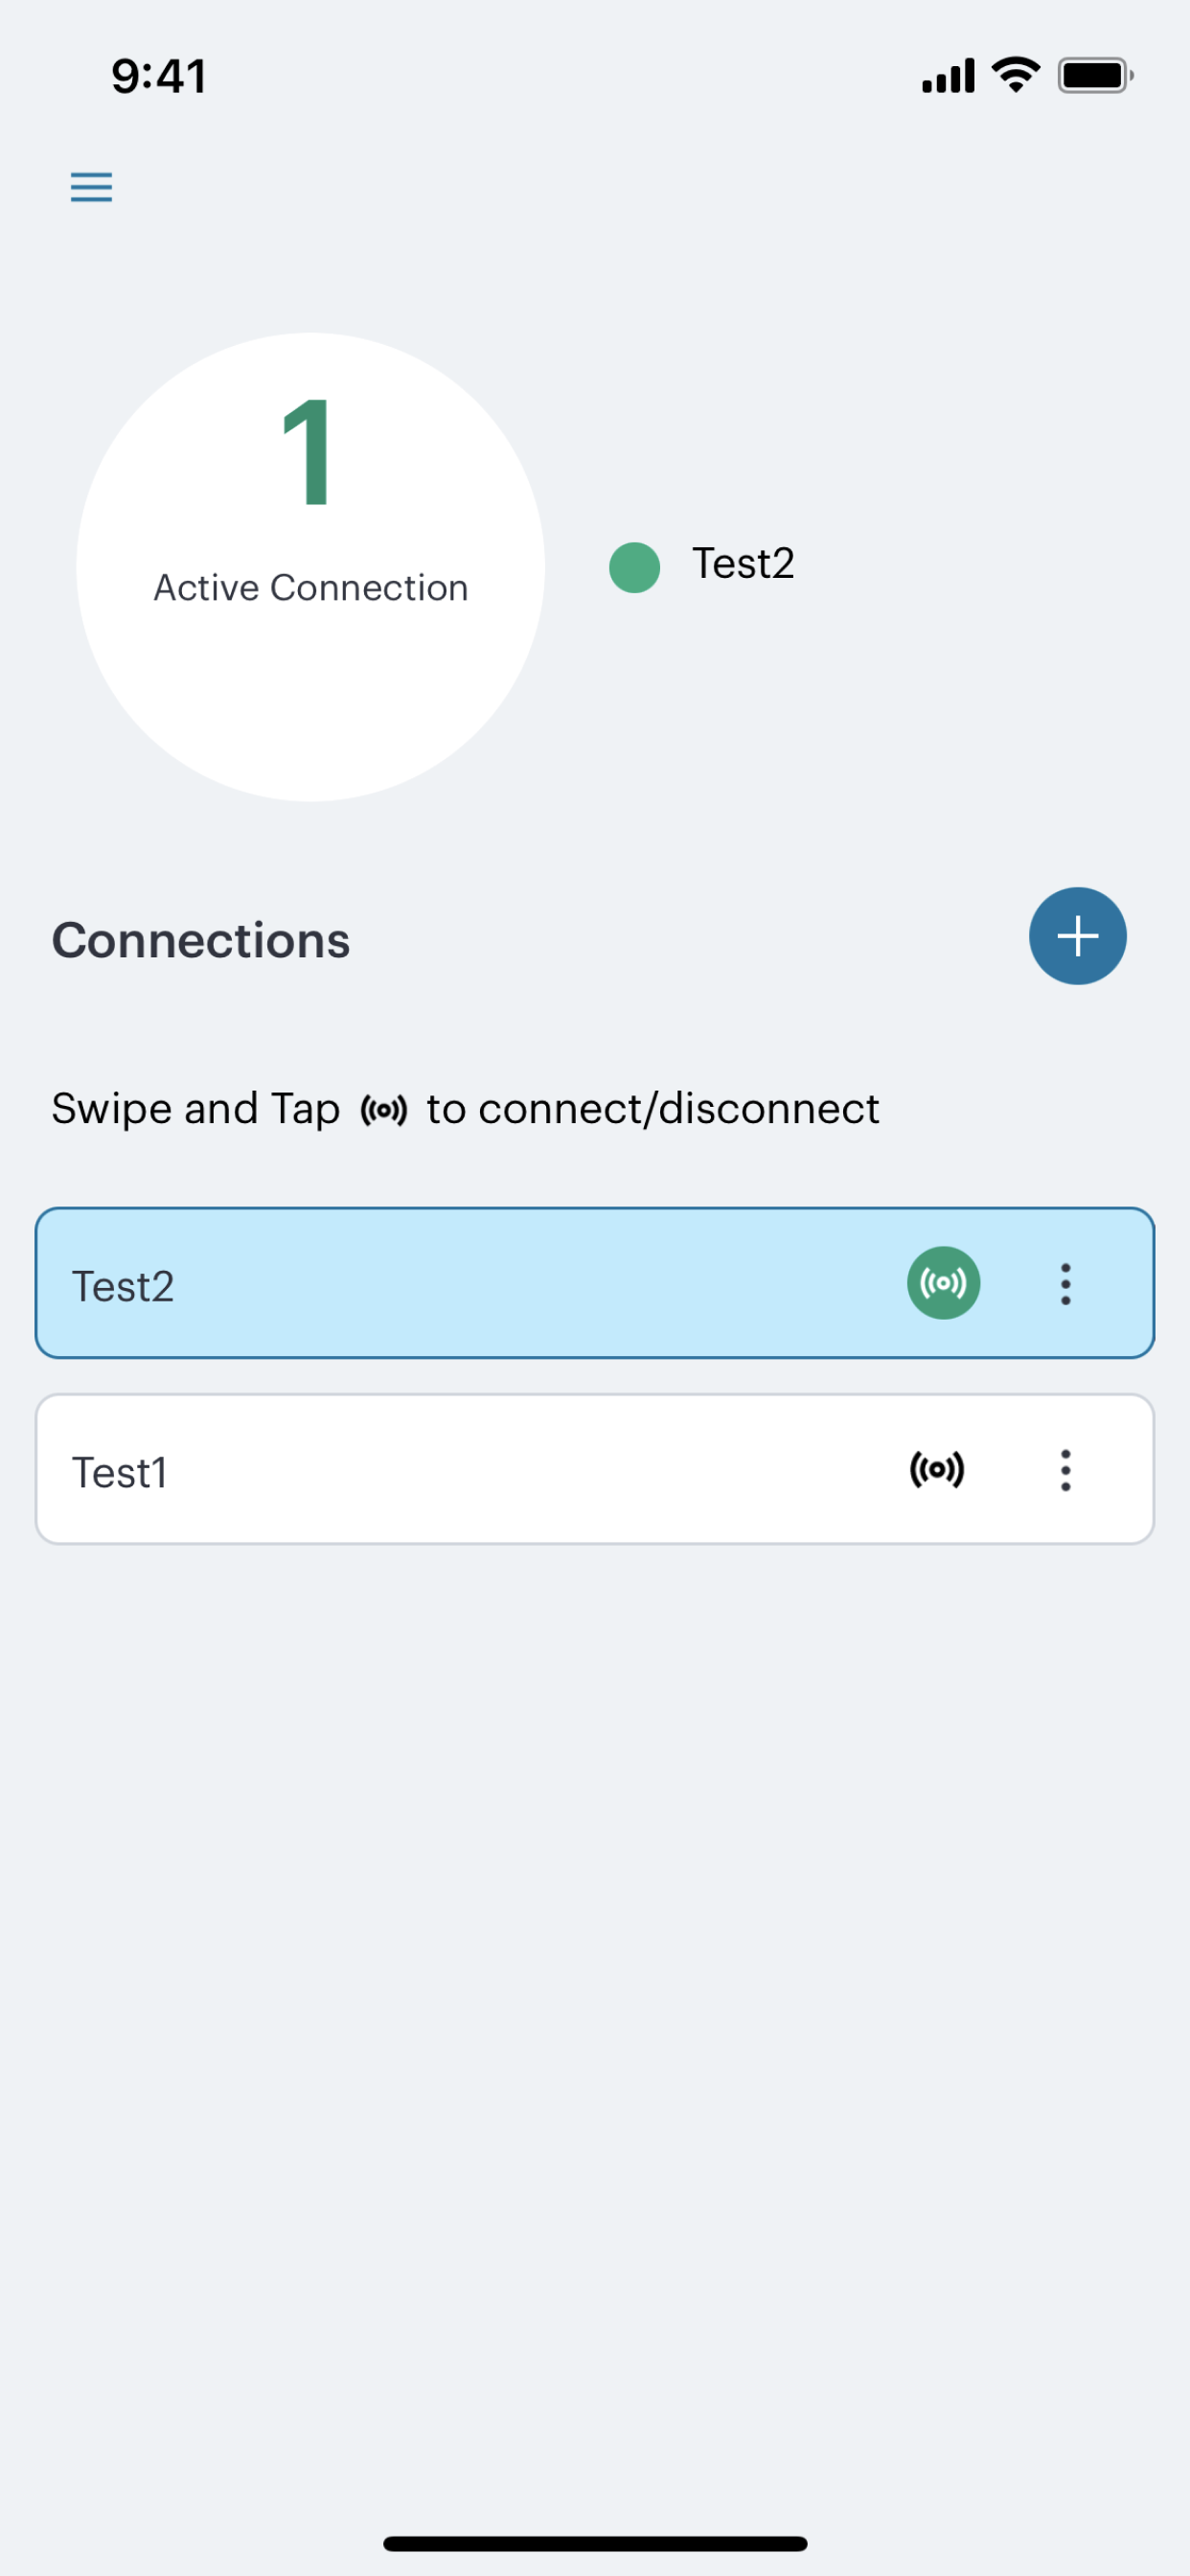
FIGURE 244 iOS Active nZTA Connection
Note
To learn more about how Ivanti Secure Access Client maintains a connection with the Controller, and how user sessions are validated with your ZTA Gateways, see Introduction.
(Optional) If your sign-in authentication policy is configured for Multi-Factor Authentication, you might be required to complete a TOTP (Time-based One Time Password) secondary authentication step each time you sign in.
For a first time login, the user is presented with a TOTP registration page:
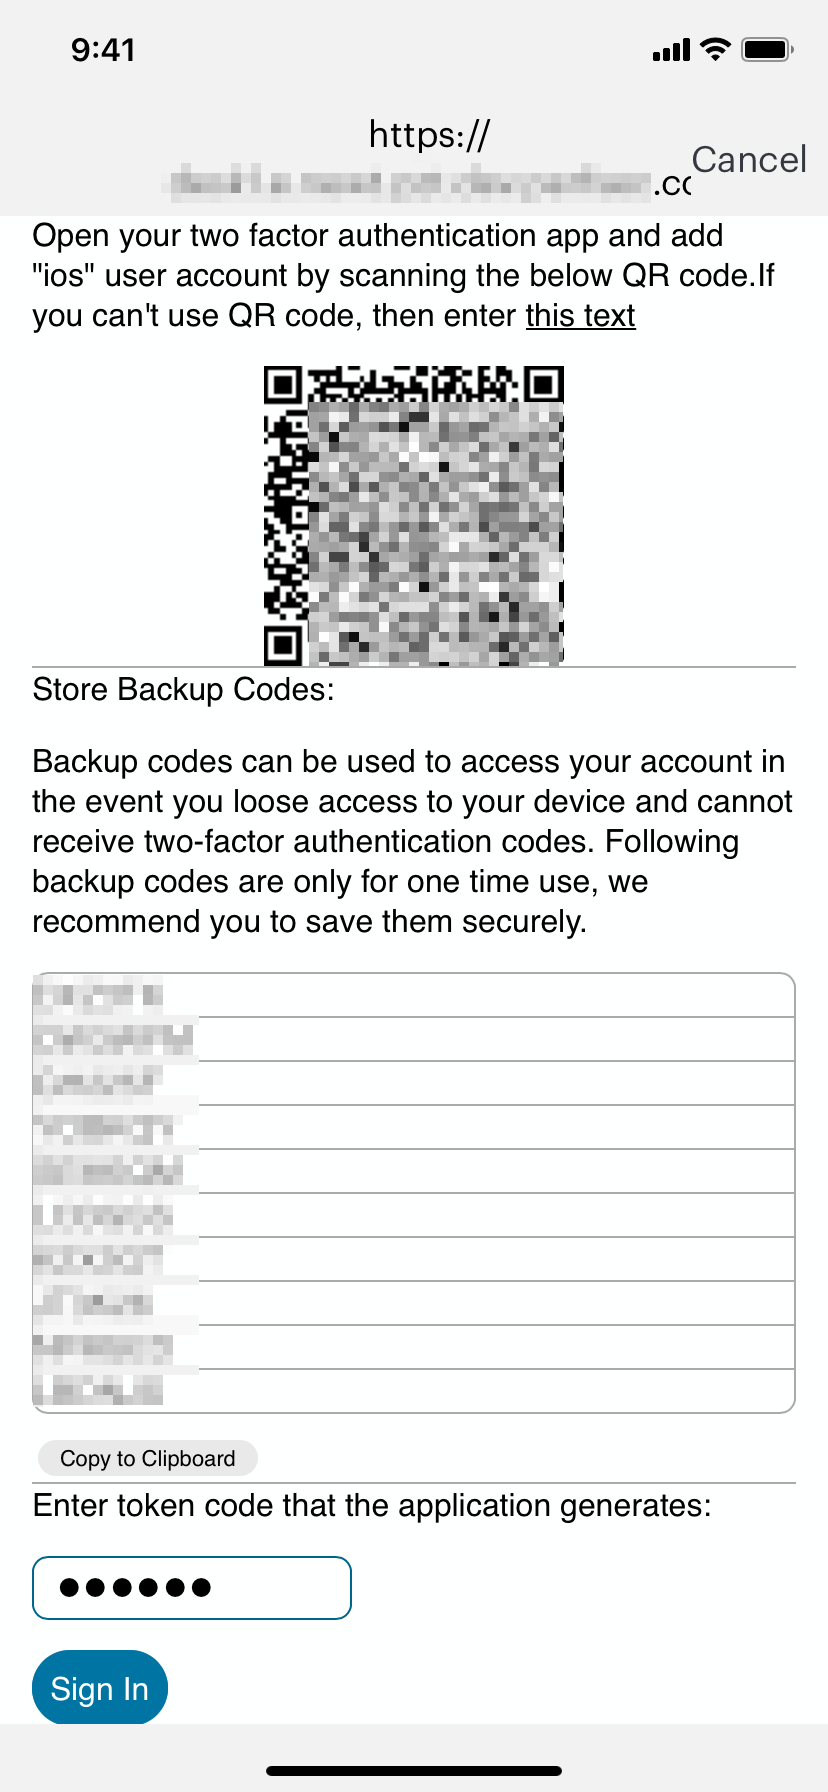
FIGURE 245 First-time sign in TOTP registration
Use this page to add your user details to an authenticator app on your device, such as Google Authenticator or Microsoft Authenticator. If you do not yet have such a two-factor authenticator app installed, do that now.
Scan the QR code, or enter the provided text, to add the user details to your authenticator app. Then, store the generated backup codes in a secure location for future retrieval of a lost account.
Finally, enter the token code generated by the authenticator app into the box provided, then tap Sign In.
Note
For future sign-in attempts, the TOTP challenge dialog appears without the registration details or backup codes. As before, you provide the generated token code from your authenticator app into the box provided and select Sign In.
(Optional) Tap the Disconnect button to manually disable the nZTA connection. This facility overrides the on-demand connection feature and prevents Ivanti Secure Access Client from connecting to the Controller or any ZTA Gateways. By tapping this button, your nZTA-protected applications become inaccessible until the connection is restored. For more details, see Disabling the nZTA Connection.
(Optional) Tap the connection to view the connectivity status. For example:
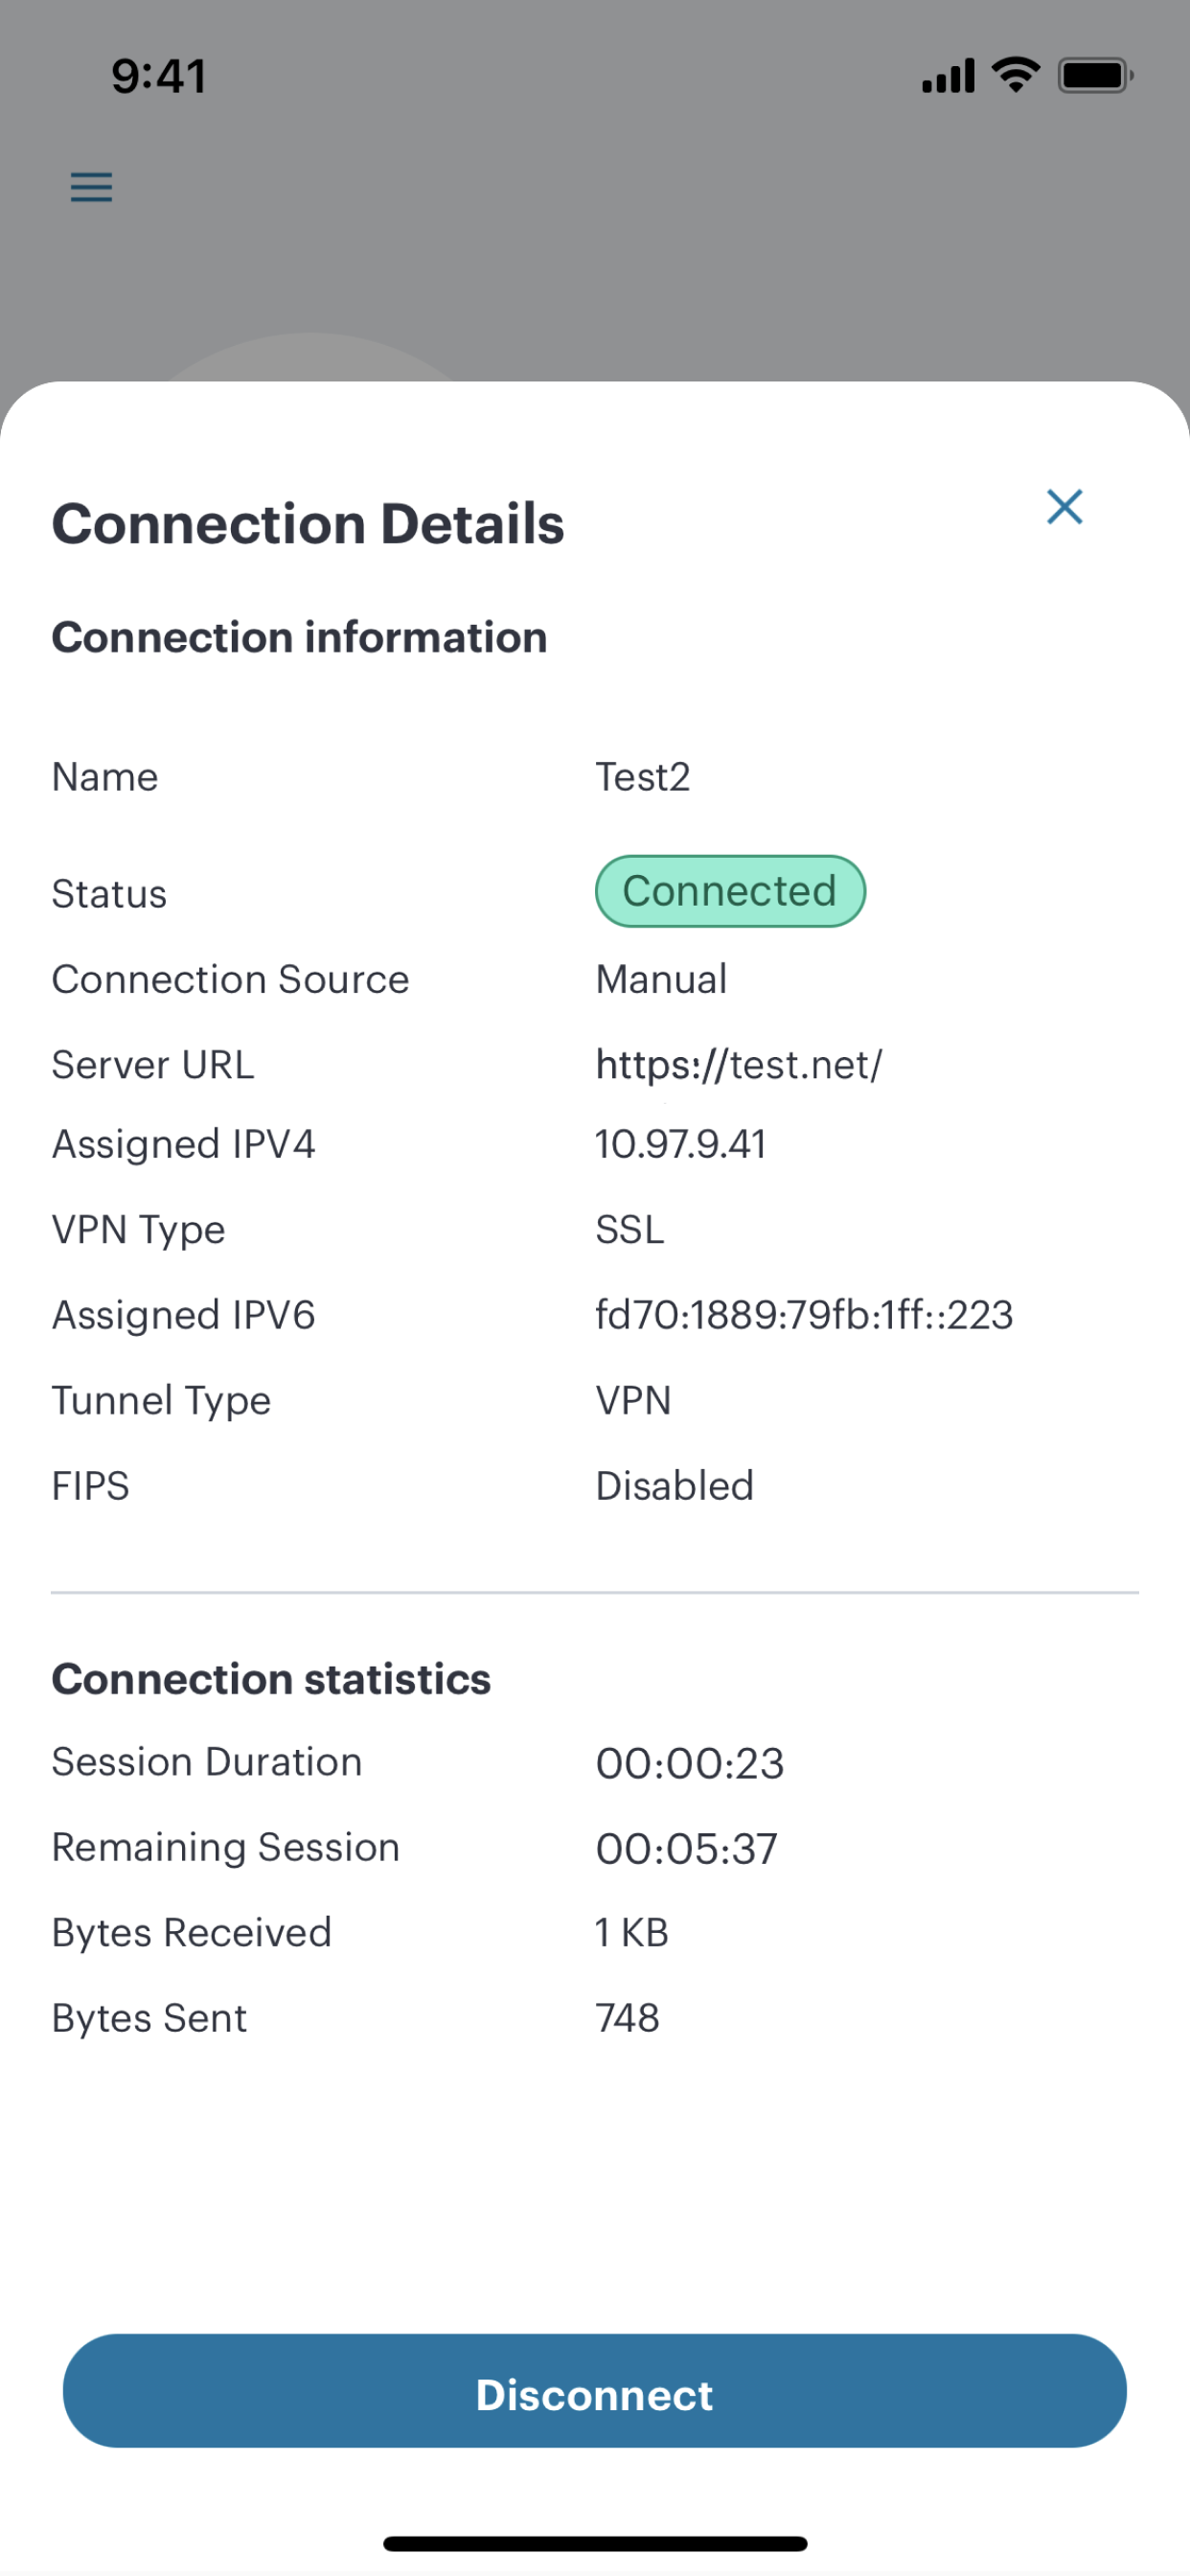
FIGURE 246 iOS Connectivity Status
To use a supported app, start the app as usual from the iOS interface, and enter any credentials if requested.
Installing a Beta Release of the iOS Client
Periodically, Ivanti might make available a pre-release beta version of Ivanti Secure Access Client for iOS for limited testing purposes. Beta releases of Ivanti Secure Access Client for iOS use the TestFlight package, a third-party app that enables users to download and test pre-GA packages of products. To learn more about TestFlight, see https://testflight.apple.com/.
Before you start, you must:
Have an iOS sign-in/enrollment URL for nZTA, as provided by the Ivanti DevOps/Support organization.
Install and register the TestFlight package from the Apple App Store.
Configure TestFlight to have access to the Ivanti Secure Access Client app, using information provided by the Ivanti DevOps/Support organization.
To enroll a beta client on your iOS mobile device:
Locate and start the TestFlight app. For example:

FIGURE 247 TestFlight App Icon
In the TestFlight app, select the Ivanti Secure Access Client app and install it. For example:
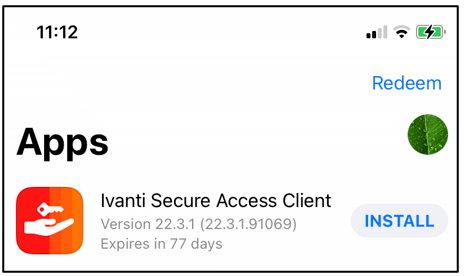
FIGURE 248 TestFlight Ivanti Secure Access Client App Install
After the app installs, it is added to the iOS interface. For example:
FIGURE 249 Ivanti Secure Access Client App Icon
Continue to enroll the device using the standard iOS Client enrollment procedure. Start the Ivanti Secure Access Client app and follow the remaining steps.
Enrolling an Android Mobile Device
Note
For mobile devices, Ivanti Neurons for Zero Trust Access compliance requires Android v8.0 or later.
Note
Application discovery and the use of a default Gateway is not supported from Android devices.
Before you start this process, you must:
Have an Android sign-in URL for nZTA, based on the tenant FQDN provided by the Ivanti DevOps/Support organization.
(For testing pre-GA/Beta Ivanti Secure Access Client packages only) Have an invitation email from your Ivanti representative that describes how to access pre-GA builds of the Ivanti Secure Access Client app from the Google Play store.
The procedure to enroll your Android device differs depending on whether you have an existing Ivanti Secure Access Client app installed and configured with a connection to a classic VPN product.
To enroll an Android device that has a previous connection to a classic VPN product:
Start your Android device and access its home page.
Locate and start the Ivanti Secure Access Client app.
In the main app menu, select Enroll To ZTA:
FIGURE 250 The Ivanti Secure Access Client app menu
The Enroll with ZTA screen appears.
In the text box provided, enter your corporate email or sign-in URL and tap Submit:
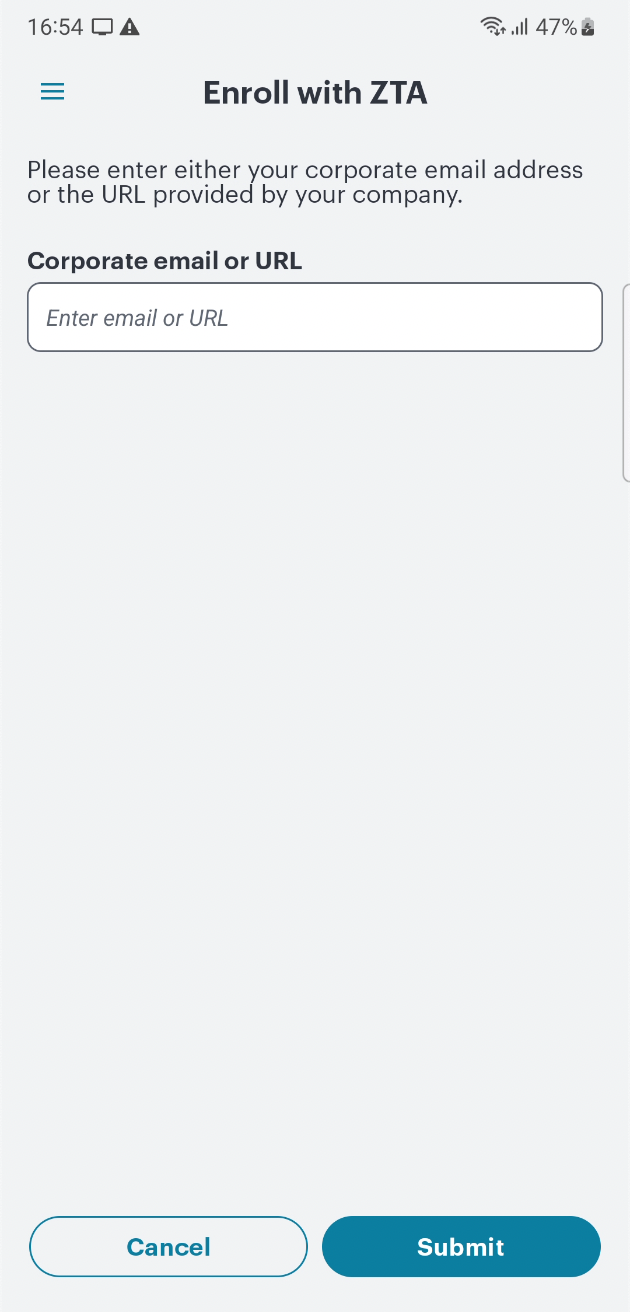
FIGURE 251 Enroll with ZTA
To complete the enrollment procedure, follow the remaining steps below.
To enroll an Android device with no previous Ivanti Secure Access Client installation:
Start your Android device and access its home page.
Locate the Ivanti Secure Access Client app in the Google Play store and install it.
Note
If you are testing pre-GA/Beta builds of Ivanti Secure Access Client for Android, use the instructions provided in your invitation email to locate and download applicable pre-GA Ivanti Secure Access Client app builds in the Google Play store.
After the app installs, it is added to the Android interface. For example:
FIGURE 252 Ivanti Secure Access Client App Icon
Start the Ivanti Secure Access Client app.
The welcome screen appears. For example:
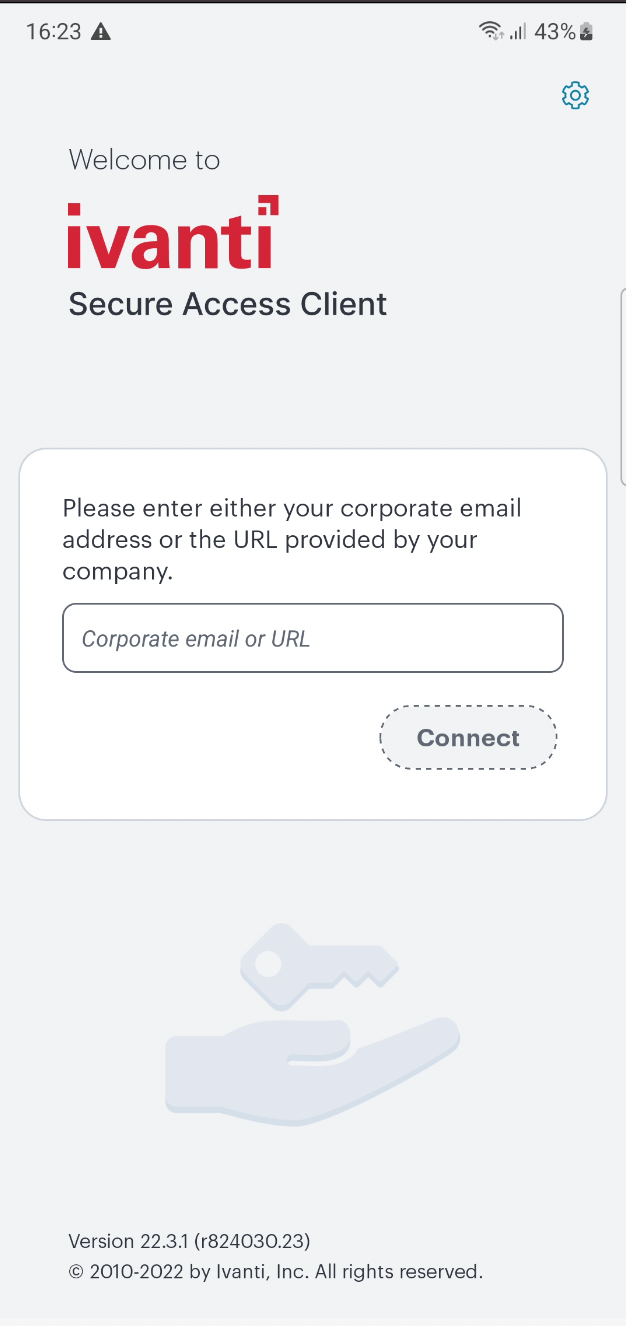
FIGURE 253 Ivanti Secure Access Client Welcome Screen
Enter the corporate email or nZTA sign-in URL.
For example:
Default: “https://tenant1.mycompany.com/login/enroll”
Custom: “https://tenant1.mycompany.com/login/<custom_user_signin>/”.
Click Connect.
To complete the enrollment procedure, follow the remaining steps below.
For both of the previous Android device procedures, continue with the following steps:
Perform any required authentication for enrolling. (Local or Azure AD credentials)
Note
When using Azure AD authentication during onboarding, if you select “No” at the “Stay Signed In” prompt, you must re-enter your AD credentials whenever the login page prompts. To avoid this, make sure you select Yes at the Stay Signed In page.
The compliance of the device is checked, session information is gathered, and a VPN tunnel to the Controller is created automatically. This is indicated by a key icon and a Ivanti Secure Access Client icon.
The Connections screen shows the active Controller connection:
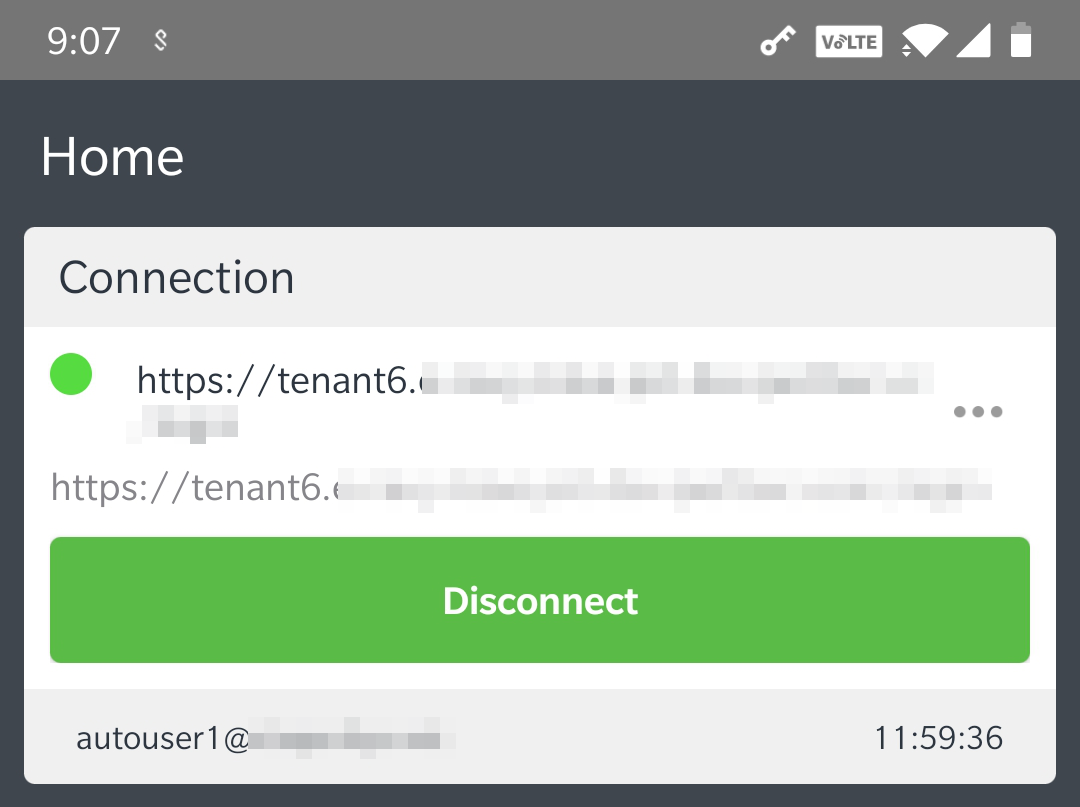
FIGURE 254 Android Active nZTA Connection
Note
To learn more about how Ivanti Secure Access Client maintains a connection with the Controller, and how user sessions are validated with your ZTA Gateways, see Introduction.
(Optional) If your sign-in authentication policy is configured for Multi-Factor Authentication, you might be required to complete a TOTP (Time-based One Time Password) secondary authentication step each time you sign in.
For a first time login, the user is presented with a TOTP registration page:
FIGURE 255 First-time sign in TOTP registration
Use this page to add your user details to an authenticator app on your device, such as Google Authenticator or Microsoft Authenticator. If you do not yet have such a two-factor authenticator app installed, do that now.
Scan the QR code, or enter the provided text, to add the user details to your authenticator app. Then, store the generated backup codes in a secure location for future retrieval of a lost account.
Finally, enter the token code generated by the authenticator app into the box provided, then tap Sign In.
Note
For future sign-in attempts, the TOTP challenge dialog appears without the registration details or backup codes. As before, you provide the generated token code from your authenticator app into the box provided and select Sign In.
(Optional) Tap the Disconnect button to manually disable the nZTA connection. This facility overrides the on-demand connection feature and prevents Ivanti Secure Access Client from connecting to the Controller or any ZTA Gateways. By tapping this button, your nZTA-protected applications become inaccessible until the connection is restored. For more details, see Disabling the nZTA Connection.
(Optional) Tap the connection to view the connectivity status. For example:
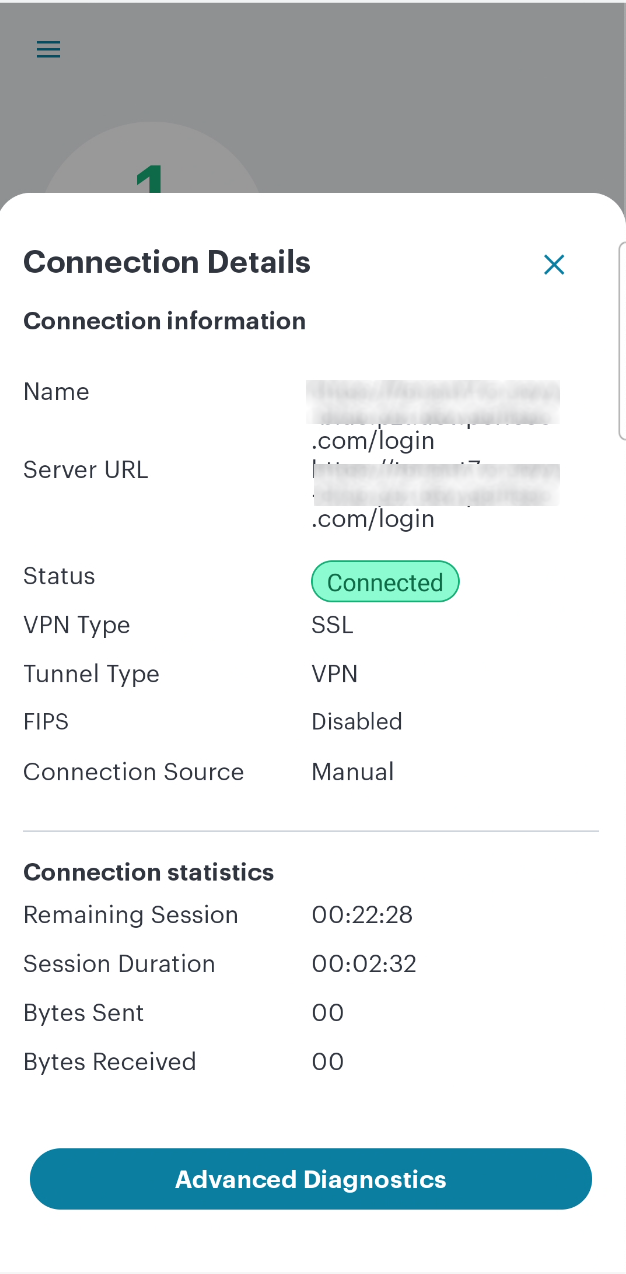
FIGURE 256 Android Connectivity Status
(Optional) Tap the page to view the Gateway Status. For example:
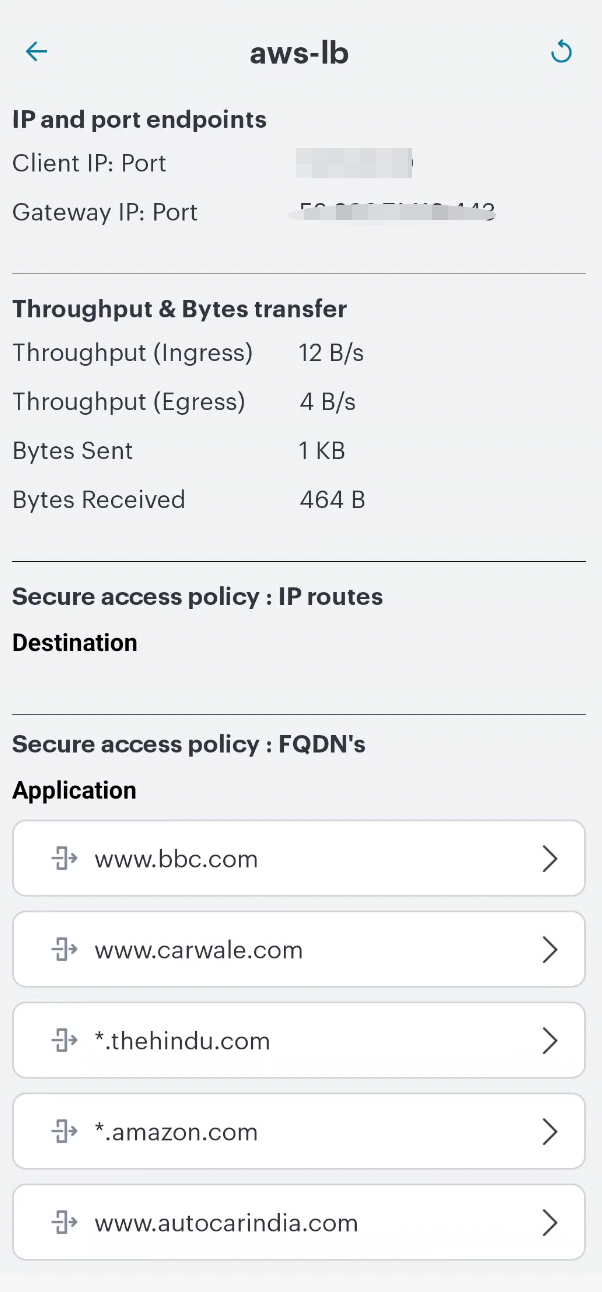
FIGURE 257 Android Gateway Status
(Optional) Tap the left arrow to return to the Connections screen.
To use a supported app, start the app as usual from the Android interface, and enter any credentials if requested.