Logging in as a Tenant Administrator
Preparing to Login
As a Tenant Admin, you can configure Ivanti Neurons for Zero Trust Access (nZTA) to support the Gateways, users, devices, policies and resources that are required for your organization’s nZTA implementation.
To log into the Controller, you require a Tenant Admin login.
All Tenant Admin accounts are set up by the Ivanti DevOps team. Once your Tenant Admin account has been created, you will receive an email which describes how to log into the Controller as a Tenant Admin.
You can then proceed to login to the Controller, see Logging into the Controller as a Tenant Admin.
Logging into the Controller as a Tenant Admin
Before you can log in as a Tenant Admin, you will receive an email from the Ivanti DevOps team. This email contains:
Your Tenant Admin user name.
Your password.
The nZTA domain. That is, the FQDN of the Controller.
A hyperlink to start the login process.
To log into your Tenant Admin account:
Click the hyperlink in your email.
The administrator login page appears.
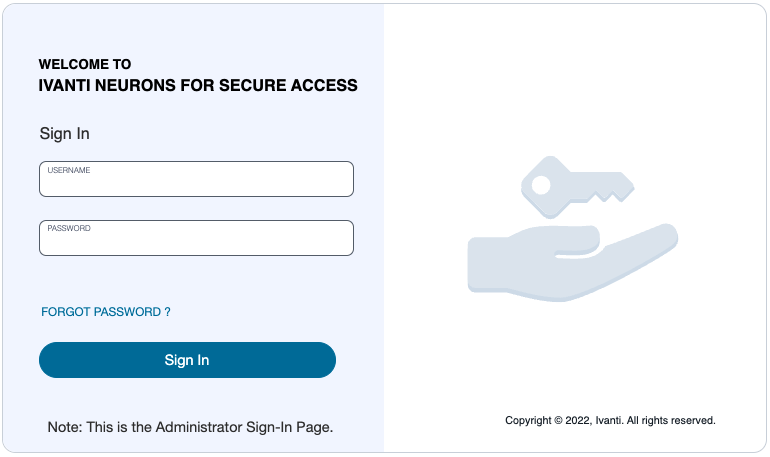
FIGURE 11 Tenant Admin Login Page
Log in using your supplied Tenant Admin credentials.
The following default timeouts are used for all Admin sessions:
The idle timeout is 10 minutes.
The session timeout is 60 minutes.
To configure Admin session timeout values, see Configuring Session Timeouts.
If nZTA requests it, specify a new password for your account.
Once this procedure is complete, you access the nZTA graphical interface as an admin user.
The graphical user elements that appear depend on your configured state.
When you log in for the first time, and until nZTA is minimally configured, a Welcome dialog appears, which leads to the Secure Access Setup (Onboarding) wizard. See Working with the Onboarding Wizard.
When you log into a configured system, the nZTA Network Overview page appears, see Viewing the nZTA Network Overview.
Note
To reset a forgotten password, click FORGOT PASSWORD. This link presents a credentials form through which you enter a username and password. If the entered credentials match a registered administrator account, nZTA emails a password reset link to the entered address allowing the recipient to create a new password.
Working with the Onboarding Wizard
When you log in for the first time, and until nZTA is a configured system, a Welcome dialog appears. To proceed, select Configure Now.
The first step enables you to configure a custom domain for this subscription:
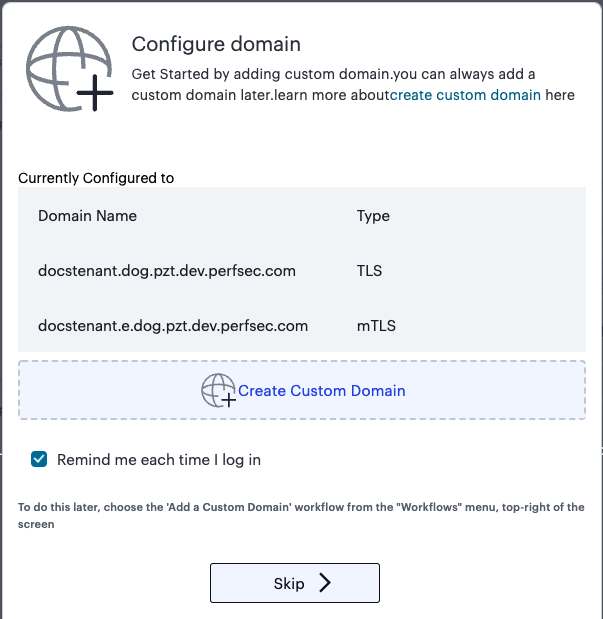
FIGURE 12 Onboarding Wizard - configuring a custom domain
The current domain (in both TLS and mTLS form) is displayed, along with the option to configure a custom domain. To skip this step and continue using the default domain, select Skip.
To configure a custom domain, select Create Custom Domain to start the Create Custom Domain workflow. For more details on this workflow, see Specifying a Custom Domain.
After you have configured a custom domain, or if you chose to skip ahead, the Secure Access Setup (Onboarding) wizard appears.
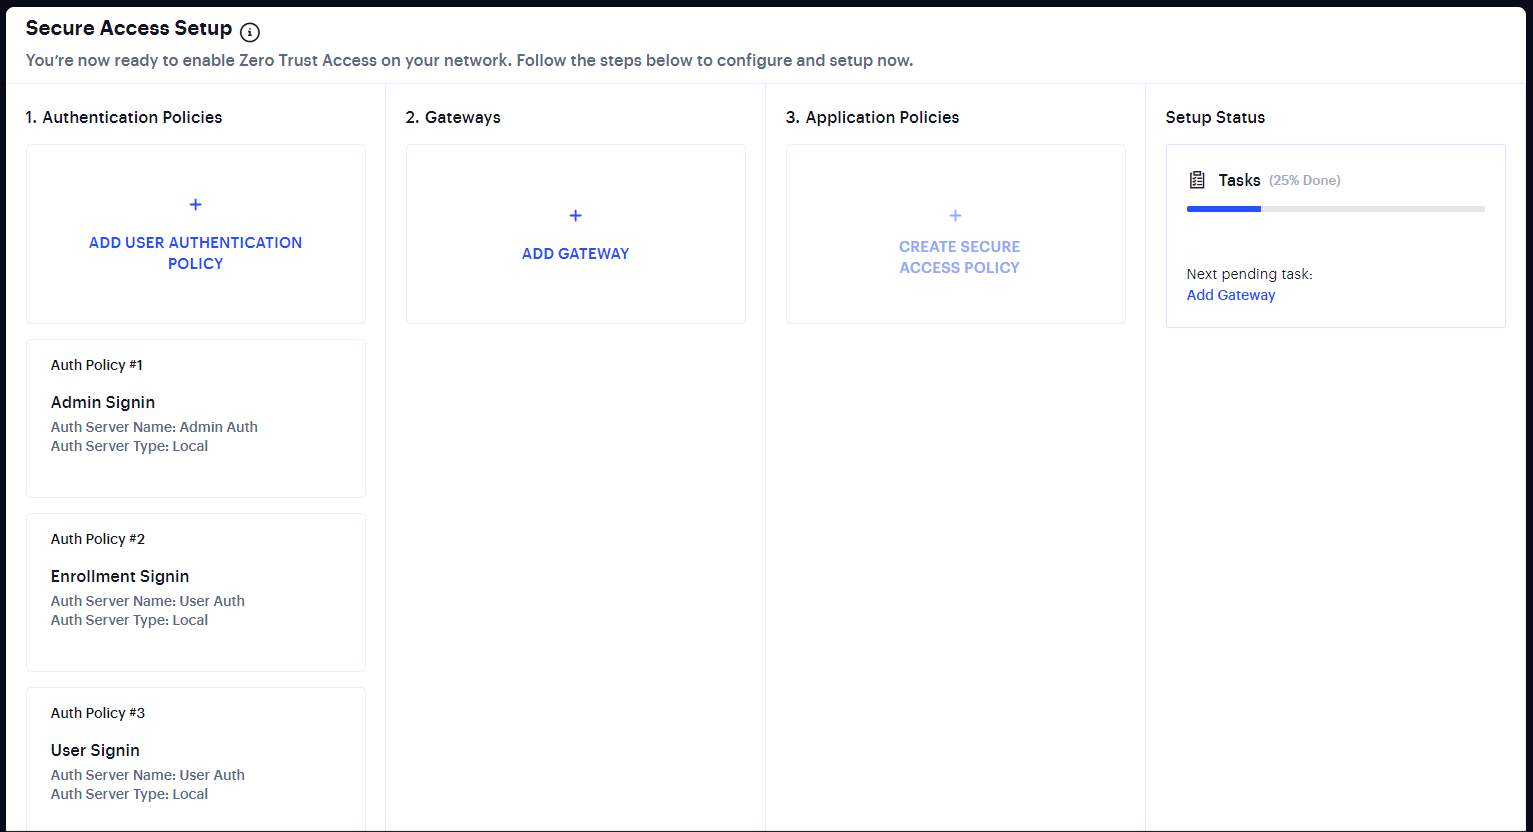
FIGURE 13 The Secure Access Setup (Onboarding) Wizard
This wizard enables you to configure the required elements of nZTA using a number of pages and workflows:
Add User Authentication Policy. This displays the User Policies page.
Local authentication policies are present by default, which can be used immediately.
If you choose to use the default local authentication policies, you can proceed directly to the Add Gateway step.
If you choose to create your own local authentication policies, or to immediately implement SAML authentication, these must be performed separately from the Onboarding wizard, see Working with User Authentication.
Add Gateway. This displays the Gateway Network Configuration workflow, see Working with Gateways.
Application Policies. This displays the Create Secure Access Policy workflow, see Creating Device Policies and Device Policy Rules.
As you complete each steps, the Setup Status indicates the percentage of Tasks that are complete.
After all tasks are complete, click Go to Dashboard.
Note
You can also start the Onboarding wizard from the Secure Access > Onboarding menu option.
Viewing the nZTA Network Overview
After you log in to the Tenant Admin Portal following successful completion of the Onboarding Wizard, nZTA displays the Network Overview page. This serves as the home page for your portal, and provides an overview of user and service activity across your enterprise.

FIGURE 14 The Network Overview Page
Note
To return to this page any time, click the Insights menu icon in the nZTA menu and select Overview. Alternatively, click the banner at the top.
From this page, you can view and configure all functions and capabilities allowed through your subscription and role. Using the nZTA menu at the left-hand side, choose from:
The Show/Hide menu icon, providing the ability to show or collapse the nZTA menu tree:

FIGURE 15 Showing or hiding the nZTA menu system
The Insights menu icon, providing access to the analytics and monitoring components of the nZTA portal:

FIGURE 16 Accessing the Insight menu
To learn more about the functionality offered by this menu, see Using the Insights Menu to Monitor User Activity and Service Usage.
The Secure Access menu icon, providing access to configure the individual components that comprise your Secure Access Policies:

FIGURE 17 Accessing the Secure Access menu
The Administration menu icon, providing access to administrative functions related to your nZTA subscription:

FIGURE 18 Accessing the Administration menu
The chapters in this guide cover each of these functions in detail.
Changing the UI Theme
nZTA offers two themes for your UI display:
Light theme:

FIGURE 19 The Network Overview Page - light theme
Dark theme:

FIGURE 20 The Network Overview Page - dark theme
To change the current theme, which remains in place through subsequent logins, use the Settings menu:
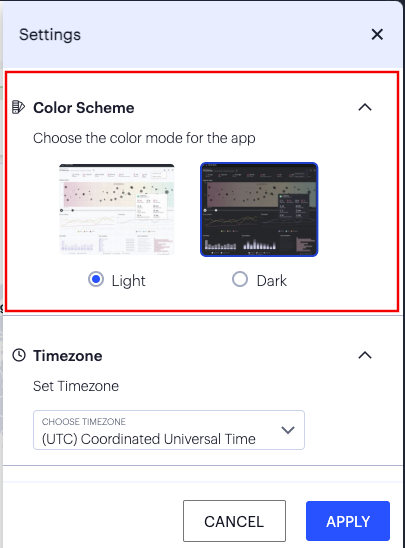
FIGURE 21 Changing the UI theme
Through the Color Scheme panel (indicated), click Light or Dark to switch between themes.
Setting the Timezone
To configure the default timezone for this admin login account, use the Settings menu:
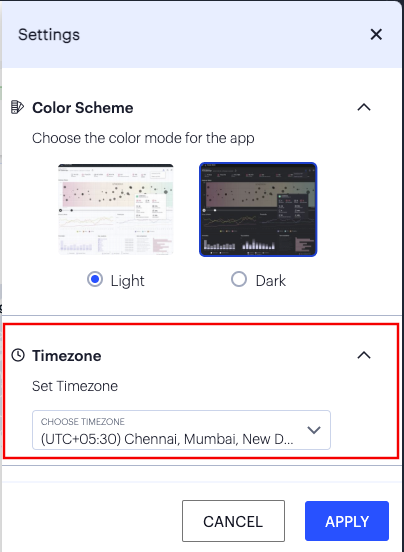
FIGURE 22 Configuring the default timezone
Choose a timezone in the provided drop-down selector, then click Apply.
The configured timezone affects the display of data on all Insights pages, and each admin login account within a tenant deployment has their own specific timezone configuration. Changes to the timezone persist across login sessions, and the default setting is UTC (Coordinated Universal Time).
The current timezone can be observed through the date-time selector at the top of each Insights page.
Note
Changing the timezone can affect the data displayed in each chart or graph. For example, a recently-observed non-compliance event involving a client device in the GMT timezone that appears in the Last Hour view (when using GMT (UTC + 00:00) as your configured timezone) might then only appear in the Last X Hours view when you switch your timezone to IST (UTC+05:30).
Configuring Session Timeouts
To configure timeout values for admin and user sessions, use the Settings menu:

FIGURE 23 Configuring timeout values for admin and user sessions
Through the Session Settings panel (indicated), you can set the following timeout values:
Admin Idle Timeout: the time, in minutes, after which the admin login session to the Tenant Admin Portal times out due to inactivity. (default: 10)
Admin Max Session Length: the time, in minutes, after which the admin login session to the Tenant Admin Portal ends and must be re-authenticated. (default: 60)
User Idle Timeout: the time, in minutes, after which the user login session to nZTA times out due to inactivity. (default: 60)
User Max Session Length: the time, in minutes, after which the login session to nZTA ends and must be re-authenticated. (default: 720)
To apply your changes, click APPLY.
Note
To use these settings, your configured ZTA Gateways must all meet minimum version requirements for session control. nZTA disables the panel and displays a warning message if this is not the case.
Note
To learn more about user sessions and the effect of configured timeouts, see Using Ivanti Secure Access Client with nZTA.
Resetting All Filters and Selections
Each page in the Insights menu allows data filtering, enabling you to observe and monitor only the analytics and log data you want. Each filter or selection feature includes its own reset to default value option. To learn more about the Insights menu and the analytics capabilities of nZTA, see Using the Insights Menu to Monitor User Activity and Service Usage.
Should you want to reset all filters and data selection criteria across the Tenant Admin Portal in one go, use the Settings menu:

FIGURE 24 Resetting all filters and data selection criteria across the Tenant Admin Portal
Through the Filter Reset panel, you can remove all filters and data selection criteria immediately, returning each page to its default view. Each admin user stores filters and selections separately, so this function affects the current user only.
To activate, enable Set Filters to default, then select APPLY.
Logging out of the Controller
To log out of the nZTA Tenant Admin Portal and end the current session, click the Profile icon and select Logout.
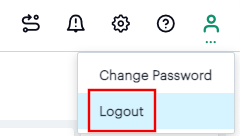
FIGURE 25 Logging out of the portal