Creating/Editing Secure Access Policies
Introduction
A secure access policy defines how end-users can connect to Ivanti Neurons for Zero Trust Access (nZTA) to access applications. Each secure access policy is defined in terms of four dimensions:
Gateways: A ZTA Gateway (or ZTA Gateways) through which Application access is controlled, and on which the secure access policy is deployed, see Working with Gateways.
Users: The user methods, user policies, and user groups that are required on the ZTA Gateway, see Working with User Authentication.
Devices: The device policy rules and device policies that define which end user devices can access applications, see Creating Device Policies and Device Policy Rules.
Applications: The on-premise and cloud applications to which end users have access, see Working with Applications and Application Groups.
When a secure policy is created on the Controller, it is downloaded automatically and applied to the ZTA Gateway referenced by the policy.
nZTA has one built-in secure access policy, Application discovery. This policy, when enabled and configured, directs any request from an application that is not referenced by a policy to a default Gateway. See Configuring a Default Gateway for Application Discovery.
Viewing your Secure Access Policies
To see the list of secure access policies currently defined on the Controller:
Log into the Controller as a Tenant Admin, see Logging in as a Tenant Administrator.
From the nZTA menu, select the Secure Access icon, then select Secure Access Policies.
The Secure Access Policies page appears.
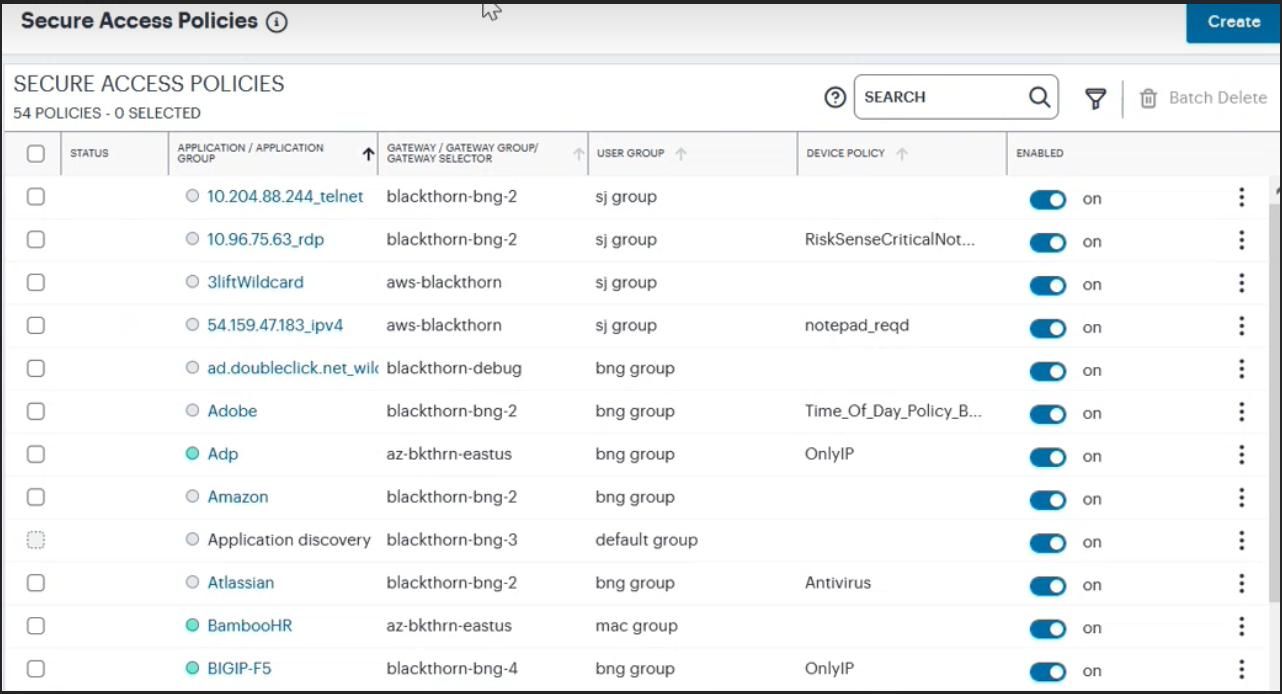
FIGURE 196 Viewing the list of secure access policies
Each policy is shown with the following details:
Status indicator: The current availability of the application.
Applications/Application Groups: The Application or Application Group this secure access policy is configured for.
Gateways: The ZTA Gateway or ZTA Gateway Group or ZTA Gateway Selector that controls access to the applications named in this secure access policy.
Users: The User Group for this secure access policy.
Device Policies: The device policy that applies to this secure access policy.
Enabled: Whether or not this secure access policy is enabled.
Note
Select the application name to view the Application or Application Groups page.
An application group is identified by the arrow adjacent to the application name. Select the arrow to show the applications available in this group:
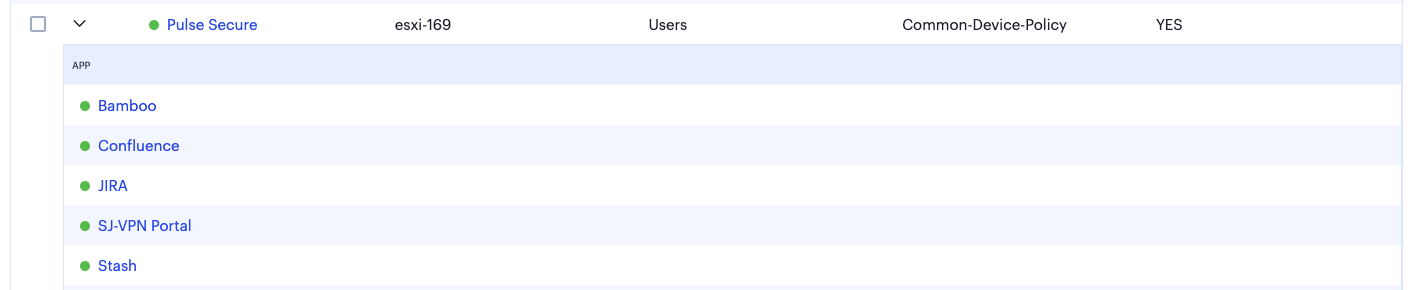
FIGURE 197 The applications contained in an application group
The Status indicator uses one of the following color schemes to determine application health:
Green: The application (or application group) is reachable.
Gray: The Controller cannot determine the availability of the application (or application group).
Red: The application (or application group) is unreachable.
Application health status is available only for URL or IP address-based applications. Application definitions using a URI that contain a wildcard-based FQDN are not monitored for this purpose and are shown with a gray status indicator to denote that the status cannot be determined.
Note
The built-in Application Discovery policy is not monitored for this purpose and uses a gray status indicator.
Note
To view a chart showing the top non-reachable applications, see All Applications.
Through this page you can:
Create a new secure access policy, see Creating a Secure Access Policy.
Edit an existing secure access policy, see Editing a Secure Access Policy.
Use the View Details link in the message, which appears on successful creating/updating of policy, to view the newly created/updated policy in the list.
Enable or disable a secure access policy. Select the policies you want to enable/disable using the toggle button, then select the corresponding link at the top of the page.
Delete a secure access policy. Use the three dots adjacent to the policies you want to delete, then select Delete.
Perform Search for occurrences of named applications, application groups, gateways, gateway groups, device policies, user groups and enabled status (yes/no) for the policies listed on this page.
Filter the policies displayed on the page by application/application group, gateway, user, device policy, or status. When you select the Filter icon, a side panel dialog appears within which you can select specific criteria to filter the display to show only matching policies. Applied filters remain in place until you select Clear All from the side-panel, or until you leave the page.
Creating a Secure Access Policy
A secure access policy defines how end users can connect to nZTA to access applications.
To create a secure access policy:
Log into the Controller as a Tenant Admin, see Logging in as a Tenant Administrator.
From the nZTA menu, select Secure Access > Secure Access Policies.
The Secure Access Policies page appears. This lists all current secure access policies.
FIGURE 198 Viewing the Secure Access Policies page
Click Create:
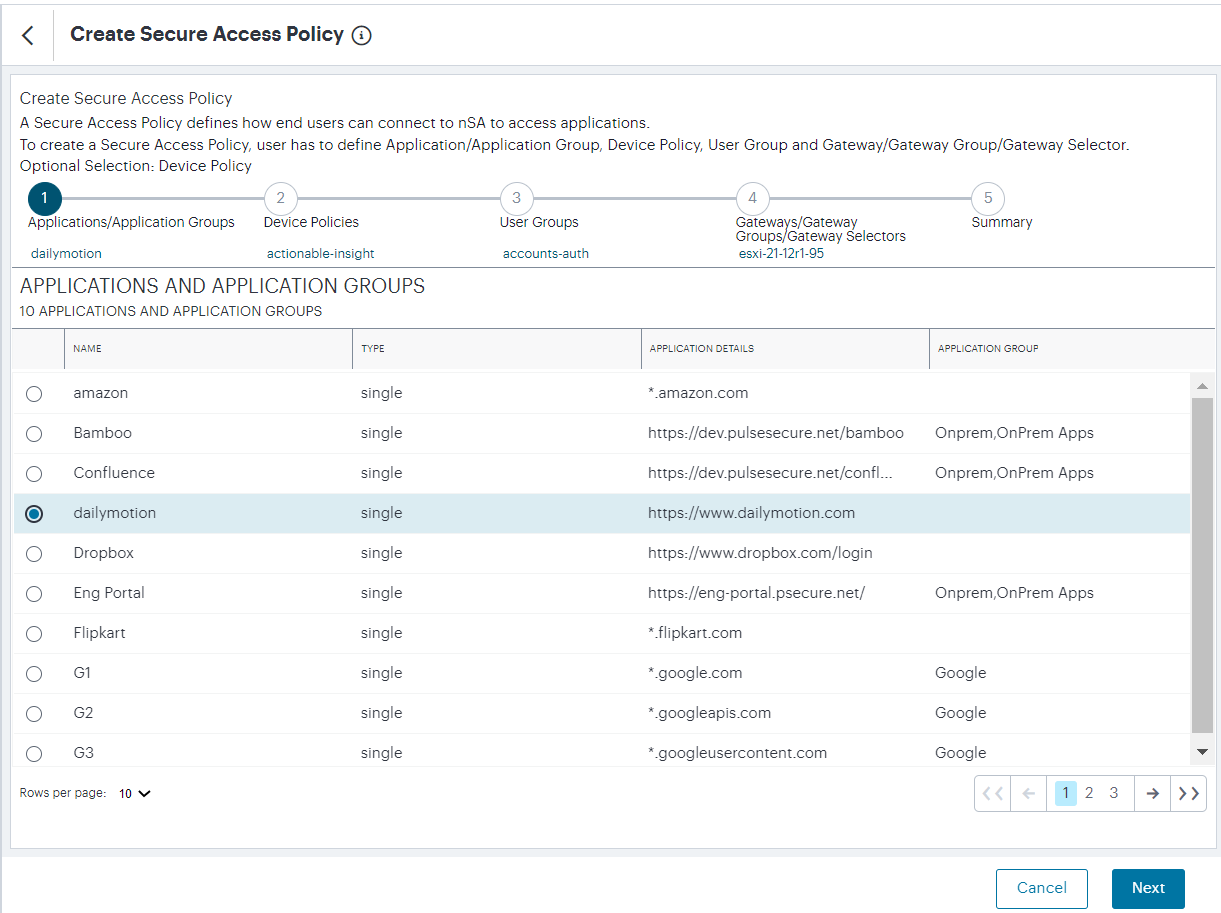
FIGURE 199 Creating a new Secure Access Policy
Note
At any point during this process, you can reset the form data by selecting Reset. You can also view existing secure access policies in a pop-up dialog by selecting View Secure Access Policies.
Select the application, or application group, for the policy. Click Next.
Note
An application, or application group, can be associated with only one secure access policy.
From the Device Policies list, select the device policy to apply to your Secure Access Policy. Click Next.
From the User Groups list, select the user group to apply to your Secure Access Policy. Click Next.
From the Gateways, Gateway Groups and Gateway Selectors list, select the ZTA Gateway/Gateway Group to which you want to publish your Secure Access Policy. Click Next.
Verify the Summary details and then click Create.
The policy is created and added to the list of secure access policies.
(Optional) To edit a listed secure access policy, select the adjacent three dots and then select Edit. After the secure access policy is updated, it is automatically applied to the ZTA Gateway that it references.
(Optional) To enable a disabled secure access policy, use the toggle button. After the secure access policy is enabled, it is automatically applied to the ZTA Gateway that it references.
(Optional) To disable an enabled secure access policy, use the toggle button.
(Optional) To delete an unused secure access policy, select the adjacent three dots and then select Delete. Confirm the deletion in the subsequent dialog.
After the secure access policy is created, it is automatically downloaded and applied to the ZTA Gateway that it references.
Note
Secure Access Policies can take several minutes to reach their destination ZTA Gateway(s). If an entered policy contains configuration that fails to apply properly due to a compatibility or validation problem, nZTA displays an error message that the applied configuration is incorrect. nZTA attempts to re-apply the configuration in the policy at 15 minute intervals, and repeats this process until such a time as the policy is corrected or deleted.
Editing a Secure Access Policy
You can edit a secure access policy to change how end users connect to nZTA to access applications.
For example, you must edit the Application discovery secure access policy if you want to use a default gateway to support the application discovery feature. To do this, you must assign an unused gateway to the secure access policy. See Configuring a Default Gateway for Application Discovery for details of default gateways.
To edit a secure access policy:
Log into the Controller as a Tenant Admin, see Logging in as a Tenant Administrator.
From the nZTA menu, select the Secure Access icon, then select Secure Access Policies.
The Secure Access Policies page appears. This lists all current secure access policies.
Select the three dots adjacent to the secure access policy you want to edit, then select Edit.
The Edit Secure Access Policy form appears.
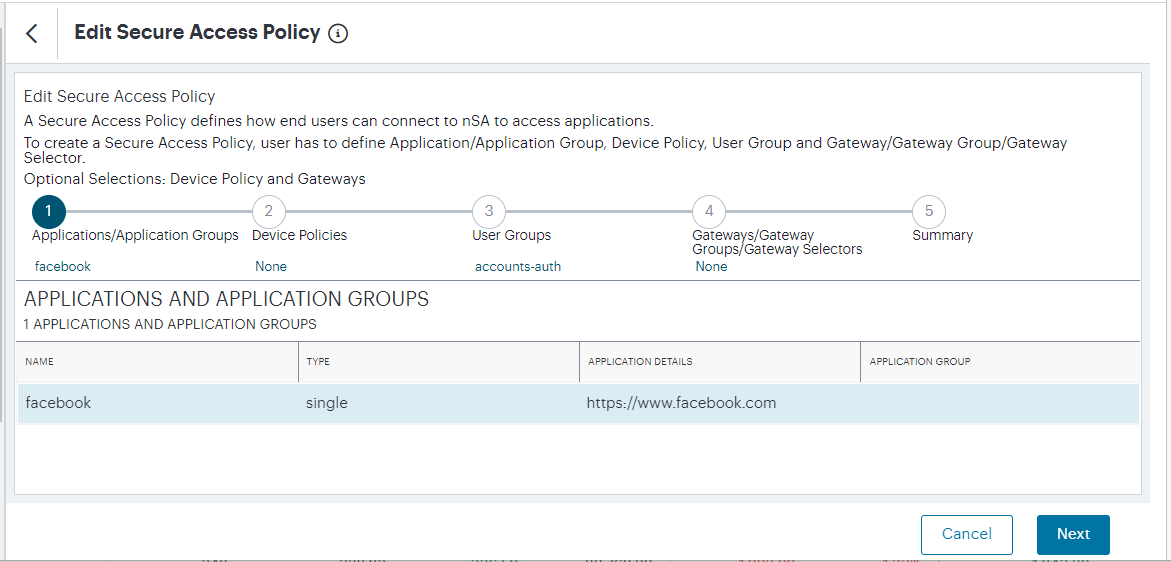
FIGURE 200 Editing a Secure Access Policy
Note
The Application Type and Application cannot be changed.
Make any required changes to the secure access policy.
Select Save.