Using Enterprise Integration to Export Your Logs for External Analysis
Introduction and Prerequisites
Ivanti Neurons for Zero Trust Access (nZTA) gathers data for events that occur on your ZTA Gateways and from the Controller’s Authentication, Authorization and Accounting (AAA) service. These events are categorized and stored in the following log files:
Access Logs
Admin Logs
Event Logs
You can view and obtain these logs at any time through the nZTA Tenant Admin Portal (for details, see Checking the Logs).
nZTA enables you to automatically export log data for analysis in an external third-party enterprise analytics or visualizer tool through Enterprise Integration. This enables enhanced visibility into the health and efficiency of the services running in your nZTA deployment, or to facilitate debugging in the event of unexpected service behavior.
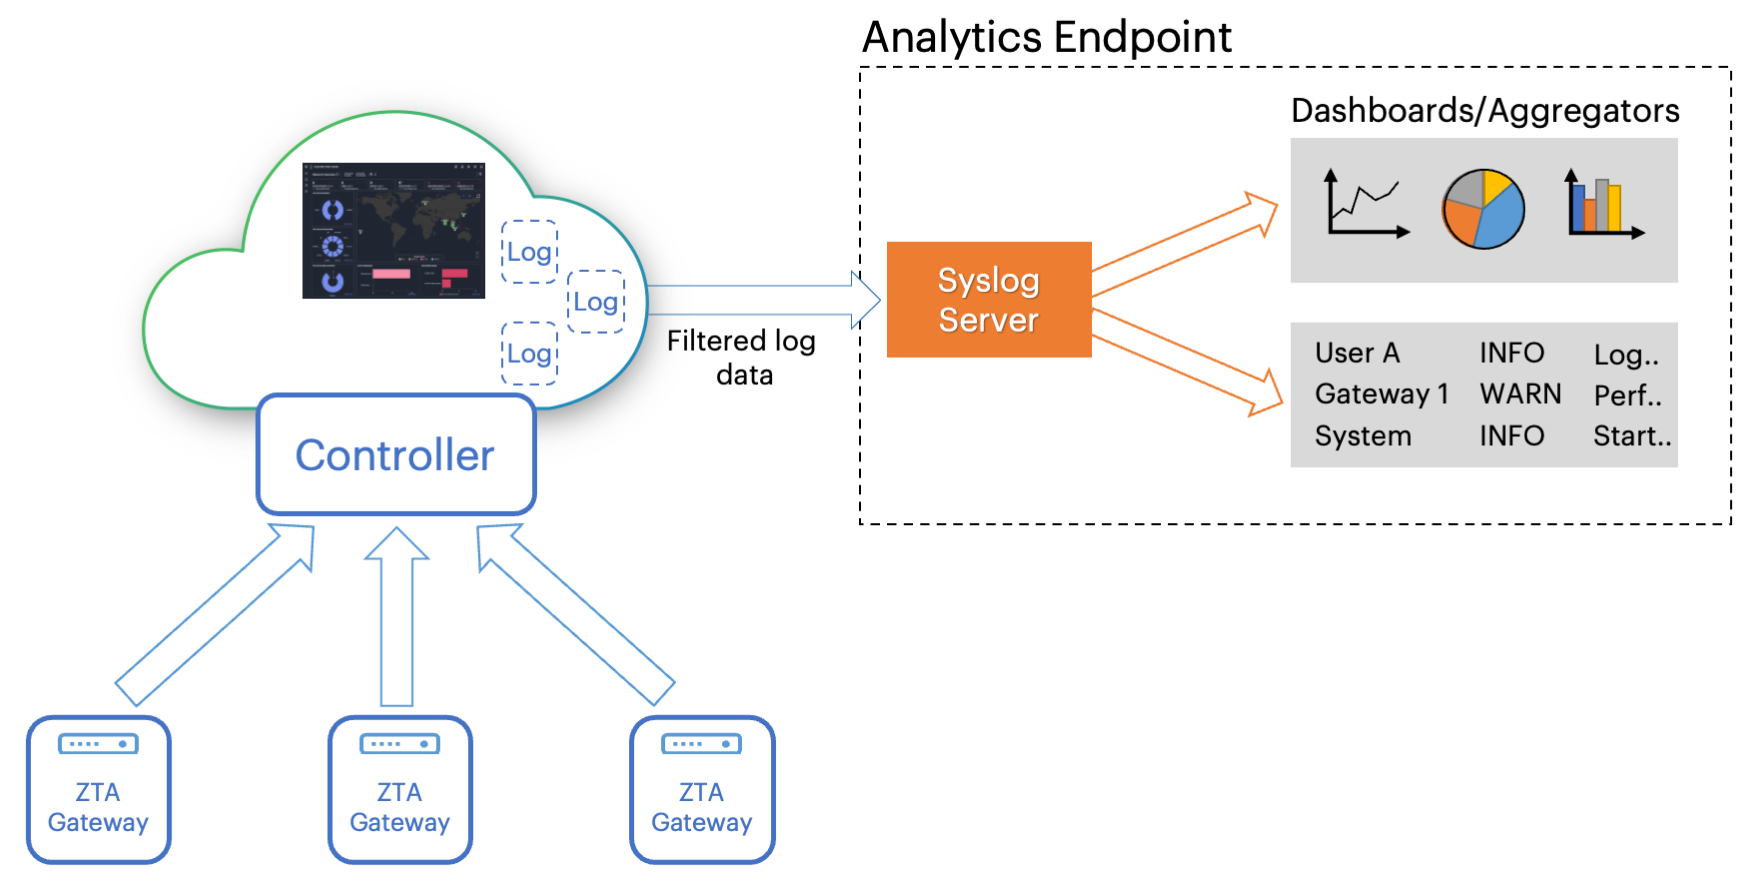
FIGURE 428 Exporting log data to an external analytics endpoint
To receive the log data exported from nZTA, your analytics endpoint should employ a syslog service that supports ingestion of data in JSON or WELF format. Syslog is a protocol defined through RFC 5424, and nZTA supports exporting log data to any Security Information and Event Management (SIEM) system that can accept and parse syslog messages. Supported configurations are:
A publicly-reachable syslog server for your Controller. This requires you to configure nZTA with the hostname or IP address and port on which the analytics service is listening, and with the client certificate to use to authenticate nZTA to the syslog service.
An on-prem syslog server for your ZTA Gateway(s). This requires you to configure nZTA with the hostname or IP address and port on which the analytics service is listening, and with the required protocol for the syslog service.
Note
nSA exports log data at 30 minutes intervals.
To use this facility, you must:
Obtain and import a trusted Server Certificate Authority (CA) certificate suitable for the analytics service, see Importing a Trusted Server CA Certificate.
Obtain and import a client authentication certificate for nZTA, see Adding a Client Certificate to the Controller.
Note
A client certificate is not required for an on-prem syslog server.
Configure the Controller with the details of either:
Your publicly-reachable syslog server, see Adding a Public Syslog Server to the Controller.
Your on-prem Gateway syslog server, see Adding a On-Prem Syslog Server for ZTA Gateways.
Importing a Trusted Server CA Certificate
To export your logs to an analytics service, you first need to add a certificate for a Trusted Server Certificate Authority (Server CA).
Make sure you have a suitable certificate file, in PEM (Base64 ASCII encoded) format, stored on your local workstation before starting this procedure.
Note
nSA supports certificate files in PEM format only. Other formats, such as PFX, are not currently supported.
To import a certificate for a trusted server CA:
Log into the Controller as a Tenant Admin, see Logging in as a Tenant Administrator.
From the nSA menu, click the Administration icon, then select Enterprise Integration > Trusted Server CA.
The Trusted Server CAs page appears.
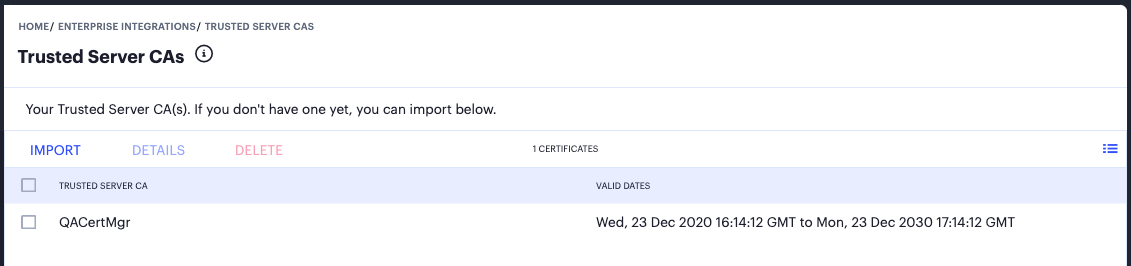
FIGURE 429 Viewing Trusted Server CA certificates
To import a Server CA certificate, click Import.
The Import Server CA page appears.
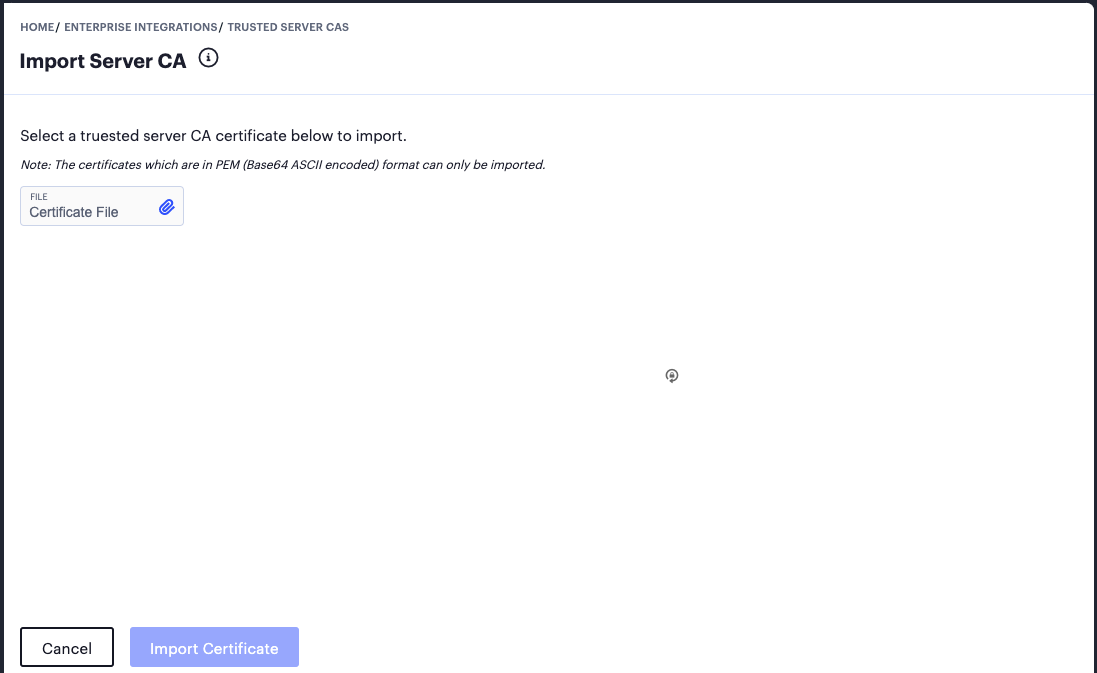
FIGURE 430 Importing a Trusted Server CA certificate
Click Certificate File and use the subsequent dialog to locate the certificate file from your local workstation file system.
To import the selected certificate, click Import Certificate.
The Trusted Server CAs page appears showing the successfully imported certificate.
(Optional) To view the details stored in a certificate, select the certificate checkbox and click Details.
(Optional) To delete a certificate, select the certificate checkbox and click Delete.
Note
You can import more than one trusted server CA certificate.
After you have imported your trusted server CA certificate to the Controller, proceed to add your client certificate (see Adding a Client Certificate to the Controller).
Adding a Client Certificate to the Controller
Before you can export your logs to an analytics service, you must add a client certificate to verify the identity of the Controller to the external service.
Note
A client certificate is not required for an on-prem syslog server.
Make sure you have a suitable client certificate file, in PEM (Base64 ASCII encoded) format, stored on your local workstation before starting this procedure.
Note
nSA supports certificate files in PEM format only. Other formats, such as PFX, are not currently supported.
To import a client certificate:
Log into the Controller as a Tenant Admin, see Logging in as a Tenant Administrator.
From the nSA menu, click the Administration icon, then select Enterprise Integration > Client Authentication.
The Client Authentication page appears.

FIGURE 431 Viewing Client Authentication Certificates
To import a client certificate, click Import.
The Import Certificate page appears.
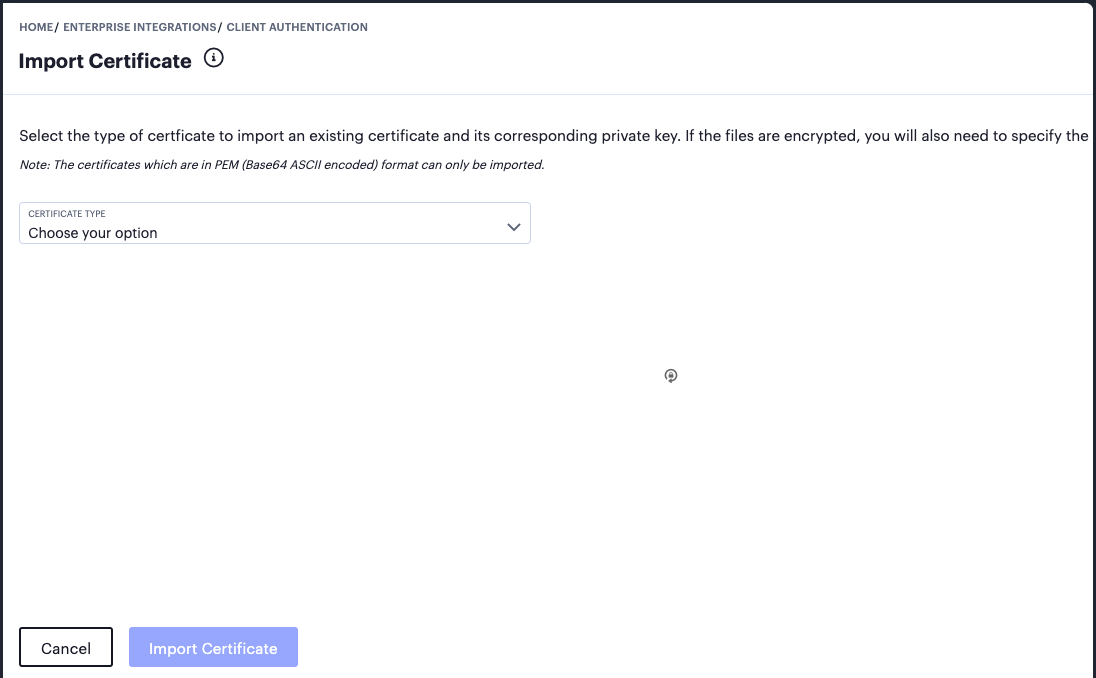
FIGURE 432 Importing a Client certificate
Click Certificate Type and select one of the following options:
Client Certificate with embedded private key: Use this option if you are importing a certificate file with an embedded private key.
Client Certificate with separate private key: Use this option if you are importing a certificate file with a separate private key file.
nSA updates the page to show the relevant import fields based on your selected option.
Click Certificate File and use the subsequent dialog to locate the certificate file from your local workstation file system.
(Optional) If you selected to use a separate private key, click Private Key File and use the subsequent dialog to locate the private key file from your local workstation file system.
(Optional) For Password Key, enter your private key passphrase.
To import the selected client certificate, click Import Certificate.
The Client Authentication page appears showing the successfully imported client certificate.
(Optional) To view the details stored in a certificate, select the certificate checkbox and click Details.
(Optional) To delete a certificate, select the certificate checkbox and click Delete.
Note
You can import more than one client certificate.
After you have imported your Trusted Server CA certificate and Client certificate to the Controller, proceed to add the details of your external analytics service (see Adding a Public Syslog Server to the Controller).
Adding a Public Syslog Server to the Controller
Before you configure a publicly-reachable syslog server on the Controller, ensure that:
Your syslog server is publicly-reachable, and that you know the hostname or IP address and port of the service.
You have already added suitable Server CA and Client certificates.
To configure a syslog server in the Controller:
Log into the Controller as a Tenant Admin, see Logging in as a Tenant Administrator.
From the nSA menu, click the Administration icon, then select Enterprise Integration > Syslog Servers.
The Enterprise Integrations page appears.

FIGURE 433 Viewing Enterprise Integration Syslog Servers
Click Add.
The Add New Configuration page appears, on the Configuration tab.
For Type, select Syslog via Controller.
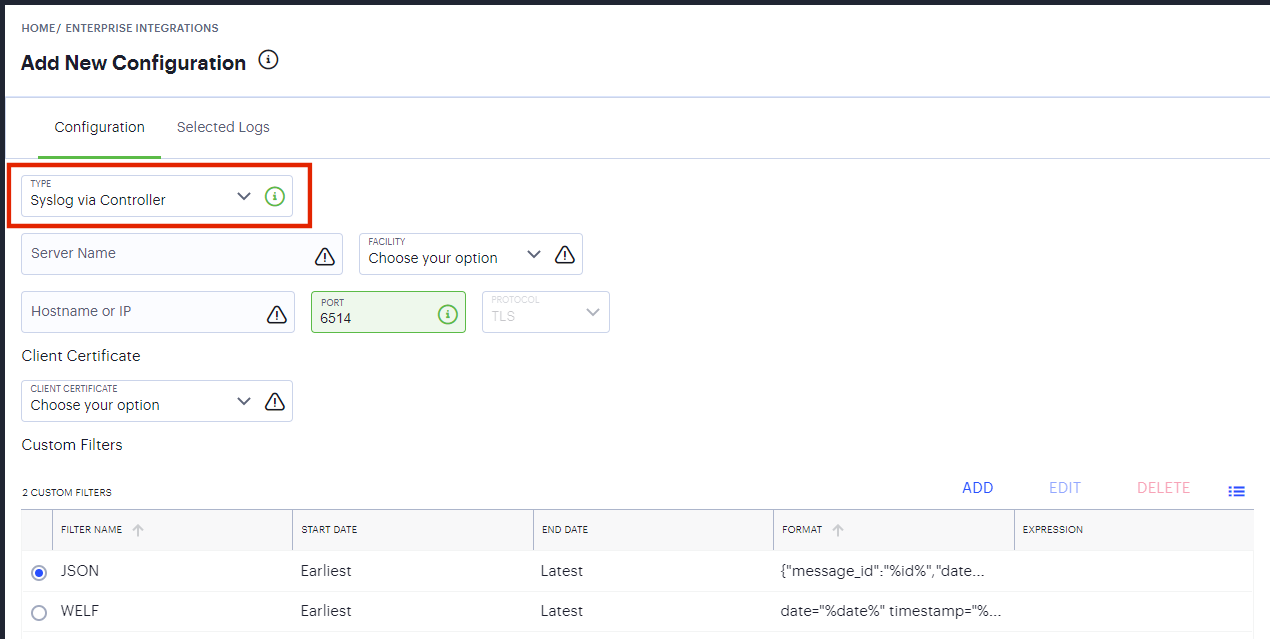
FIGURE 434 Add a new Syslog Server configuration
Enter data for the following fields:
Server Name: An identifying name for this syslog server configuration.
Facility: The syslog facility level nSA should use while exporting log data.
Hostname or IP: The hostname or IP address of the syslog server. This must match the value contained in the Subject Alternative Name specified in the Server CA certificate applicable to this configuration.
Port: The port on which the syslog server is listening.
Protocol: This field is read-only. nZTA supports only the TLS protocol in this instance.
Client Certificate: The client certificate you want to use with this syslog server.
Specify or create a Custom Filter to select the log data sent to the syslog server. Choose from:
Use either of the predefined “JSON” or “WELF” filters. These do not place restrictions on the log data and forward all logs to the external syslog server, using the respective data format.
Create your own filter, based on log parameter rules you define yourself, see Setting a Custom Syslog Filter.
Note
The predefined JSON and WELF filters are fixed and cannot be updated or deleted.
Click Next to select the required log files.
The Selected Logs tab appears.
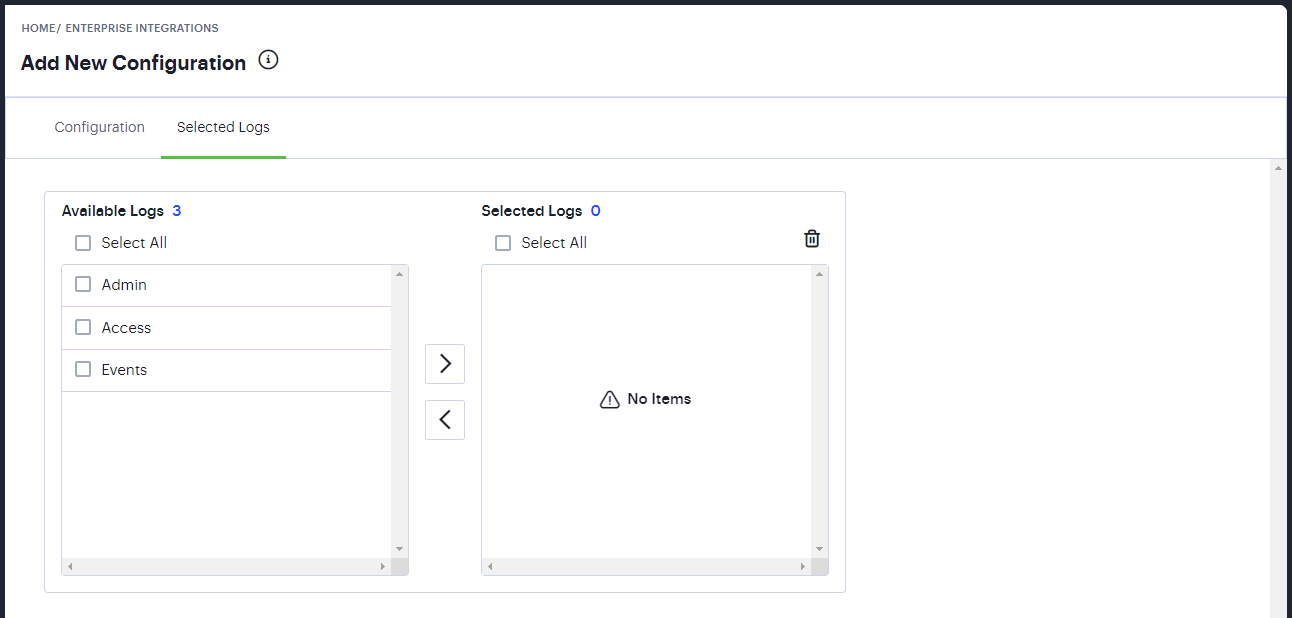
FIGURE 435 Select the logs to be exported
From the list of Available Logs, select the checkbox adjacent to the desired log and click the arrow to move it to the the Selected Logs list.
Repeat this step for each log you want to include. Use the reverse process to remove included logs.
To create a syslog server configuration with the current settings, click Save Changes.
Optionally:
To edit an existing syslog server configuration, select the checkbox adjacent to the configuration entry and click Edit.
To duplicate an existing syslog server configuration, select the checkbox adjacent to the configuration entry and click Duplicate. This creates a complete copy of the chosen configuration using the same server name appended with “-copy”.
To delete an existing syslog server configuration, select the checkbox adjacent to the configuration entry and click Delete.
Adding a On-Prem Syslog Server for ZTA Gateways
Before you configure a on-prem syslog server for ZTA Gateways to nZTA, make sure you have added a suitable Server CA certificate. To learn more, see Importing a Trusted Server CA Certificate.
Note
Ensure that know the hostname or IP address and port of the service.
To configure an on-prem syslog server for ZTA Gateways in the Controller:
Log into the Controller as a Tenant Admin, see Logging in as a Tenant Administrator.
From the nSA menu, click the Administration icon, then select Enterprise Integration > Syslog Servers.
The Enterprise Integrations page appears.
FIGURE 436 Viewing Enterprise Integration Syslog Servers
Click Add.
The Add New Configuration page appears, on the Configuration tab.
For Type, select Syslog from Gateways.
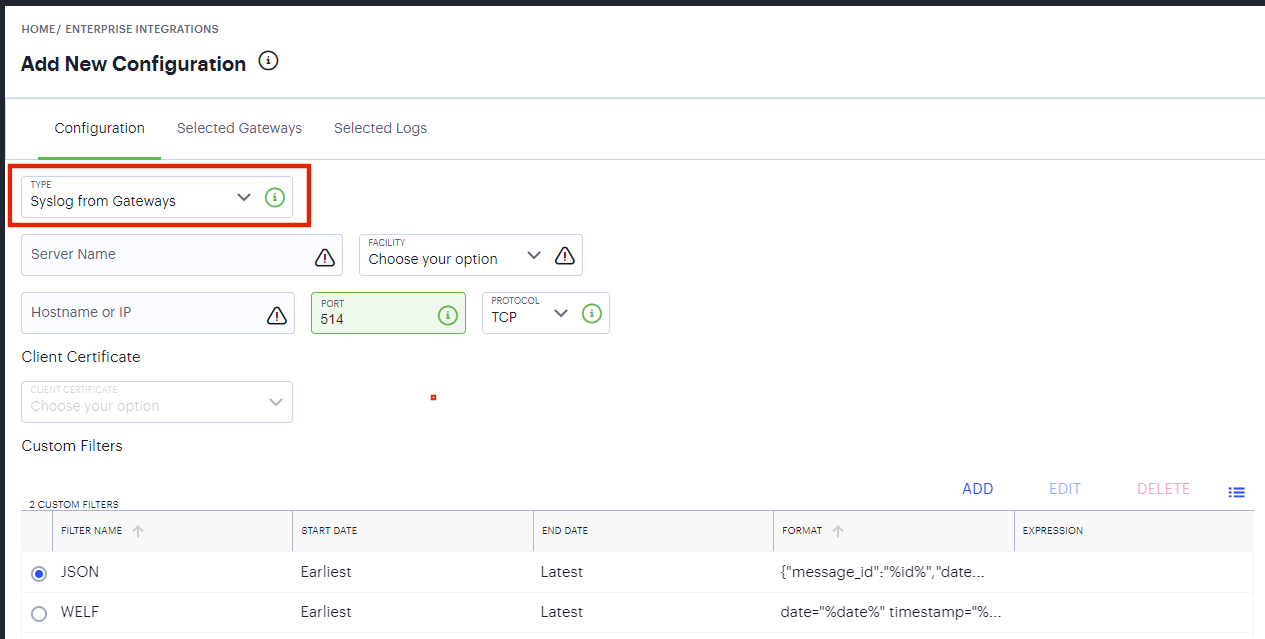
FIGURE 437 Add a new Syslog Server configuration
Enter data for the following fields:
Server Name: An identifying name for this syslog server configuration.
Facility: The syslog facility level nSA should use while exporting log data.
Hostname or IP: The hostname or IP address of the syslog server. This must match the value contained in the Subject Alternative Name specified in the Server CA certificate applicable to this configuration.
Port: The port on which the syslog server is listening.
Protocol: the required protocol for communicating with your on-prem syslog server. Both TCP and UDP are supported.
Client Certificate: This field is unavailable.
Specify or create a Custom Filter to select the log data sent to the syslog server. Choose from:
Use either of the predefined “JSON” or “WELF” filters. These do not place restrictions on the log data and forward all logs to the external syslog server, using the respective data format.
Create your own filter, based on log parameter rules you define yourself, see Setting a Custom Syslog Filter.
Note
The predefined JSON and WELF filters are fixed and cannot be updated or deleted.
Click Next to select the required gateways.
The Selected Gateways tab appears.
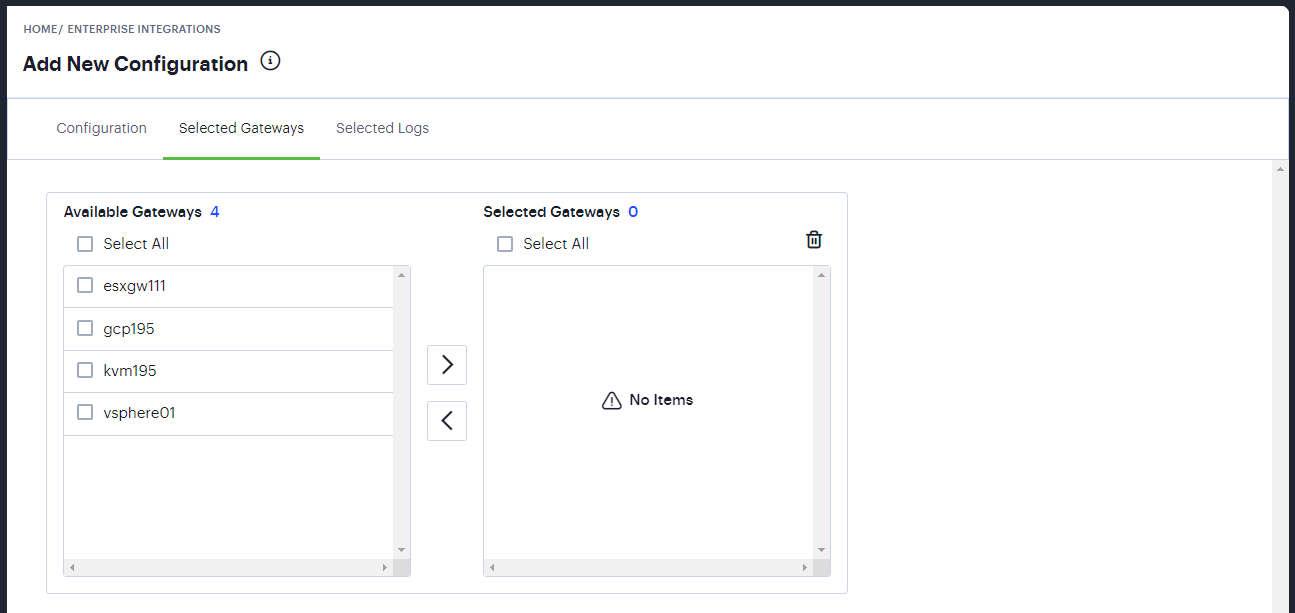
FIGURE 438 Select the gateways
From the list of Available Gateways, select the checkbox adjacent to the desired Gateway and click the arrow to move it to the the Selected Logs list.
Repeat this step for each Gateway you want to include. Use the reverse process to remove included ZTA Gateways.
Click Next to select the required log files.
The Selected Logs tab appears.
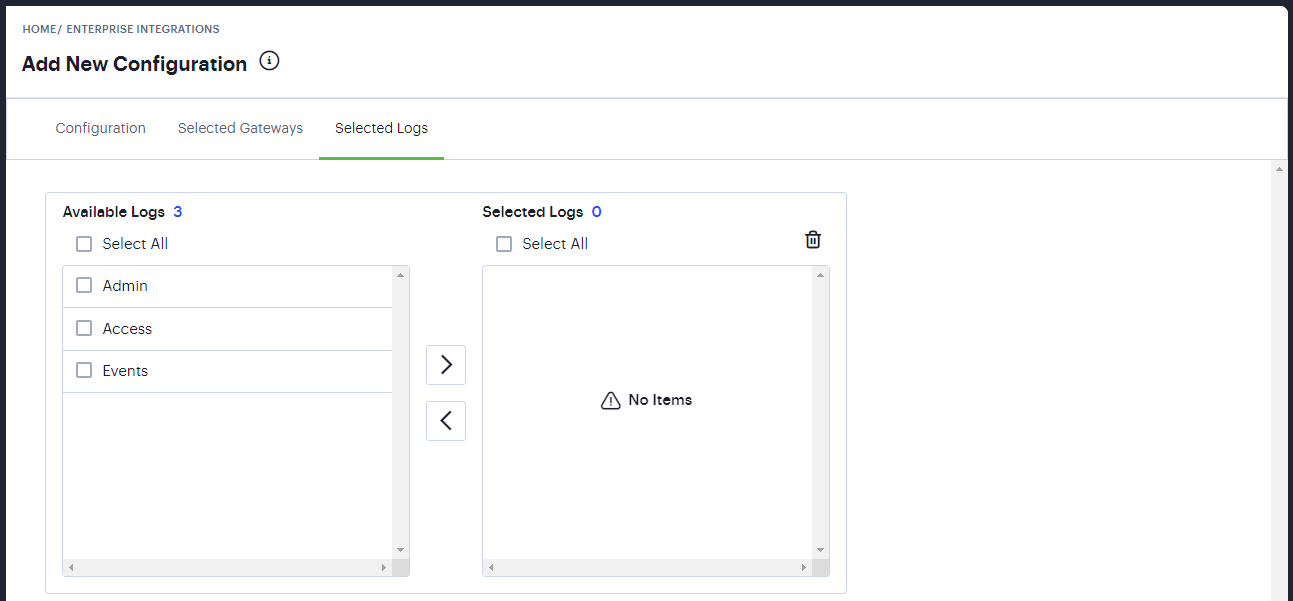
FIGURE 439 Select the logs to be exported
From the list of Available Logs, select the checkbox adjacent to the desired log and click the arrow to move it to the the Selected Logs list.
Repeat this step for each log you want to include. Use the reverse process to remove included logs.
To create a syslog server configuration with the current settings, click Save Changes.
Optionally:
To edit an existing syslog server configuration, select the checkbox adjacent to the configuration entry and click Edit.
To duplicate an existing syslog server configuration, select the checkbox adjacent to the configuration entry and click Duplicate. This creates a complete copy of the chosen configuration using the same server name appended with “-copy”.
To delete an existing syslog server configuration, select the checkbox adjacent to the configuration entry and click Delete.
Setting a Custom Syslog Filter
nSA enables you to create a custom filter that builds a query to specify the data items exported to your syslog server. You can specify criteria based on matching log data fields, date selection, and log output format.
Note
This procedure assumes you are in the process of creating or editing a syslog server configuration. To learn more, see Adding a Public Syslog Server to the Controller.
To add a custom syslog filter:
From the Add New Configuration page, locate the Custom Filters section and click Add.
The Custom Filter dialog appears.
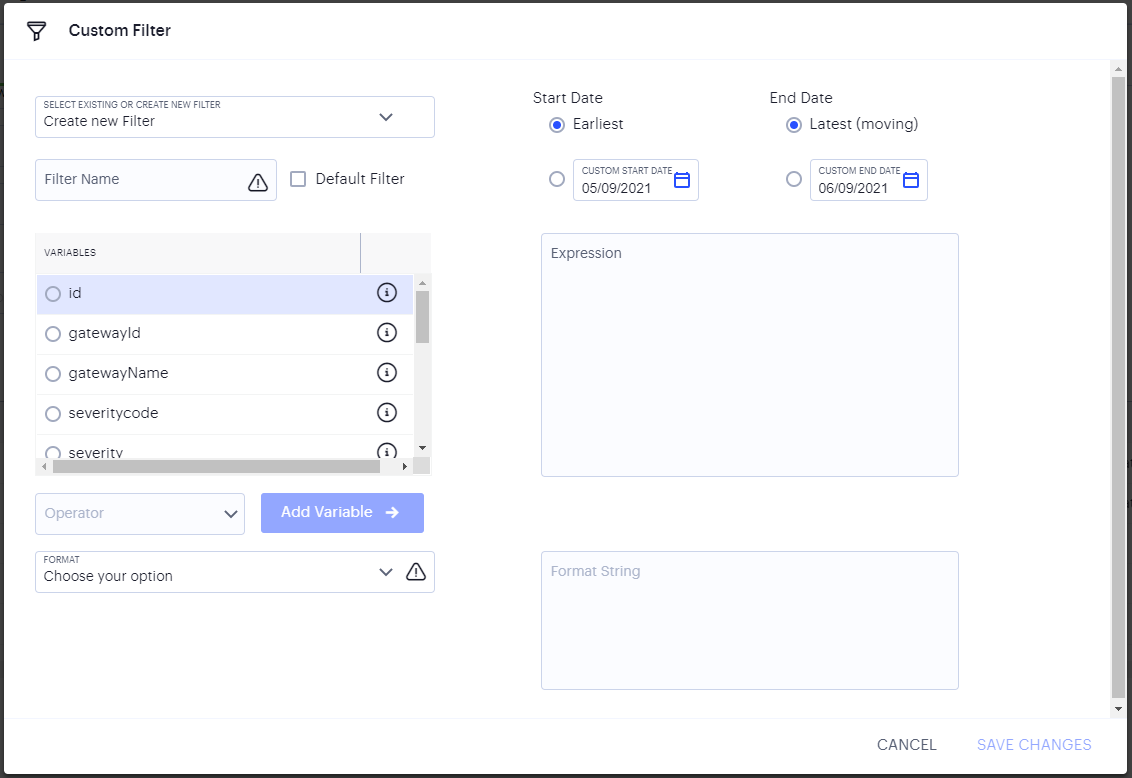
FIGURE 440 Setting a custom syslog filter
Use Select existing or create new filter to either:
Create a new filter from scratch.
Select an existing filter as a template. This option pre-populates the Expression and Format String fields with values used in the selected filter, which you can then use to create your new filter.
Enter a Filter Name.
Select a Start Date and End Date for the log data to be included. Use the default Earliest and Latest values to include all data, or select custom start and end dates, or a combination.
Note
nZTA stores log data for the previous 30 days.
(Optional) To use this filter as the default for your Syslog Server configurations, select Default Filter.
(Optional) Select from the list of available log data Variables, select an Operator, and then click Add Variable to add a filter based on the chosen value.
nSA populates the Expression field with an expression matching your selection. An example value is added to the right of the operator, but this can be freely edited to your required value.
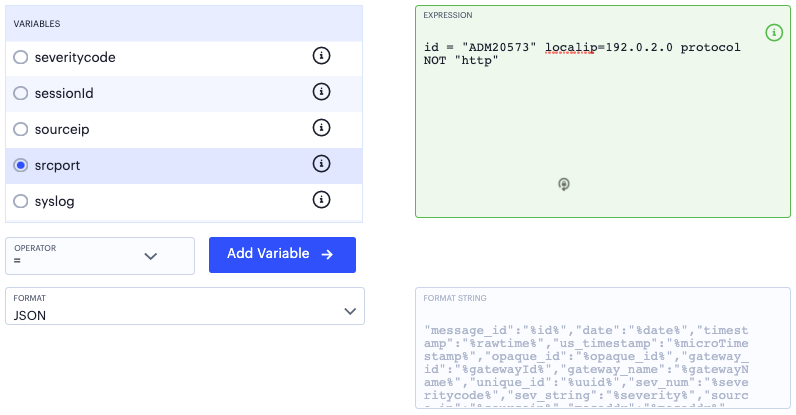
FIGURE 441 Building a custom syslog filter expression based on the log fields: message ID, local IP address, and protocol.
Note
Hover your pointer over the (i) icon to the right of each variable to view a tooltip showing example usage.
(Optional) Repeat the previous step as required for each log data variable you want to include in the syslog filter.
Select an output Format for the log line. Choose from JSON or WELF. The resultant formatted string is shown in the box provided.
To save your filter settings, click Save Changes.
The Add New Configuration screen appears, showing your new filter as selected. Continue to create your syslog server configuration.