Connectors
Ivanti Neurons connectors facilitates seamless communication and data transfer between different devices, Neuron platforms, databases, or services in your organization. They act as digital bridges that standardize and manage the flow of information, ensuring consistency, compatibility, and efficiency in cross-platform interactions.
Based on the direction of data flow. there are two types of connectors.
The inbound connectors enable you to import data about your organization, such as device or user data, into the Ivanti Neurons Platform. A connector keeps the details of which data to gather, where to gather it from, and when and how frequently to import that information into Neurons platform.
There are two types of connectors you can choose from for most of the data sources that Neurons supports: those that run in the cloud and those that use an on-premises connector server. For other data sources, just one of these connector types will be available.
Cloud connectors import data from cloud-hosted services such as Microsoft Azure or AWS; you add them to the Neurons cloud connector server. On-premises connectors import data from local, on-premises source applications such as Ivanti Endpoint Manager, or they are generic, such as the CSV connector. On-premises connectors require that you also set up a local connector server by installing the Ivanti Neurons Agent with an Agent Policy that has the Connector Server capability enabled.
You can have as many connectors and local connector servers as you need to gather data when and how you want. Each connector server can have multiple connectors, even of the same type or accessing the same source application.
The connector performs a full synchronization of all eligible data during the initial run and when you select Run now. On subsequent runs, it performs an incremental (delta) synchronization, importing only records added or modified since the last successful run.
User roles other than the administrator may need to view and set up connectors. To do so, those roles will need to be assigned Connectors permissions. For details, see Access Control.
The following are the available inbound connectors, see the following pages:
- Adobe Connector
- Amazon Web Services (AWS) connector
- Catchpoint connector
- CDW CSV Import connector
- CrowdStrike connector
- Cynerio connector
- Dell Warranty connector
- Generic File Import (CSV) connector
- Google Chrome Enterprise connector
- Google Workspace connector
- Insight connector
- Intel Endpoint Management Assistant connector
- Ivanti Avalanche connector
- Ivanti Cherwell Service Management connector
- Ivanti Data Center Discovery connector
- Ivanti Desktop & Server Management connector
- Ivanti Endpoint Manager connector
- Ivanti Endpoint Security connector
- Ivanti Neurons for ITSM connector
- Ivanti Neurons for MDM connector
- Ivanti Neurons for Service Mapping connector
- Ivanti Patch for Configuration Manager
- Ivanti Pulse Profiler connector
- Ivanti Security Controls connector
- Jamf Pro connector
- Lenovo Warranty connector
- Microsoft 365 connector
- Microsoft Active Directory connector
- Microsoft Azure connector
- Microsoft Configuration Manager connector
- Microsoft Defender for Endpoint connector
- Microsoft Entra ID connector
- Microsoft Intune connector
- Okta connector
- OneLogin connector
- Qualys connector
- Rapid7 connector
- Salesforce connector
- ServiceNow connector
- Tenable connector
- VMware vCenter connector
- Workspace ONE connector
The outbound connectors enable you to export data from the Ivanti Neurons platform to external systems or services. A connector keeps the details of which data to sent, where to send to and when and how frequently to export that information from Neurons platform.
Currently Neurons supports: those that run in the cloud. The Cloud connectors export data from Ivanti Neurons platform to cloud-hosted services.
Connector Permissions Requirements
To manage outbound connectors, you need additional RBAC permissions.
-
To view Audit Trails connectors, you must have both the "View Audit Trails connectors" permission and the "Connectors > View Connectors" permission.
-
To create or modify an Audit Trails outbound connector, you must have both the "Create Audit Trails Connectors" permission and the "Modify Credentials" permission.
-
To update credentials, you must also have the Credentials > Modify Credentials and View Credentials permission.
-
To delete Audit Trails connectors, members must have both the "Delete Audit Trails Connectors" permission and the "Credentials > Modify Credentials" permission.
The following are the available outbound connectors, see the following pages:
If you want to whitelist the public outbound IP address for the outbound connectors, contact Ivanti support.
About on-premises connector servers
On-premises connectors require that you install the Ivanti Neurons Agent with an Agent Policy that has the Connector Server capability enabled, on a local Windows server that has access to your data source. This enables data to be relayed to Neurons from the source application (for example, Endpoint Manager).
An on-premises connector server uses HTTPS (port 443) to communicate. Learn more about Required URLs, IP addresses and ports.
The following minimum requirements are required for an on-premises connector server:
- Microsoft Server operating system that is compatible with the Ivanti Neurons Agent installation
- Intel Core i7 processor at 2.5 GHz
- 8 GB of RAM
- 40 GB of disk space
- Broadband internet connection
An on-premises connector server is not required for cloud connectors.
Getting started
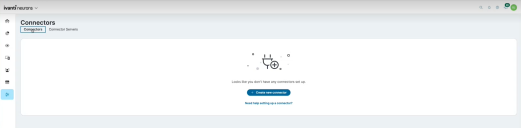
To get started connecting to an on-premises source application, you first need to populate Neurons with an on-premises connector server.
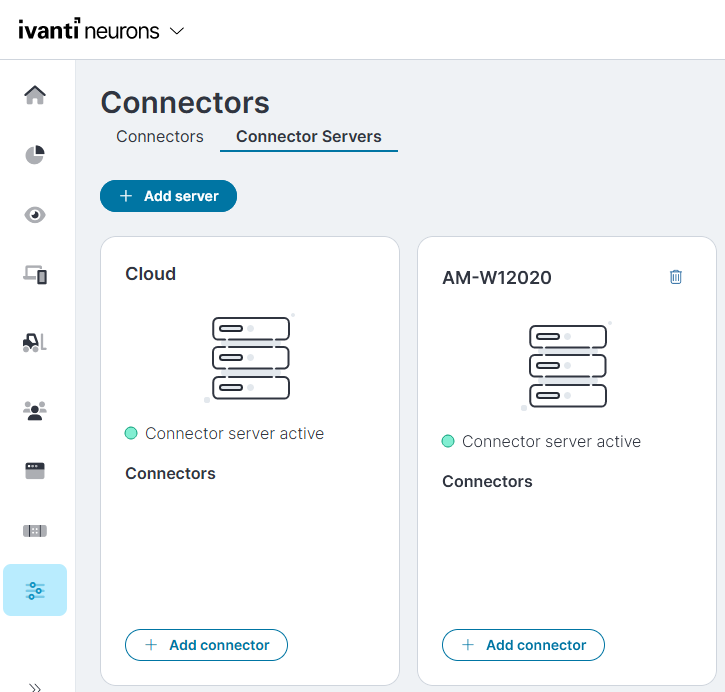
By default, new users will find that the Connectors > Connector Servers page displays just a Cloud connector server option until an on-premises connector server is added. A local connector server is not required for cloud connectors—you can immediately add one or more of those connectors to the Cloud option on the Connector Servers page. To set up a cloud connector, see the Ongoing tasks section below.
-
Log into your Ivanti Neurons account as Administrator.
-
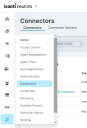
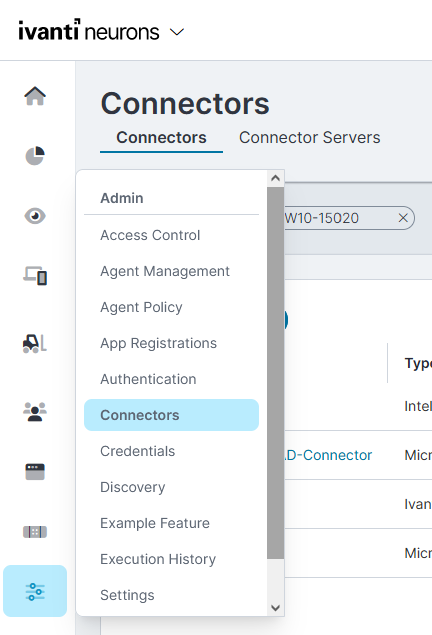
In the left navigation pane, click Admin > Connectors.
-
Click the Create new connector button.
-
On the Available Connectors page, click the Download Neurons Agent button to download the Ivanti Neurons Agent with the Infrastructure Agents policy, which has the Connector Server capability enabled by default. Alternatively, create an Agent Policy with the Connector Server capability and install using that. For more details refer to Agent Policies.
The download dialog appears. Click Download. -
On a server in your environment that has access to the source application, run the executable that you downloaded. This will install the agent with the policy. For information on firewall requirements, refer to Required URLs, IP addresses and ports.
-
Return to your Neurons web session. It may take a few minutes for the connector server to appear on the Connector Servers page. Once it does, you can add connectors to start gathering data from specific sources at specific times. See the next section for setting up a connector.

Ongoing tasks
- Click Admin > Connectors and make sure the toggle at the top of the page is set to Connector Servers.
- Find the connector server in the list that you want to add a connector to, and click Add Connector. Use the Cloud option to add a cloud connector for a cloud-hosted service.
- From the available connectors list, select the type of connector to create.
- Configure the options for the connector. For details about individual connectors, see the full list at the bottom of this topic.
- To run the connector immediately, click Save and Run at the top right of the page.
or
To save the connector and not have it run until its scheduled time, select the Active check box and click Save. - To monitor the progress of your connectors, set the toggle at the top of the page to Connectors. The list of connectors shows the current status, number of records processed and the number of records that failed to import, as well as last run, next run, and scan duration. The import can take hours if there's a lot of data.
The Jamf Pro connector requires that you enable an option in Jamf Pro before setting it up in Neurons. For details, see Jamf Pro connector. Likewise, some Microsoft cloud connectors require that you create an app in Entra ID before use. For details, see Creating apps in Entra ID for Microsoft connectors.
You can also view imported records on the Devices page. For details, see Devices.
- Click Admin > Connectors and make sure the toggle at the top of the page is set to Connectors.
- Find the connector that you want to change and click the
 icon in the column to the far right.
 - Select Run now. The connector syncs all current data.
Scheduler Limitation:
The connectors with overlapping schedules on the same server will not be queued—any connector unable to start will miss that run and resume at its next scheduled interval.
-
Only one connector can run at a time on each server.
-
If two connectors are scheduled to start at the same time, only one will run; the other will skip that run and wait for its next scheduled time.
There are two possible workarounds for this limitation:
-
Schedule the connectors so that they do not overlap or run simultaneously. This ensures both connectors operate correctly without failures. This approach is suitable if running multiple connectors at the same time is not required.
-
Deploy each connector on a separate connector server, creating the connectors on different servers. This allows both connectors to run concurrently without conflict. This option is recommended if simultaneous operation of multiple connectors is necessary.
For on-premises connectors, Ivanti Neurons automatically downloads a log file to the following path each time the connector runs: C:\ProgramData\Ivanti\Ivanti Cloud Agent\Logs.
This path is located on the connector server (i.e., the host server that has the connector engine installed and where the connector runs from). The path contains numerous Ivanti Neurons log files – look for the Collector.Engine.log file.
For cloud connectors, you can download a zip file containing the log files for a given connector. Depending on the amount of data collated, the download may take a bit of time to complete.
- Click Admin > Connectors to open the list of configured connectors.
- Locate the connector you want to view a log file for.
- Scroll to the end of the row, click the options menu ( ), then select Log.
At the start of the download, a pop-up dialog will briefly open stating that the logs are being collated. Some browsers will continue the download without issue. If a pop-up blocker is enabled for your browser, you may see a message that the pop-up is blocked and needs to be approved. In this case, you will need to approve pop-ups from ivanticloud.com before downloading the zip file again.
The zip file will download to your browser’s configured download location. The filename will contain a timestamp (year, month, day) from when the download occurred (for example, Connector_4718c622_202409171647_logs.zip).
You can delete the data that was imported by a connector into Ivanti Neurons. This action will wipe any data that was imported by a given connector, but will leave all other data that was discovered, inventoried, or imported by other connectors you have set up. If the only data for a particular record was imported by the given connector, then the entire record will be deleted.
You can also wipe imported data as part of the procedures for deleting a connector or uninstalling a connector server.
- Click Admin > Connectors and make sure the toggle at the top of the page is set to Connectors.
- Find the connector that you want to wipe data from and click the icon in the column to the far right.
- Select Wipe Data.
- Click Admin > Connectors and make sure the toggle at the top of the page is set to Connectors.
- Find the connector that you want to change and click the icon in the column to the far right.
- Select Disable or Delete:
If disabling, you can re-enable the connector by going to the same menu and selecting Enable.
If deleting, it's recommended that you also select Wipe Data, which will delete all of the data that was imported by the connector. If you don't select this option, the data will become orphaned; the records will have no active data source but still exist in the system. If you choose not to wipe the data now, you can delete the orphaned records at a later date. For details, see the procedure below.
- Click Admin > Connectors and make sure the toggle at the top of the page is set to Connector servers.
- Find the connector server that you want to uninstall and click the
 icon at the top right corner.
 -
To wipe all data imported by the listed connectors, select Wipe Data. If you don't select this option after uninstalling the connector server and associated connectors, the data retrieved by the connectors will remain in Ivanti Neurons as orphaned without an active data source. To delete these records at a later date, see the procedure below.
- Click Delete or Delete all.
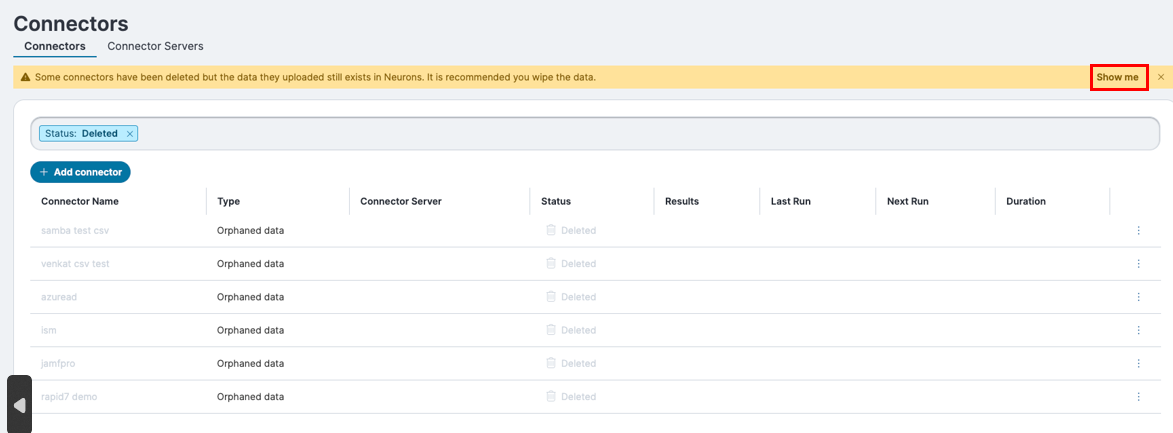
If you did not wipe your data during the process of deleting a connector, you may find that records imported by that connector still display in Ivanti Neurons. These records are considered orphaned; they have no active data source but still exist in the system.
If your Ivanti Neurons database contains orphaned records, a yellow banner will display on the Connectors page alerting you to those records. You can click Show me to filter the results down to just those orphaned records. You can then delete that data from the system by clicking the options menu in each row and selecting Wipe Data.
For an overview of attributes that are imported by connectors, and how attributes are mapped to target attributes, see Connector data mapping.